Saturday, 21 February 2015

Spring Greens

 Spring Greens


Hi, Shelagh here. Last month I was lucky enough to win the IndigoBlu challenge and following this, I was invited to create a project for this month's challenge entitled 'Spring Greens,' so here we have it. I must admit I did find it a challenge and took some time to work out the direction I was to follow as I felt few of my IndigoBlu stamps fitted in with subject. 
Many thanks for visiting my blog and if you should have any queries, please ask and I will attempt to help.

Materials:-
·         Canvas
·         IndigoBlu Stamps:- Nature 1, Stylised Flowers
·         Inkpads:- Versafine Onyx Black, Versamark; Distress Inks – Pine Needles, Black Soot
·         Embossing Powder:- Wow Twinkling Green and Twinkling White; Clear Detail
·         Spectrum Noir Aquatints – Greens (from all sets)
·         Acetate:- Heatable
·         Pebeo:- Mixtion Relief Outliner, Mirror Gilding Sheets Green and Silver
·         Sakura:- White Pen
This project was quick to realise, once thoughts and materials were gathered (omitting drying time.)

Extras:-
·         Deep photo frame
·         Pebeo Fantasy Prisme Pale Green
·         Mod Podge Sparkle


Instructions:-
1.       I painted the canvas with water then dropped on the greens in areas allowing the variety of shades to fuse and keeping the blue-greens towards the top.
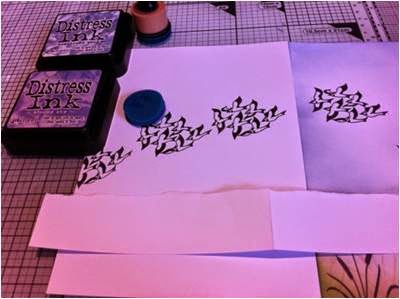
2.       Once dry, I stamped the ‘Stylised Flowers’ four times (‘off the page’) using Versamark Black and embossed with clear detail embossing powder. The butterfly was stamped three times using Versamark and heat-embossed using ‘Twinkling Green.’ The clouds were stamped twice, again with Versamark then heat-embossed using ‘Twinkling White.’


3.       At this point I blended Ranger Distress ‘Pine Needles’ and ‘Black Soot’ around the edges.
4.       The flower stems were out-lined on one side with a white pen; the seed-heads were outlined with the Mixtion and once dry but still tacky, silver leaf was applied. The same was applied to the centre of stems but once dry, green leaf was applied. P
NB The silver leaf looks white on the photo – oh! the joys of photography!
5.       I stamped the butterfly three times onto heat-proof acetate, embossed with the green powder as before and cut the images out.  I folded the wings back and attached them over the image on canvas with Cosmic Shimmer glue.


Extras:-
To finish the project, I painted the frame with pale green ‘Fantasy Prisme,’ the second coat stippling the paint to create the illusion of texture. Once dry, I applied Mod Podge ‘Sparkle’ to add more interest.  I removed the two peripheral acetate butterflies, placed the canvas inside the frame then glued butterflies over their stamped images but on the frame.
I hope you find the above useful and feel encouraged to ‘have a go.’
Thank you,
Shelagh.


Tuesday, 17 February 2015

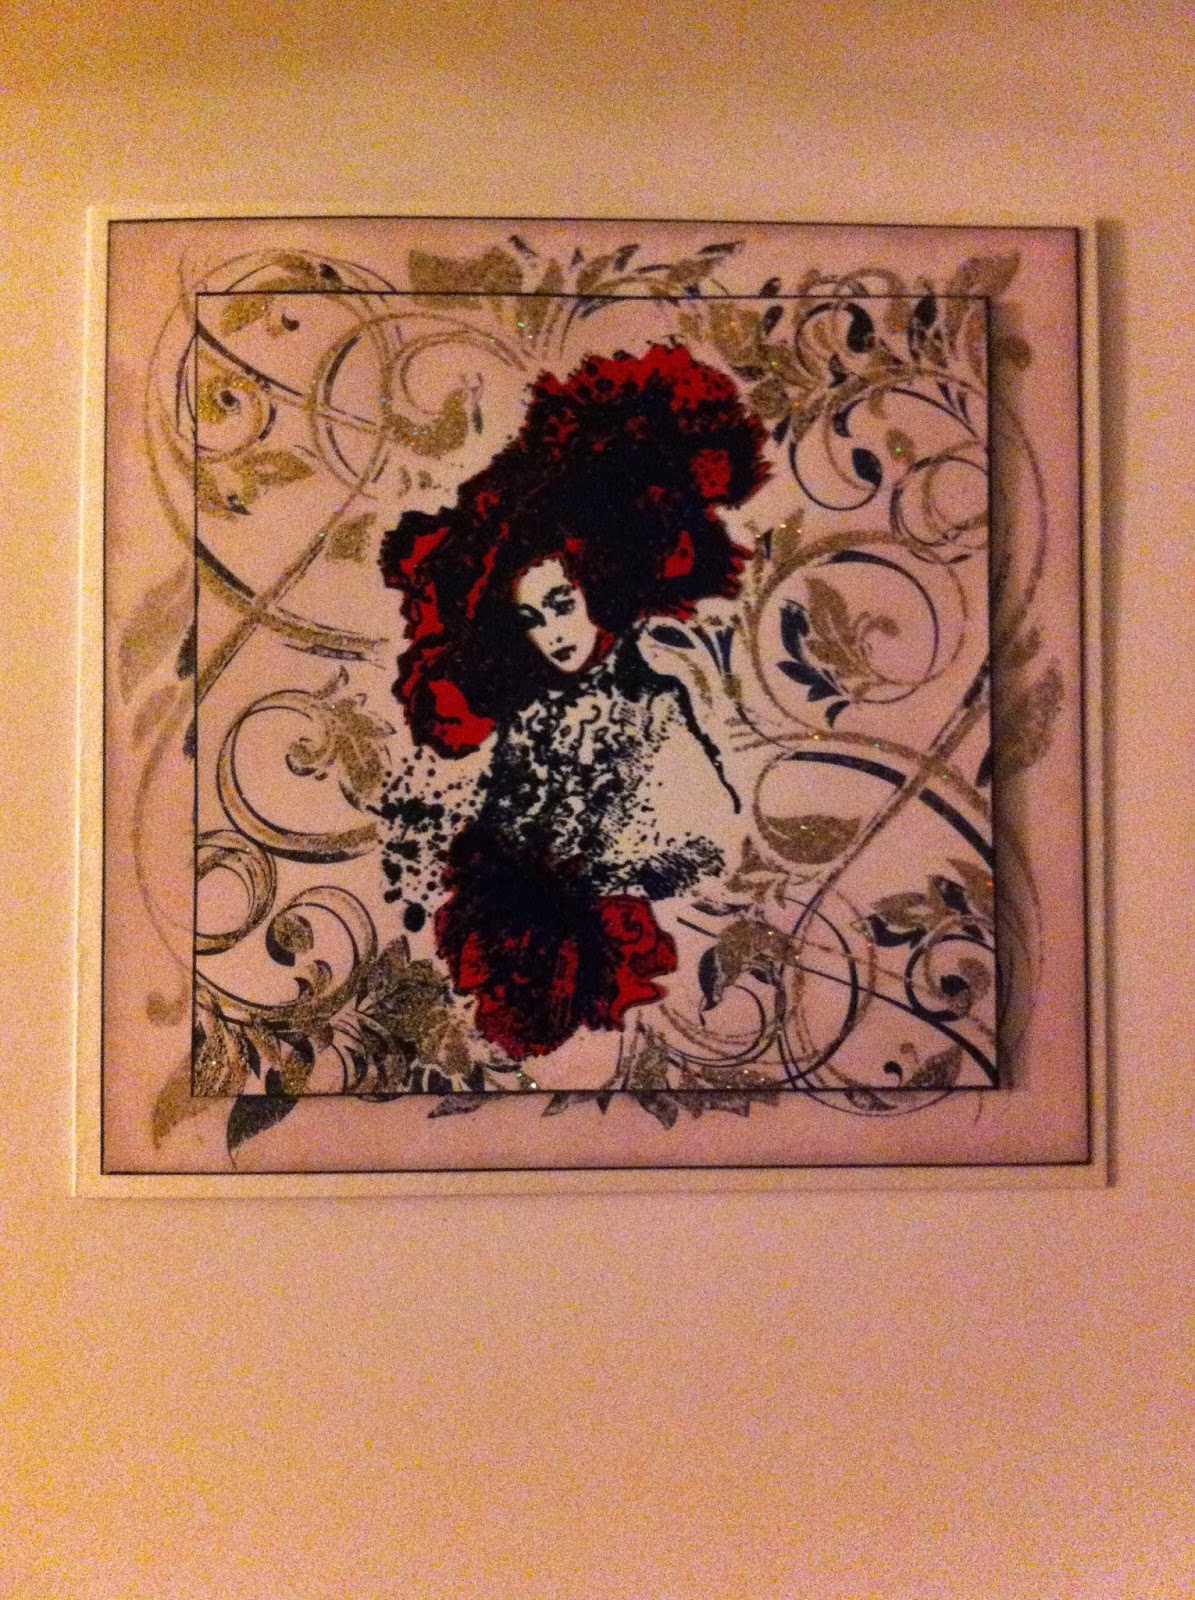
Lady, partly in Red!

My latest offering!

Here is my entry for the current IndigoBlu challenge 'A Touch of Red.' 

The title 'The Lady, Partly in Red' came to me once the design was complete and whilst the familiar, similarly named song is not entirely our anthem, it was frequently played all these years ago when we were on honeymoon - and yes I did have a couple of red outfits with me.


'The Lady, Partly in Red.'

Here is how I made the card.

Materials:- 
·         Cardstock:- Neenah Solar White, Crafter’s Companion Pearlescent White
·         Paper:- Red copy paper
·         Stamps:- IndigoBlu Floral Swirl, Music Hall
·         Inkpads:- Versmark, Versafine Onyx Black; Distress Milled Lavender
·         Embossing Powder:- Wow Sahara Sand, Clear Detail

Instructions:-

1.       Cut white card into a square 12cmx12cm and stamp the lady from the ‘Music Hall’ set in the centre using Versafine Onyx Black. Heat emboss with clear detail powder. Stamp another image on a sticky note, cut it out and mask the image in preparation for the next step.

2.       Stamp the ‘Floral Swirl’ twice with the corner at bottom right and top left using Versamark; heat emboss using Sahara Sand. Over-stamp but off-set these images again using Versafine Onyx Black.

3.       Blend Milled Lavender around all four edges.


4.       Stamp and heat-emboss the lady again onto a piece of scarlet copy paper using Versafine Onyx Black and clear detail powder. Cut out the hat and hand/glove areas omitting the face and body; adhere onto main image as in paper-piecing.

5.       Cut another sheet of card into a square 14cmx14cm. Repeat instructions at (2) and (3) on this larger square.

6.       Edge each square with a black alcohol marker.

7.       Mount the smaller square centrally onto the larger.

8.       Score and fold a piece of white pearlescent card. Cut the folded card into 14.5cmx14.5cm.

9.    Mount the completed image centrally onto this.


Et voila, here we have 'The Lady, Partly in Red!'

If you have any questions or quandaries about the above please don't hesitate to get in touch.

Thank you for visiting and hope to see you again.

Kind regards,

Shelagh.


Sunday, 1 February 2015

Floral


                                                 Clarity Stamps Challenge 24 Floral
February 2015
 Exterior

Interior

                                                                                                   
Materials:-

  •  Shaker Box with Lid
  • Gesso:- Black, White
  • Cardstock:- Clarity Theuva Card, Supersmooth Paper
  • Stamps:- Clarity Stamps ‘Happily Ever After,’ large and small Gerbera, repositionable ‘Funky Foliage,’ ‘Leafy Swirls’
  •  Inkpads:- Versafine Onyx Black, Versamark; Ranger Distress Picked Raspberries, Festive Berries, Squeezed Lemons, Evergreen Bough, Mowed Lawn, Peacock Feathers, Old Paper; Memento London Fog
  • Embossing Powder:- Clear Detail, Gold detail Embossing
  • Foam pads
  • Mod Podge
  • Cosmic Shimmer glue
  •  Gilding Wax

Instructions:-


Box:-

   
                                                                          Plain Box
                                                                       Second Coat
                                                          Dry brushed with black Gesso.


  • Coat box inside, out including side and base with White Gesso. Repeat on lid. When dry, give the box and lid another coat. Allow to dry.
  •  Dry brush with Black Gesso to create a ‘shabby’ finish. (The photograph is much darker than reality but should you need to, it can be lightened with a dry-brushing of white Gesso.)


  • When dry, and using the large ‘Leafy Swirl,’ apply Versamark and stamp around the side of box. Sprinkle over gold detail embossing powder and heat emboss. Repeat on lid. 
         *N.B. This takes some time; take care as the box can become hot.


  •   Stamp along the side of the lid using the small ‘Leafy Swirl’ and emboss as before.
                  (I also stamped the large ‘Leafy Swirl’ inside the lid to add interest.)

Interior:-

'Happily Ever After' stamp


  • Stamp the Happily Ever After castle eight times onto Theuva card using Onyx Black and emboss with clear fine detail powder. Brush ‘London Fog’ sparingly over extreme edges of stamped images and cut each out. Snip areas away and layer with 1mm foam pads to create a   decoupaged image. Set aside. (Please note the stamping shown here is on copy paper as this is a re-run for this post. The original in the completed box is on Theuva.) 


 Gerbera, Large and Small and Leaves from 'Funky Foliage'

  •  Stamp large Gerbera 9 times on Supersmooth paper using Onyx Black and emboss with clear detail powder. Using Festive Berries and Picked Raspberries, blend ink over each image. Trim and decoupage into three flower-heads.


  •  Stamp small gerbera three times following procedure at (3). Trim and add a small image to the centre of each flower-head. Set aside.


  •  Stamp 8 straight-edged leaves and one curved leaf from the Funky Foliage set onto Supersmooth using Onyx Black and emboss with clear detail powder. Blend Mowed Lawn, Evergreen Bough and Peacock Feathers over the images and cut out. Set aside.


  •  Draw around the circumference of the box onto a piece of Supersmooth paper. Cut out the circle, making fractionally smaller to fit the inside by cutting inside the pencil line. Check it fits snugly and adjust accordingly.


  • Use your castle image to decide where the sun mask is to be placed on the circle; Blend over Evergreen Bough for the sky and Mowed Lawn for the grass. Tear a copy-paper hillside and blend ink over to create light and shade. (I also blended in some London Fog to create the illusion of a path from the castle.) Remove mask and blend Squeezed Lemonade over.


  • Spritz the inked circle crumple it whilst damp. Dry then blend Old Paper over to create an aged look.


  • Paint the inside base of the box with Mod Podge and apply the inked circle. Apply more Mod   Podge over the entire circle.
  • Site the castle image to suit and attach using Cosmic Shimmer glue. 

  • Glue the edge of each cut-out leaf and apply to the inside rim of the box, allowing a small over-lap.


  • Decide where you wish to place the flower-heads and attach using Cosmic Shimmer Glue. Add remaining curved leaf to suit.
  • My last addition was a touch of gold gilding wax to the lid and around the side.


My original idea was to create a ‘Secret Garden’ visible only when the box lid was opened, however I could not find a box that fitted my design. I tried various other designs over the period of a week until I happened upon a set of ‘Shaker’ boxes in a cupboard. The idea blossomed and my thoughts changed from the original secret garden to something more akin to ‘The Sleeping Beauty’ or even ‘Rapunzel.’

Thank you for reading the post and visiting my blog; apologies for it is rather lengthy, however there were more than a few steps and techniques to cover. Should you have any questions or queries, please ask and I'd be delighted to help or look for an answer.

Hope to see you back again!
Shelagh  ;~}


Wednesday, 28 January 2015

Shoe Box


  • I made this example a little while ago using Sizzix dies for both box and shoe. The flowers were also made from the Sizzix collection. 
  • The suitcase was made from Kraft card, Coredinations and Tilda patterned papers and the shoe  from Tilda patterned papers.
  • The suitcase fronts were run through an embossing folder prior to inking the edges.


  • The interior was decorated with more papers from the same Tilda selection.
  • A toning ribbon was tied around the suitcase as a fastener. 
Thank you for visiting my blog, today. Now must go hurry to the Post Office before the snow flurries get any worse!

Saturday, 24 January 2015

Golden Girl

Golden Girl

Hi,
For my weekly post, I thought I'd show you a card I made at the end of last year.  It's made with an eclectic collection of stamps. The image is Bildmalarna Mimosa; the leaves - Clarity Stamps re-mountable Maple Leaves; the background - IndigoBlu 'Bubbles;' the sentiments - Stampin Up.

1.The background inside and out was stamped and heat-embossed using Versamark and Wow Twinkle White Embossing Powder on two sheets of A4 white card. It was then coloured using Adirondack Butterscotch, with Willow blended around the edge to create depth. One sheet was cut into four equal rectangles which were mounted onto white and trimmed. All four were then secured onto black, a short edge next to a long edge.

2.The girl was stamped using Versafine Onyx Black and coloured using Spectrum Noir pens. It was then die-cut into a circle using a Tonic plain circle die from one of their sets and attached to the centre of the coloured background.

3. The maple leaves (all three sizes) were stamped repeatedly onto green pearlescent vellum (I bought this in the USA a good few years ago) with Versamark and heat-embossed with Wow Gold Embossing Powder. They were cut out and secured around the the circumference of the image.

4. I scored and folded a long rectangle of white pearlescent card from my stash to create an easel card which has a mountain fold as a 'stopper.' (This is my preference rather than a stopper on the base.) A background off-cut from (1) was mounted and a sentiment stamped, matted and added.


5. The back and base of the easel was layered with background paper from (1) and a few leaves and a sentiment added.

.... and there we have 'Golden Girl.'

Many thanks for visiting.

Best wishes,

Shelagh.


Tuesday, 20 January 2015

The Rose

                                                                          The Rose


This card was quite time consuming but I wanted to explore another use for a stencil I've had in my stash for quite some time. I found the Letraset Tacky Dots the cleanest way to attach each small petal.


Shelagh Metselaar
The Rose


·         
       Materials:-
      Cardstock:- Neenah Solar White; White Pearlescent; Creative Expressions – Gold; Black Card;           Tilda – Sewing
·         Stamps:- Imagination Crafts - Rose, Butterfly
·         Stencil:- Imagination crafts – Flower
·         Punch – EK Success
·         Letraset Tacky Dots
·         Inkpads:- Distress Inks – Weathered Wood, Tea Dye; Versafine Onyx Black
·         Stamps Away Clear Detail Embossing Powder
·          Distress Markers, water brush
·         Quickie Glue Pen
·         Glamour Dust – Gold

 Instructions:-
 1. Cut 3 squares of white card slightly larger than the stencil. Tape the stencil on card and draw around flowers using a Micron pen. Repeat on other two pieces of white.
 2.  Repeat with patterned paper and cut out each individual petal.
 3.  Apply the Letraset Tacky Dots to reverse of patterned paper and apply each petal to corresponding area on white card.
 4. Ink the edges with Tea Dye and mount onto black, then gold then black again.
 5. Stamp the Rose stamp 6 times on white card and colour in using Distress Markers. (I used my glass mat as a palette.)
 6. Decoupage the images. Mount onto black, gold, black as in (4.)
 7. Adhere centrally to paper-pieced background.
 8. Stamp each butterfly twice and colour using Distress Markers. Cut out and set aside.

I completed the card by scoring a long piece of white pearlescent card centrally to fit the completed topper, allowing for a border. The remaining length at each side was scored and matted panels of the paper-pieced stencil added. The ends were scallop-punched, decorated with flowers reserved from the patterned stencil work. Attach butterflies to suit. Using a Quickie Glue Pen to highlight flower centres and areas of the stencil work, Gold Glamour Dust Glitter completed the card.

Thank you for visiting my blog. I'm still very much a novice in finding my way around this new experience. 

Shelagh. ;~}


Monday, 19 January 2015


Glitz and Glamour
January 2015


Materials:-
• Cardstock:- white, gold mirri, black
• Stamps:- IndigoBlu ‘Love Is,’ ‘Sewing Mends the Soul,’ ‘Music Hall’
• Inkpads:- Versamark, Ranger Distress Salty Ocean, Peacock Feathers, Black Soot
• Embossing Powders:- Wow gold, Wow holographic white
• Pens:- Sakura White Pen, Quickie Glue Pen
• Extras:- Glamour Dust gold glitter, ribbon, self-adhesive gems
Instructions:-
1. Take a 5ins x 7ins piece of white card and stamp the ‘Love Is’ heart using Versamark in the centre.  Heat emboss in goldInk and emboss the corset stamp from ‘Sewing Mends the Soul’ with Versamark, having turned the first embossed image upside down.
2. Repeat inking and embossing scissors from the same set to create a dress-form.
3. Stamp and emboss separately heart, corset and scissors again on another piece of card and cut out.
4. Ink and emboss as before the scroll-flourish from ‘Music Hall’ set around outside of card at (1.)
5. Ink and emboss using white embossing powder inside this frame.
6. Ink the card and separate images using Salty Ocean and Peacock Feathers. Darken the outer edges using Black Soot.
7. Attach the scissors, heart and corset to main image using foam pads. Add gems.
8. Highlight the outer gold scrolling with a white pen and areas of the skirt and corset with glue pen. Apply the glitter to the glued areas.
9. Curl some areas of the skirt and corset.h
10. Mount onto gold mirri then black.
• The decoration was made from a flower, bird and branch punch from another gold-embossed  heart and ribbon coloured using the inkpads.


Thursday, 1 January 2015

Things With Wings


The idea for this card came from a clip about Lapwings where one was flying around reed beds. As an extra note of interest, we were out in the Jeep heading for a brisk winter’s walk in the country this afternoon when I spotted three lapwings scrabbling about in a field; this is not a sight I’ve seen since I was a child!


Materials:-
·        Cardstock:- Theuva Card x 3, Black Pearlescent Card, Silver Mirri Card, White Pearlescent Card
·        Clarity Stamps:- Lapwing Set, Reed stamp

·        Inkpads:- Ranger - Archival Black; Distress Frayed Burlap, Old Paper, Antique Linen, Mowed Lawn, Weathered Wood, Stormy Sky; Versafine Onyx Black

·        Clear Detail Embossing Powder
·        Micron pen
·        Spectrum Noir Pencils

Instructions:-
Stamps used

  • On a piece of Theuva card, positioned 'portrait' - short sides top and bottom - and using Versafine Onyx Black, stamp the smaller 'Standing Lapwing' towards the foot of the right hand side.  Dust with embossing powder and heat set.

  • Stamp this again on a sticky note and cut out.
  • Using the same process, stamp the 'Lapwing in Flight' in the centre of the card and the 'Flight of Lapwings' at the top left hand corner

  • On a second sheet of Theuva card, stamp three sets of the 'Flight of Lapwings' in a downward motion and heat emboss.
  • Stamp some masks on 'sticky notes' and cut out.
  • On a third sheet, stamp two sets of the same almost parallel to echo the horizon.
  • Using distress ink 'Old Paper' stamp the 'Reed' stamp randomly along the foot of each of the three cards.  Over stamp these to suit with the same stamp and Black Archival.
  • Cut a large circle mash (the sun) from a 'sticky note' and place over part of the stamped 'Lapwing in Flight'.  Place a lapwing mask over the stamped image and also over the 'Standing Lapwing' and the 'Lapwings in Flight'


  •  Tear a sheet of copy paper across to create a rough horizon. Place this over the first card about one third of the way from the foot. Using a blending tool and Weathered Wood, gently colour the area above the horizon mask and on to the top of the card.

  • Move the horizon mask onto the second then third stamped sheets and repeat.

  • Using a blending tool and Old Paper, add colour over the stamped reeds at the foot of each sheet. Build this up to a small mound at the right of sheet 1 so the ‘Standing Lapwing’ appears to do just that. Add depth of colour to this area by blending in Frayed Burlap and blend in some Mowed Lawn along the reeds.

  • Remove the sun mask and blend some ‘Squeezed Lemonade’ to form a reflection on the water. Shade the sun using some yellow Spectrum Noir pencils and blend into paper. (I used my fingers).
  •  Blend Stormy Sky and Weathered Wood to create the darker sea. (I originally coloured the sea lighter and sky darker but on looking out from my craft room on a beautifully sunny winter’s day out towards Aberdeen harbour and the horizon, I noticed the opposite was true thus all change)!
  • From here, using Spectrum Noir grey pencils, add some shading to the birds.
  • Trim, mount onto silver, black then white. 


Thank you for visiting my blog
Shelagh ;-}


    Wednesday, 31 December 2014

    Lady in Pink


    Materials:-
    * Cardstock:- Clarity Card 7x7 Gelli Plate card, pearlescent white and black card, silver mirri card; discarded Gelli Plate print
    * Acetate
    * Clarity double sided sticky sheet
    * Clarity Stamps:- Butterfly Tree and butterflies, Remountable Winter Trees, ‘Suede Lady,’Remountable ‘Happy’ words
    * Inkpads:- Ranger Archival Black, Ranger Distress Victorian Velvet, Seedless Preserve
    * Fine glitter

    Instructions:-
    1. Using Archival Black, stamp ‘Suede Lady’ onto white card and cut out; repeat four times more on the discarded Gelli Plate print and cut these out. Decoupage onto the white image and set aside.
    2. Stamp the Butterfly Tree onto a piece of 7 x 7 Gelli Plate card using Seedless Preserve. Cut a sun/moon mask and place partially over the tree image.
    3. Tear a piece of copy paper to create a hill; place this under the tree image and blend out using Victorian Velvet. Continue this to create a landscape. Trim a sliver from top and bottom; mount onto black pearlescent, white Gelli Plate card, silver mirri to suit.
    4. Using Seedless Reserve and two of the Winter Trees, stamp images in the background. Blend in shadows under the trees.
    5. Remove one side of the protective covering from half a sheet of Clarity double sided sticky. Using Seedless Preserve, stamp the three butterflies from the Butterfly Tree set twice (two images of each size of butterfly.) Scatter over fine glitter. Remove the other protective sheet and place a piece of acetate over this sticky side. Cut butterfly images out. Glue one set onto the scene to suit. Add the ‘Suede Lady’ image.
    6. Colour a scrap of card with Victorian Velvet and stamps ‘Happy Birthday’ in Seedless Preserve centrally. Decorate with remaining acetate butterflies. Mat onto black pearlescent and silver mirri.
    7. Create an easel card blank from a long piece of pearlescent card. Add matted image to the easel and sentiment to the mountain fold.

    This card is made with love for my mum who celebrates her 88th birthday on 4th January and I am also entering it into the Clarity Stamp Challenge.

    Sunday, 30 November 2014

    IndigoBlu Challenge September 2014


                                                                     IndigoBlu Challenge September 2014

    Happy Friday from Shelagh,

    Yesterday, I was doing up bit of 'redding up' (N. East Scots dialect for tidying up) in my craft room and threw out a ribbon spool. I then looked through my box of IndigoBlu stamps and came up the idea of recycling it. This idea may run and run with Christmas not far away and I'd love my ribbon stash to be condensed into a smaller area. (My large collection had more than a little to do with living in USA for over two years, where there were nine different craft stores within a thirty minute drive!!) The colours of the leaves roughly replicate an ornamental tree at my front door which is currently displaying beautiful autumnal shades.

    How I made this little hanging is detailed below.

    This is my first attempt at 'posting' and I'm afraid it's not going too well. The photograph is not as sharp as it is on file and I'm having difficulty in loading another, so please forgive!

    Thank you for looking.


    Cheers,


    Shelagh


    Indian Summer

    Shelagh Metselaar IndigoBlu Challenge September 2014

    Materials:-
    • Stamps:- IndigoBlu -  Holly, Boadicea, Discover Your Passion, Mr Darcy
    • Cardstock:- White; Acetate
    • Inkpads:- Archival  - Sepia;  Memento – Rich Cocoa
    • FlitterGlu
    • Gilding Flakes:- Lancashire Rose, Morris Dance
    • Colouring Medium:- Pan Pastels,  Spectrum Noir Colouring Pencils
    • Empty Cardboard Ribbon Spoon
    • Gesso
    • Circle die
    • Thick twine – small piece.
    Instructions:-
    1. Peel away the top cardboard covering of the ribbon spool to create an aperture but leaving the base intact. Paint the ribbon spool with two or three coats of gesso inside and out. (The reverse of base does not need to be done as this will be covered.)
    2. Using Rich Cocoa, stamp ‘Miss Austen’ from the Mr Darcy set on white card. Colour to suit using Spectrum Noir pencils, blending shades together. (I only coloured the face, flowers and leaves). Die cut the image with the circular die, selecting a size fractionally smaller than the inside of the spool.
    3. Stamp the same image on acetate with Archival Sepia; leave to dry. Blot with copy paper to ensure the image is thoroughly dry. Die-cut as in (2).
    4. Ensuing the images are in line, attach the acetate to the coloured image. (I used folded mini glue dots in intervals around the extreme edge, where they were almost invisible.)
    5. Place some foam mount inside the dry ‘gesso-ed’ spool and attach circular image.
    6. Sponge FlitterGlu onto holly leaf stamp and stamp sixteen images on white card. Cover seven with Morris Dance flakes and nine with Lancashire Rose. Stamp two butterfly images from Discover Your Passion set in FlitterGlu and cover with Morris Dance. Cut out both butterfly images and attach on onto the other.
    7. Colour the leaves with Pan Pastels and cut out. In a clockwise direction, glue the seven ‘Morris Dance’ leaves around the top of the spool to frame ‘Miss Austin.’
    8. Using a larger circle die than that in (2) cut a circle from white card. In an anti-clockwise direction, glue the nine ‘Lancashire Rose’ leaves.
    9. Knot some thick twine and place at back of spool. Glue the leafy circle over the back of the spool to hide the twine.
    10. Stamp the flower collage from ‘Boadicea’ seven times on white card, colour the largest flower only – again using Spectrum Noir pencils and cut out. Add to the frame along with the gilded butterfly from (6).
    And there we have it – something from nothing!