Monday, 14 March 2016

Clarity Stamp Challenge 37 Mid-month 'It's All About the Girls!'


Clarity Challenge 37 Mid-month
‘It’s All About the Girls'
'Masque'

Hello and welcome back to Shelagh-land (The Making Lady) and many thanks for your visit. There are quite a few birthdays to be recognised around this time, so I have combined this reason with my Clarity Challenge Mid-month submission. I love 3D work and although I've haven't possessed this stamp for long, the shape shouted 'Masqued Ball' to me. I hope you like how I've used it. Most of the components are available from the Clarity Stamp website with a few additions from my stash.

Apologies for the lack of step-by-step photos but there is work going on in the house - right next to my craft room and presently the area is a 'No-Go' zone! 


Materials:-
·         Stamps:- Filigraphy Leaves 1
·         Stencil:- Tree of Life
·         Cardstock:- Clarity Stencil Card 7x7, mirri card from stash, 8x8 white card
·         Panpastels:- Gold
·         Inkpads:- Versamark
·         Ranger Mini Blending Tool and sponges
·         Embossing Powder:-   Gold Detail, two shades of red/gold and orange/gold from stash
·         Feathers:- coloured marabou from stash
(N.B. All items listed apart from ‘stash stuff’ are available from Clarity Stamps website.)


Instructions:-
1.       Cover entire branch area of tree of life with masking tape or post-it notes, leaving only the intricate root area, complete with Celtic symbol open. Tape in place over one corner of 7x7 card and sponge over Versamark. (I used a Ranger mini blending tool and sponge.) Remove stencil.
2.       Over the Versamark stencilled outline, apply gold Panpastels, gently building up the depth of colour.
3.       Repeat these two steps on each remaining corner, working in a clockwise direction.
4.        Add red liner tape around each card edge, sprinkle on a mixture of embossing powders as detailed in (5) and gently heat emboss. (I started from the reverse of the card to stop the powder flying onto the stencilled image.) Set aside.
(N.B. I tried stencilling all the areas before adding the Panpastels but the final image was not as sharp.)
5.       Stamp the Filigraphy Leaves onto post-its and cut out a mask. Set aside.
6.       Again using Versamark, stamp the Filigraphy Leaves stamp onto another sheet of the 7x7 card. Sprinkle pinches of gold and the other two colours over the stamped image then heat emboss.
7.       Mask this image then turn the stamp to face the other way and stamp and emboss again as in (5.) Cut out the complete image, leaving a fraction of a white border. Cut out the central leaf on each side.
8.       Stamp another four leaf images and emboss as in (5.) On two images, cut into the shape, to leave the inside rim of leaves. Shape the card, gently rounding the leaves and glue into place over main piece.
9.       From the remaining two images, cut single leaves to suit and glue in place.
10.   Mat stencilled image onto white card, followed by gold mirri then black card.
Et voila! Another card suitable ‘For the Girls!’
 Although it’s not shown here, this was then mounted onto an 8x8 card for my sister’s birthday – Happy Birthday, Kay!


Here is another variation on the theme:-


Barbara’s Birthday Card!
Materials:-
·         Stamps:- Filigraphy Leaves1, Small Leafy Swirl, ‘Celebrate’ – Word Chain 3
·         Cardstock:- Clarity Stencil card 7x7, toning mirri card, 8x8 card
·         Stencil:- Tree of Life
·         Inkpads:- Versamark, Peacock Feathers
·         Embossing Powders:- Wow Gold Twinkle, Gold Detail two colours of turquoise from stash
·         Clarity Brushes
·         Feathers, Filigree Leaves from stash
·         Perfect Pearls:- gold, blue, turquoise, green


Instructions:-
1.       Tree of Life stencil prepared and used as above in (1,) (2) and (3.)
2.       Load Clarity brush with Peacock Feathers ink then brush most off onto copy paper before brushing over stencilled card.
3.       Run red liner tape around each edge and gently brush on a selection of toning Perfect Pearls. Set aside.
4.       Stamp Filigraphy Leaf 1 using Versamark as in (6) but heat emboss as before with pinches of  sparkling gold and different turquoise and blue embossing powders.
5.       Repeat (7,) (8) and (9) with these colours and assemble as before.
6.       Ink the small Leafy Swirl with Versamark and stamp onto feathers and filigree leaves. Add gold detail powder and heat emboss. (N.B. I tried this with a marabou feather from the card above and it ‘withered’ with the heat – so in this case, the cheaper the feathers, all the better!)
7.       Glue the decorated leaves and feathers behind the mask to suit.
8.       Stamp ‘Celebrate’ using glittery gold embossing powder and heat-set.
9.       The card was completed by matting onto white, then toning mirri then onto 8x8 card.
Et voila! 

Bon anniversaire, Barbara!


Tuesday, 1 March 2016

Clarity Challenge 37 'It's All About the Girls!'

Clarity Challenge 37
‘It’s All About the Girls!’
'On the Catwalk!'
Hi and welcome once again to Shelagh-land and the 'Making Lady's' blog. From the outset, well in my mind anyway, my take on this month's challenge was a 'no-brainer' and there is a little story to go along with it. 
A few days before I had the pleasure of attending the Clarity Retreat last year, I lost a very dear friend of thirty plus years from my Brunei days. As I was travelling out to Kuwait a few days after the Retreat, I was unable to attend her funeral but her family very kindly sent on the order of service along with a photo, black and white of course, of this dear lady taking part in an Expat fashion show in Sabah, Borneo in the 1950's (and this was awaiting me at home when I returned six weeks later.) To explain further, she was photographed walking along a stage and dressed very similarly to the lady with the handbag on the right-hand side of my card. So my dear, dear Michal, this is for you!

Materials:-
·          Cardstock:- Clarity card ‘Theuva’ 7x7; backing card mats
·         Stencils:- Stripes, Elegant Ladies Set x4, Town &Texture, Stage stencil
·         Book pages
·         Inkpads:- Distress Inks – Stormy Sky, Chipped Sapphire, Cracked Pistachio Walnut Stain; Adirondack:- Mountain Rose; Memento:- Cloudy Sky
·         Coloured Pencils:- Polychromos  or Spectrum Noir
·         Clarity stencil brushes

Instructions:-
1.       Place chosen ‘Elegant Lady’ outer stencil in centre of 7x7 card; brush over lightly with Mountain Rose. Mask figure with inner stencil, place two other ‘Elegant Lady’ outer stencils to suit and brush through with Mountain Rose.
2.       Place all three outer stencils over book pages and brush through with Cracked Pistachio and a touch of Mermaid Lagoon. Cut out each image. Colour and shade dress images using Polychromos, cut out and reserve.

3.       Ensure all three lady images on the main card are masked with the ‘inners.’ Place the ‘Curtains’ stencil from the ‘Marionettes’ stamp set over the scene to suit and brush through Chipped Sapphire.
4.       Leave the ‘Curtains’ stencil in place then place the ‘Stripes’ stencil over the scene and mask off areas as shown. Drag through Chipped Sapphire.
5.       Place Texture stencil over and cover open areas with White opaque ink.
6.       Adhere each stamped ‘book-page’ image over silhouettes and once in place, shade with pencils to suit.
7.   Mount onto white then toning card.

Et Voila – ‘On the Catwalk!’


There are also a number of examples below - slight variations on the theme - and one is off to my friend's family; I wonder if you can guess which? 
As a final note there was a quote at the foot of the photo mentioned above which I'd like to share with you all:-

'It's not the years in your life that count, it's the life in your years.'


Looking forward to your creative examples.

Much love,

Shelagh.
(The Making Lady)


Sunday, 14 February 2016

Clarity Challenge 36 Mid-month Reminder

Clarity Challenge 36
Mid-month Reminder

Love

One Love, One Heart.
(Bob Marley)
        
Hi and thank you for visiting! I appreciate the time you take to 'blog in' and also any comments or questions you may have.
Last month's response was so good, it would be great to equal or even surpass the number of entries submitted. This is the ideal 'Love' month with Valentine's Day and I'm sure you can create some fantastic projects using Clarity stamps, stencils and Groovis'. As far as the latter goes, it's most enjoyable dove-tailing different plates and borders together to produce things which are slightly different.

For the mid-month example, I'm afraid there are only photos of the finished product as this project just 'grew' as stencils, papers, pastes and colours were added. 


Materials used:-
·         Clarity Canvas
·         Clarity Stencils:- Leafy Strip, Wild Grasses 1, Sunflower, Vine Heart
·         Papers:-Music Score, Tissue Paper, Parchment Paper, 
       Fresco Finish Acrylic Paints
·         Multi Medium:- Matte
·         Texture Paste
·         Perfect Pearls – variety from both sets.
·         Coloured Pencils:– Polychromos
·         Gilding Wax:- Silver, Antique Gold, Empire Gold, Renaissance Gold

Instructions:-
Canvas
1.       Tear up the music score and apply to cover canvas using the matt medium. Paste over this with matte medium. (N.B. I used the straight edges of the score to line up with the edges of the canvas, ensuring the pieces were horizontal and vertical time about.)
2.       Choose a selection of toning Fresco acrylics and paint in areas until the desired colour is achieved. (I watered them down slightly and gradually built up the colour.)
               

3.       Scrunch up a sheet of white tissue paper, then apply over the canvas which again has a layer of matte medium. Carefully smooth this over the edges, particularly the corners, before trimming the excess then apply a light coat of matte medium to the reverse.
4.       Place on the Sunflower stencil and pull through a layer of texture paste – the large flower head only. Allow to dry.  (I had a bit of an issue here as my new brand tub of grunge paste was too hard to use, so it was a case of rooting around and luckily I found a box of trial texture pastes in my stash.)
5.       Clean stencils immediately.
6.       Place the Leafy Strip stencil on one corner and repeat as in 3). Allow to dry then apply more paste to the diagonally opposite corner and allow this to dry.
7.       Place the Wild Grasses 1 stencil in the remaining corner, pull through more texture paste and allow to dry. (At this point, I applied some texture paste through the clean stencils onto sheets of parchment paper – I used an A5 size for each stencil and allowed them to dry.)
8.       Paint chosen Fresco paints onto the dry paste images and work in with a damp paintbrush. (I watered them down slightly.)

9.       Spray the canvas with a variety of Perfect Pearls – I used Turquoise, Berry, Plum, Red, Gold, Perfect Pearl, Biscotti, Blue Smoke – mixed a few until I achieved the depth and tint I wanted in spritzer bottles. Allow to dry.
10.   Highlight areas with gilding wax. Add gilding wax around the perimeter, blending it in with the colour scheme.


Heart
1.       Place the Vine Heart on a piece of grey board – mine was from the back of a spiral notebook which had been painted and coated with a crackle paint for another project - and pull through coarse texture paste, allowing time to dry. (I had to use the coarse paste as the trial pot was empty!)
2.       Cut out heart, leaving a surround. Paint chosen colours over the paste and allow to dry.
3.       Paint over matt medium and apply tissue paper as above in 3).
4.       Add gilding wax and Perfect Pearls as in 9) and 10).

To complete:-
1.       Adhere heart to canvas. (I used Cosmic Shimmer glue.)
2.       Colour the paste images on the parchment to suit and cut out. (I used the centre from the sunflower, some leaves and stalks up to the calyxes from the wild grasses) Add the over the stencilled images to give dimension, using glue as in 1).
3.       Add hints of gilding wax here and there and shade around the images with pencil – I used a soft black pencil – a 2B.

Many thanks for popping in and looking. Any questions or queries are appreciated and I will do my best to help out. This canvas was not that perceived in my mind's eye when I first embarked on this project and turned out less structured than usual. Despite that, I rather like it!
The Clarity 'Love' Challenge runs until 29th February - as it is a 'leap year,' you have an extra day to join in and remember - there is a £50 Clarity voucher for the randomly selected winner - bit of a no-brainer really.
Best wishes, 
SShelagh (The Making Lady.)


Monday, 1 February 2016

Clarity Challenge February 2016
'Love'
'Heart to Heart!'
or 
'Hart to Hart!'
Hello, thank you for visiting and welcome back to Shelagh-land after what seems to have been a very long month. I seem to have achieved a fair bit since the beginning of the year- not least tidying all my Clarity stamps and stencils and clearing out some of my teaching resources to make room for them. 

The theme this month is 'Love' and my first step was to assemble all the Clarity stamps I deemed appropriate. However, I had been looking forward to using this stencil but it arrived just a little too late for my Christmas cards and next Christmas is a little to far off as yet so I came up with this idea but first had to check it would work as you'll see below. The only other issue was finding hearts that were small enough to fit in and they came courtesy of the shamrock from the 'Lucky' set and the 'Love is in the Air' set. So here we go!

Materials:-
·         Clarity canvas:- one 8 x 8ins, one 12 x 12ins
·         Clarity Stencil:- Deer
·         Clarity Stamp:- ‘Love is in the Air’ set; ‘Reindeer and Let Heaven’ set; ‘Lucky’ unmounted set; Birdsong set.
·         Colorbursts:- Pthalo Green, Ultramarine Blue
·         Inkpads:- Distress - Stormy Sky, Weathered Wood, Peeled Paint, Forest Moss, Mowed Lawn,  Old Paper, Antique Linen, Gathered Twigs. Memento – Nautical Blue, Pearlescent Thyme. Adirondack – Red Pepper.
·         Grunge Paste
·         Pens:- Sakura White, Micron Black

Instructions:-

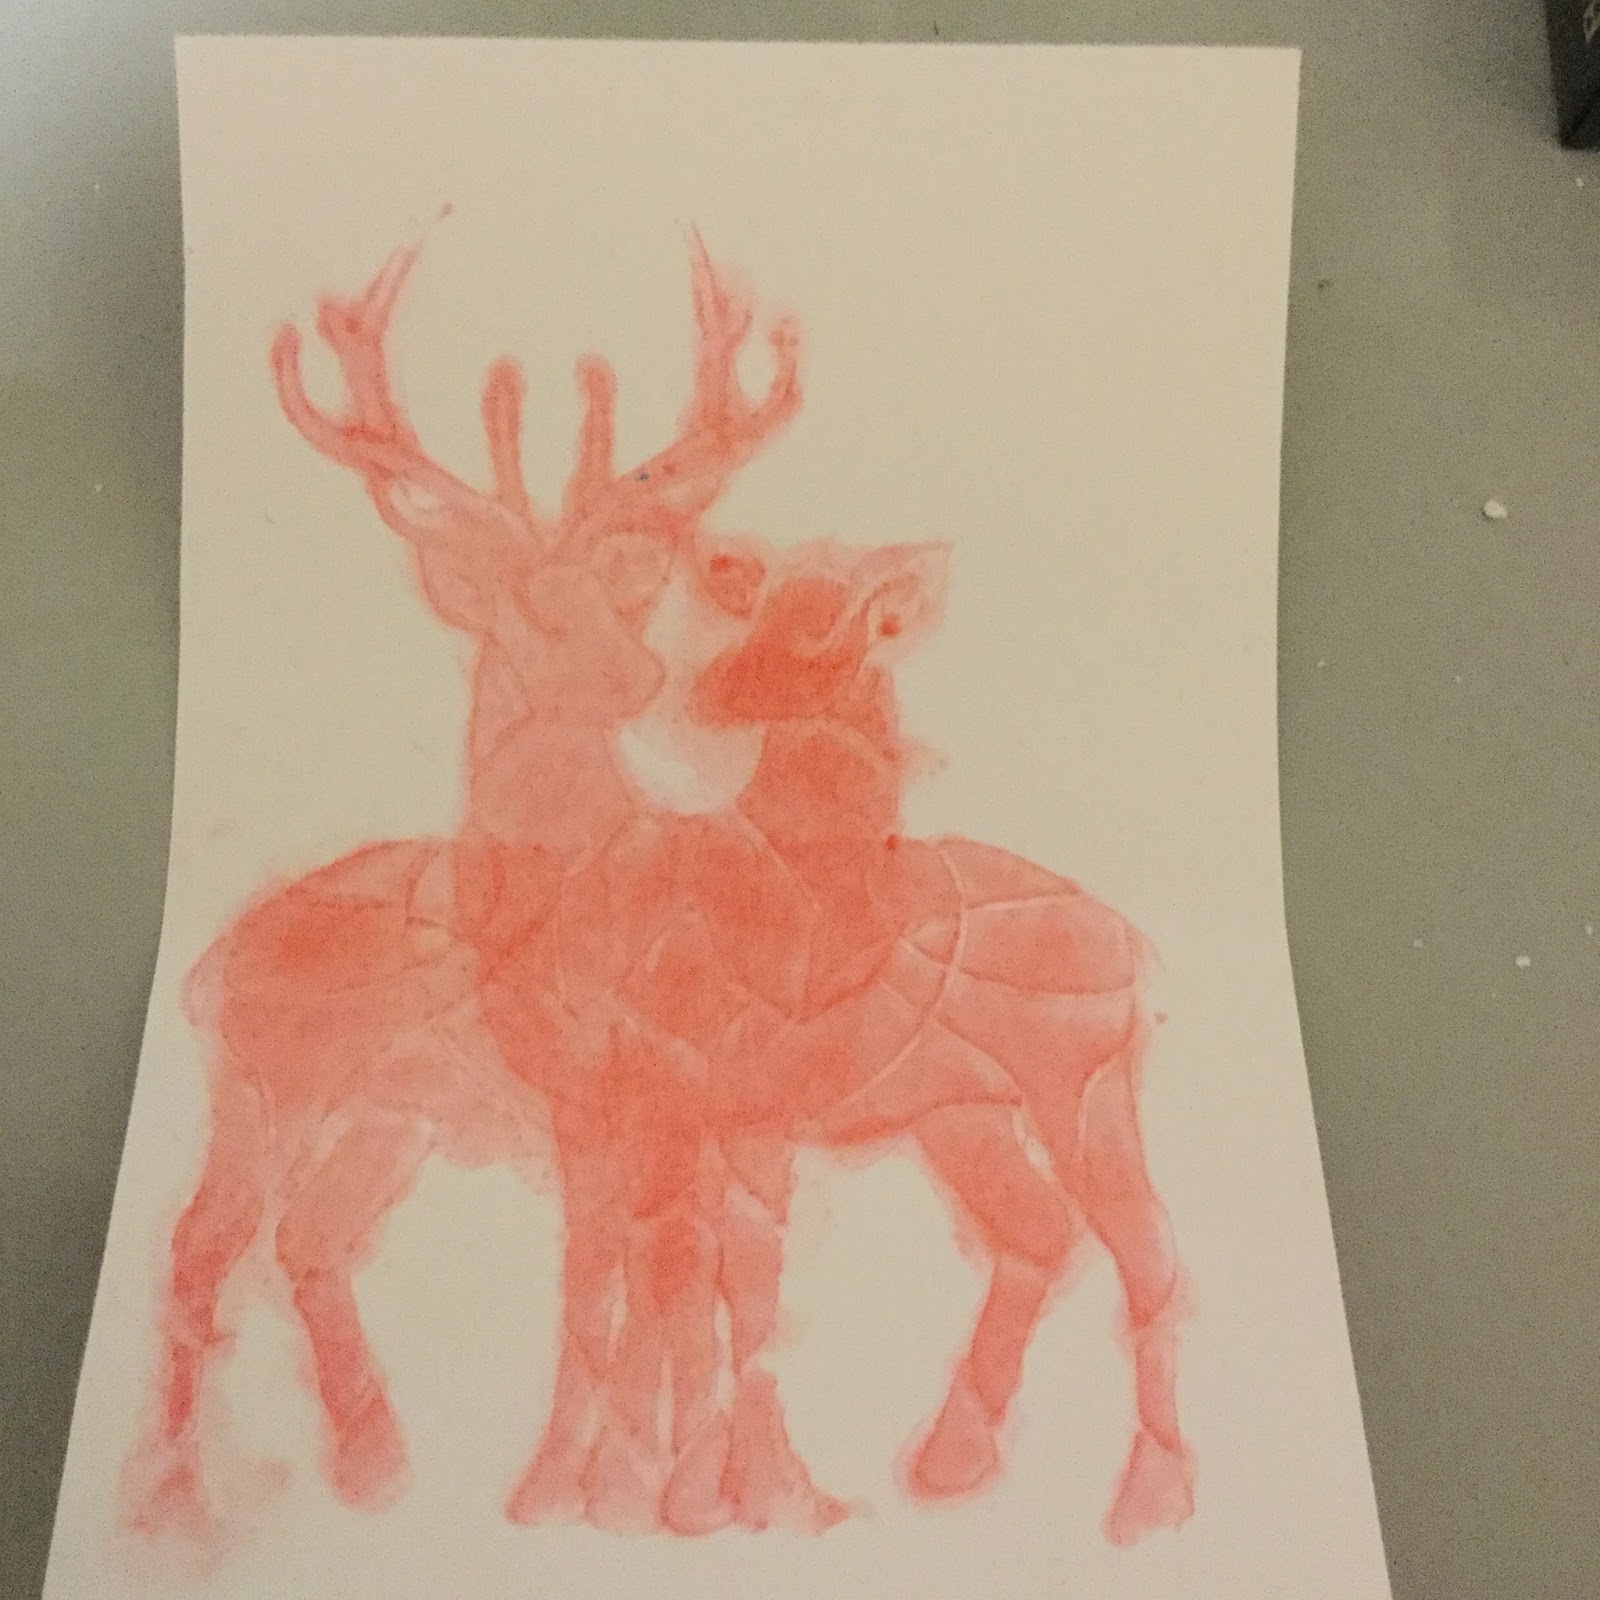
1.       First of all I experimented with the Deer stencil on paper with Candied Apple Distress ink (Only chose this colour as it was in the kitchen and I wanted to check the colour vibrancy.)

I stencilled the deer, complete with antlers facing one way then washed the stencil, masked off the antlers and stencilled through again on the flip side. The idea worked so now I could proceed!

2.       Spritz the 8 x 8ins canvas lightly with water; apply blue Colorburst to the top third and Pthalo Green to the remainder. Spritz again to disperse the colour pigment. Allow to dry.


3.       Place the deer stencil in the centre of the coloured canvas and apply Grunge Paste. Allow to dry. (Wash and dry stencil.)

4.       Flip the stencil to have the deer facing the other direction, mask off the antlers as described in 1) to create a ‘Doe’ and apply Grunge Paste again. Allow to dry while rinsing off the stencil.
5.       Replace the clean stencil over the Doe and with make-up sponges, lightly colour with Old Paper, Antique Linen and a smidgeon of Gathered Twigs.
6.       Remove the masking tape and repeat with Gathered Twigs only for the Stag. Add shade using pencils like Polychromos or Spectrum Noir.


7.       Tear a hill mask from scrap paper and create a hilly background using Weathered Wood, Stormy Sky, Peeled Paint and Forest Moss. Add definition using some colouring pencils as in (6).
8.       Stamp a couple of the ‘Love is in the Air’ images onto scrap card using Red Pepper, concentrating on the heart balloons; add clear detail embossing powder and heat to set. Cut out the heart shapes and set aside. Repeat this process with the Shamrock from the ‘Lucky’ set and cut out the leaves individually.
9.       Place the hearts in the gaps between the antlers to suit and glue to the canvas.
N.B. I put some white glue on the back of my hand, spread it out thinly then dabbed the hearts over. This gives just enough glue to stick down the card hearts.

10.   With a black Micron pen, add faux string to suggest the hearts are suspended from the various antler points. (I added a few ‘Quickie Pen’ glue spots and dusted over some fine colourless glitter.)
11.   Using the pearlescent green inkpad, stamp a random border at the foot of the canvas with the heart grass from the ‘Love is in the Air’ set. Add highlights to the hearts with a white gel pen.
12.   Stamp the antlers from the Reindeer stamp and second generation Nautical Blue ink up the right hand side of the canvas.
13.   Repeat this with the twig from the ‘Birdsong’ set up the left hand side of the canvas.
To finish, I added some pencil shadow under the deer images and the hearts then deepened the yellow spot in the sky before mounting it onto the 12 x 12ins canvas. (I used a sheet of Clarity double sided sticky.)


Et voila! Heart to Heart (or 'Hart to Hart') is complete! 

'Love' is the theme and I'd love to see what you can design and make over the coming month as I know how artistic, creative and inventive you are. 

To enter the Clarity Challenge all you are required to do is to create an original project using Clarity stamps, stencils or Groovi plates, take a photograph and either post it on your blog or send it along with your name to Claritystampchallenge@hotmail.com and it will be posted on your behalf.

The Clarity web-site can be found at www.claritystamp.co.uk and Clarity also has a Facebook page - https//:www.facebook.com/claritystamp.co.uk
     
     Meantime - KEEP CALM AND KEEP CRAFTING  XX  ;~}

Thank you again for popping in. Have a great month!

Best wishes,

Shelagh (The Making Lady)

Saturday, 16 January 2016

Clarity Challenge 35 'Say It With Flowers' Mid-Month Reminder


Clarity Challenge 35

'Say It With Flowers' Mid-Month Reminder

'Flower Boa'


Hi there and thanks for looking in. 
A mid-month offering for the January Clarity Challenge from Shelagh-land and something which will probably end up as birthday cards as I have a number to do and time is rapidly disappearing. (May even need to use the tags for this purpose, too!!! 
I hope it encourages you to dust off your stamps, stencils or Groovi plates or a combination of any of these and join in. It's free, it's fun and with a £50 Clarity voucher up for grabs - awarded to a randomly chosen submission - it is a Win, Win situation for one lucky entrant. You can enter through your blog or by sending a photo by email to claritystampchallenge@hotmail.com and have until 8pm on 31st January. Just remember to check the rules of entry on the Clarity Challenge blog.
Good luck!


Materials:-
  • Card :- White, Black, Pearlescent, Gold Mirri
  • Stamps:- Feather Boa - large; Birds & Flower Rows set, Fairy Silhouette
  • Inkpads:- Versamark, Black Archival, Versafine Jet Black
  • Embossing Powder:- Gold Detail, Clear Detail 
  • Oval die from stash
  • Ribbon from stash
  • Pens:- Black Alcohol Marker, Gold Sakura
Instructions:-

Using white card, die-cut and emboss a number of ovals as this will save time. 

Card

Oval Topper
  1. Stamp 'Feather Boa' centrally onto the oval using black Archival. 
  2. Faintly colour the ladies face with pencils.
  3. On a scrap of white card using Versamark, stamp the lady's head again and heat emboss using gold embossing powder. Over-stamp the hat using swirly edges of the 'Fairy Silhouette' and black archival then heat emboss once clear embossing powder has been applied. Cut out the hat and glue onto main image.
  4. Using Versamark and gold embossing powder, stamp a number of medium and small outline flowers from the Bird and Flower Rows set, colour using a black alcohol pen and cut out. Attach over boa to create a flower scarf. 
  5. For the hat bow, I cut a into a medium flower then attached it to the side.
Background
  1. Cut a rectangle of black card. (At this point and as a guide, I drew around the inside perimeter of the oval die with a gold pencil.)
  2. Starting at one corner I drew repeated Zentangle-type shell shapes using the gold pencil, then lightly drew over these with the gold Sakura pen until reaching the mid-point of both adjoining sides. Repeat until the background is filled in. 
  3. Mount onto black, then gold Mirri then black. 
  4. Adhere to a card blank.
Bag and Tags

Gold on White
  1. Repeat as for topper, only exchange the black Archival for Versamark.
  2. Punch a hole near the top edge and thread through matching ribbon.
Black on White
  1. As above but use black Archival and clear embossing powder.
  2. As in (2) above 
To complete, I made and decorated a box each for the card and tags then decorated a plain white gift bag.

Thank you again and best wishes.

Shelagh ;~}


Thursday, 14 January 2016

Groovi Birthday Card


Groovi Birthday Card

Mum's 89th birthday card which fits in with this month's Clarity Challenge.


Hi again,
I'd like to share with you the card I made last week for my mum. I was itching to use the 'Bell' plate but decided to use it as the skirt of an evening frock and chose the turquoise blue as Mum had a satin number in this sumptuous colour when I was little.
I won't bore you with the instructions but will record below the plates I used.
  

Groovi Plate Mate

Groovi Plates:-
  • Bells, Frilly Circles, Nested Circles, Nested Squares, Nested Deckle Squares
Groovi Borders:-
  • Annabel, Art Nouveau (Daisies)

I coloured the parchment with Polychromos (fab pencils) and the rest was my attempt at white work. 
It did take a bit of time but then, my mum is worth it; it wasn't a labour but it was done with love!

Thanks again for looking in - hope to see you again soon. 

Oh and remember the Clarity Challenge - Say It With Flowers.

Shelagh ;~}

Friday, 1 January 2016

Clarity Challenge January 2015
Say It with Flowers
La Dame au Quatre Saisons

                                Happy New Year to one and all!!!
Well here we are, January 1st 2016 and a full twelve months since being invited onto the Clarity Challenge team. The run up to my Challenge debut was fraught with issues through setting up my blog, I scarcely wish to remember it, particularly Hogmanay as the blog was still not active.(Turned out the computer didn't like the programme and once switching to another - programme that is - all was fine.) To come up with ideas hasn't always been easy, particularly when I found myself far from home with a small selection of Clarity products I'd taken with me in my suitcase; when the deadline was drawing near and with still no absolute idea in mind, a calm and measured approach was called for, 'Don't Panic' had the galvanising effect! . . . . And several ideas were conceived this way!
Suffice to say, thank you for visiting my blog and with all that's new on offer from Clarity - not least the Diamond Club, KEEP WATCHING!
However, I cannot finish my preamble without mentioning these devastating floods and adverse weather that has been hitting us up and down the country. Experiencing a little bathroom flood a couple of months ago and only having to dispose of soggy carpets and underlay, I would not know where to start the clean-up of all the sludge and mucky water. Suffice to say, I do hope the powers that be in the whole of Britain take a proper look at all the flood defences up and down the country and DO SOMETHING PRONTO!

                                   La Dame au Quatre Saisons 
This month's offering did not turn out as I had planned as the original idea was a Victorian screen card! 
(Close-ups' to follow)
Materials:-
·         Cardstock:- Clarity Theuva and Stencil Card, black card from stash, scrap paper
·         Stamp:- Clarity Unmounted La Dame au Camellias
·         Stencil:- Clarity ‘Flowers’ 7x7 inch
·         Inkpads:- Ranger - Archival in Jet Black, Distress Inks in Fossilised Amber, Twisted Citron, Wilted Violet, Abandoned Carol, Carved Pumpkin, Mermaid Lagoon, Blueprint Sketch
·         Spectrum Noir Pencils
·         Clarity Double-sided Sticky sheets
·         Fine Glitter eg Glamour Dust
·         Cropodile, eyelets, jump rings


(Plaques are equal in size, honestly!!! - just poor photography.)


Instructions:-

1.       Portion off selected part of the ‘Flowers’ stencil with masking tape. Cut four pieces of Stencil card to 3.5 x 6 inches (approx. 9 x 15 cm) and attach one piece behind the chosen portion. For ‘Spring’ sweep over a mixture of Fossilised Amber and Twisted Citron using a make-up sponge or a Clarity stencil brush. Remove the stencilled card, set aside and leaving the masking tape in place, gently clean the stencil with a baby wipe.


2.       Repeat this three more times with Abandoned Coral and Wilted Violet for ‘Summer;’ Carved Pumpkin and Abandoned Coral for ‘Autumn’ and Mermaid Lagoon and Blueprint Sketch for ‘Winter.’

3.       Trim down a sheet of double-sided sticky (reserve the remainder as it comes into use soon,) remove one side of backing and place over the stencilled image.

4.       Remove second backing sheet and pour fine glitter over. Work this well into the sticky surface with finger tips and tip remainder back into pot.


5.       Trim to suit and mat onto black card. (Clarity Black Coated card is ideal but mine is lost in amongst the Christmas clutter!)

6.       Using Jet Black Archival, stamp La Dame au Camellias four times onto ‘Theuva’ card. Colour each using Spectrum Noir Pencils to complement the four backgrounds.
Flowers:- 
Using a Clarity stencil brush on good quality paper, stencil one flower from each ink combination . . .  
. . . . as in (2.)

Cut each flower out as shown below. 


Tear each flower in a spiral from outer edge to inner (as in 1st flower, Spring, yellow below,) then fold each part of the spiral in half long-ways over a needle tool as in second flower (Summer - pink).
Roll around the needle to create a flower (Autumn-orange.)
Place a blob of glue at the base of the spiral and press down to create a finished bloom.


Add flowers to corresponding images.
Trim and mount onto the sparkly background using the off-cuts from (3.)

8.       Line up each rectangle and using the Cropodile, punch a hole in each corner.
9.       Again using the Cropodile, add eyelets to each corner.


10.   Join each rectangle using three jump rings at each corner and add a chain to top and bottom to complete. (Chains were Charity shop jewelry finds.)

Et voila - La Dame au Quatre Saisons!

Hopefully the explanation has been of use and even more so - encouraged you to enter this month's Clarity Challenge, it's fun and it's free and even better there is an opportunity for you to win a Clarity voucher simply by posting your project or if you don't have a blog, by sending it to Sazzle who will post it for you - details are as follows:-claritystampchallenge@hotmail.com
The Clarity website can be found at www.claritystamp.co.uk and Clarity also has a Facebook page - https//:www.facebook.com/claritystamp.co.uk
Meantime - KEEP CALM AND KEEP CRAFTING  XX  ;~}