Wednesday, 24 August 2016

August 2016
Fluttery Butterflies

I've just returned from one of my favourite walks - along the Ythan Estuary, just north of Aberdeen - and was as amazed as ever by the wildlife - herons (at least nine,) curlews (dozens,) cormorants, buzzards but sadly no seals, eider ducks or sand martins. Despite recent reports, I saw more butterflies today than ever before including Orange-tips, Meadow Browns and Small Tortoiseshells where one of the latter was sharing a flower with a bee! These sightings were the inspiration behind my decorative wreath and fitted in so well with this month's CB challenge colours. 

Materials:- 
  • Stamps:- Chocolate Baroque - Joyful Christmas Clear Stamp set, A Year of Stamping - April small and large; 
  • Ink Pads:- Versafine - Onyx Black; Distress Inks:- Peeled Paint, Twisted Citron, Fossilized Amber, Wild Honey, Carved Pumpkin, Spiced Marmalade, Fired Brick, Barn Door, Rusty Hinge
  • Cardstock:- White
  • Miscellaneous:- Clear Detail Embossing Powder; Spectrum Noir Sparkle Pens - Solar Red, Clear; Cutting Machine; Fine Glitter; Glue Pen.

Instructions:- 
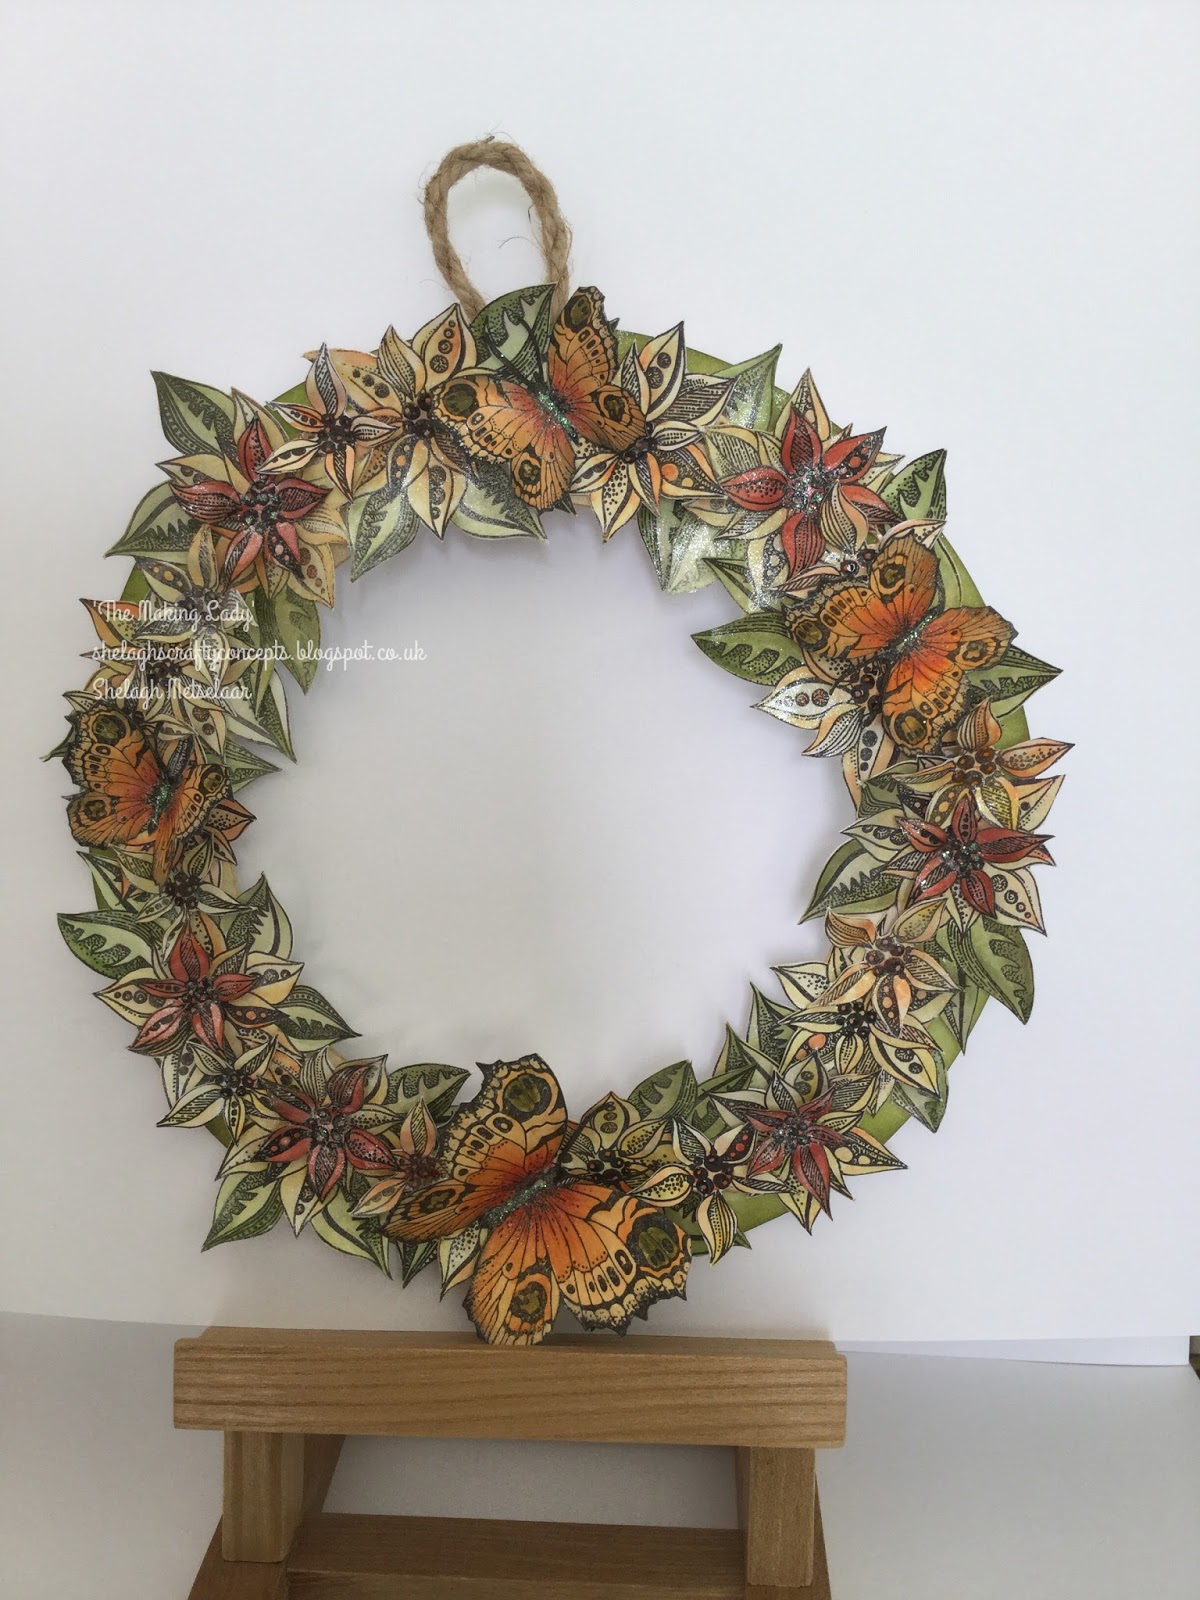
  1. Cut three rings using a large die or an electric cutting machine and glue together for stability. Blend over a mixture of Peeled Paint and Twisted Citron. Set aside.
  2. Using Onyx Black, stamp the poinsettia twenty four times in 1st and 2nd generation ink for contrast, large butterfly once and small butterfly three times. Heat emboss.
  3. Blend a mixture of the Distress inks to create 'rusty red,' green and yellow flowers and cut out.
  4. Blend yellows and oranges over butterflies and add definition with Rusty Hinge, Fired Brick, Carved Pumpkin, Barn Door and Twisted Citron using a fine paint brush. Cut out.
  5. Add Solar Red Sparkle to centre of butterflies and Clear Sparkle to flowers and leaves.
  6. Dot glue pen over berries and butterfly bodies and sprinkle with fine glitter.

  7. Glue flowers around rings to suit then add butterflies. 
  8. Gently bend petals and wings for a 3D effect.
Et voila! Fluttery Butterflies!

This is my entry for this month's Chocolate Baroque challenge.

Thank you for taking the time to read my blog. 

Shelagh ;~}


Monday, 15 August 2016

Clarity Challenge 42 Mid-month
‘Fussy Cutting’
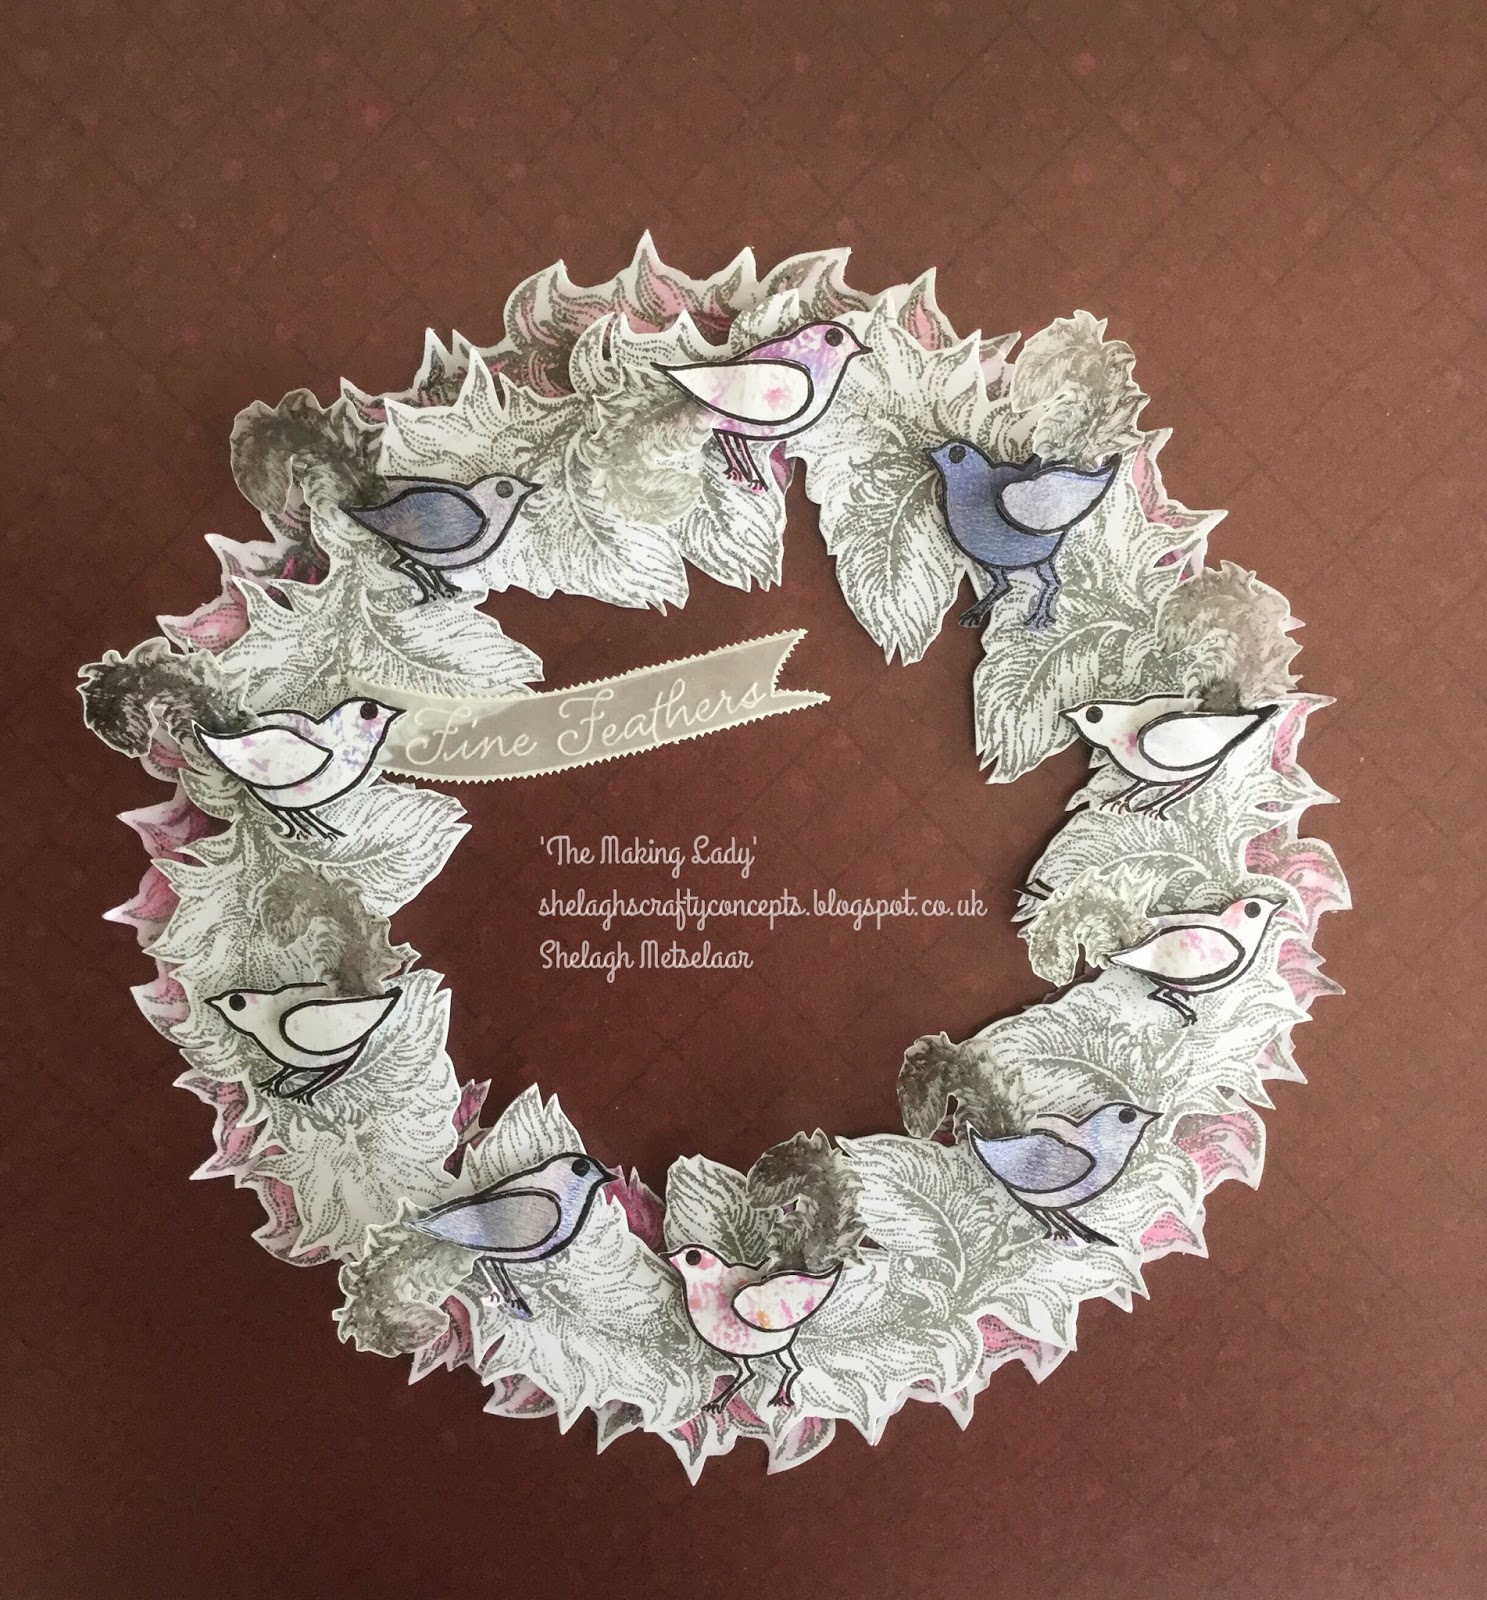
'Fine Feathers!'

Materials:-
·         Clarity Stamps:- Matrix Feathers large and small; Birds form ‘Bird and Flower Row’
·         Groovi :- Banners Border; Calendars, Relatives, Occasions Border plates
·         Inkpads:- Archival – Watering Can, Distress Worn Lipstick
·         Cardstock:- 12 x 12 white card
·         Scrap parchment
·         Fine Detail Embossing Powder


Instructions:-
1.       On a sheet of 12 x 12ins card, lightly draw a circle in pencil (I drew around a ‘salad’ plate – larger than a tea plate but smaller than a dinner plate.

2.       Using Watering Can, stamp the large feather firstly at ‘12o’clock’ then stamp onto post-it notes to form masks. Cut out a number of masks and use one of them to mask the first stamped image. Hover with your feather stamp and decide where your second stamped image will be best placed on your pencilled circle as this will form the pattern.
3.       Continue to mask and stamp until a grey circle has been formed. Fussy cut, leaving a border.
4.       Draw a slightly larger circle on another sheet of 12 x 12 (for this I used an upturned soup bowl) and repeat (3.) Stamp Worn Lipstick onto a Clarity Blending Mat, craft sheet, or glass mat and colour the feather circle with a watered down pink. Fussy cut and reserve.
5.       Stamp the Birds from ‘Birds in a Row’ onto a Gel Press print and cut out. Repeat and cut out the wings only. Attach the wings onto the bird images with foam pads. Reserve.
6.       Stamp the small feather onto scrap parchment, one for every bird image, add embossing powder and heat set. Fussy cut and add as a tail to each bird.
To assemble:-
1.       Place foam tape around the reverse of the grey feather circle and place over the pink feather circle.
2.       Add foam pads to birds and attach to suit.
3.       Using the Groovi Borders, emboss Fine Feathers, pierce with the twin tool then cut out. Add to circle to suit.

Et voila! Les Oiseaux!

Monday, 8 August 2016

Craft Stamper Take It, Make It August 2016

Hello and welcome to my blog. Above is my entry to the 'Take It, Make It challenge in Craft Stamper. Apologies to Rihanna but the title seemed to fit the bill; it was either that or a play on the name of a famous brand of raincoat! Below is a short explanation should you wish to 'have a go.'
Materials:-
·         Stencils:- Clarity Umbrellas, Umbrella Girls, Jo’s Bubbles
·         Stamps:- Clarity – ‘Joy’ set
·         Cardstock:- Clarity -  Stencil Card 7x7ins; Crafters’ Companion – Black A4; Papermania – 8x8 card blank
·         Inkpads:- Distress Inks – Pumpkin, Picked Raspberry, Salty Ocean, Twisted Citron, Fired Brick, Peacock Feathers, Old Paper, Tea Dye, Antique Linen, Black Soot;
·         Miscellaneous:- Faber Castell Polychromos; White Chalk marker; Fine black pen; Quickie Glue pen; Glamour Dust; Wink of Stella – Silver; Turquoise alcohol marker


Instructions:-
1.       Using a loop of low-tack tape, fasten Umbrella Girl ‘inner’ stencil to centre of a sheet of 7x7 card to act as a mask; tape Umbrella stencil over and blend a variety of bright Distress Inks over the stencils.
2.       Remove stencils and tape Umbrella Girl ‘outer' stencil over to protect surrounding colour. Colour image with Antique Linen, Old Paper and Tea Dye. Add definition with Polychromos. Remove stencil.
3.       Add highlights to umbrellas with white chalk pen. Scribble fine borders around coloured shapes and add dots to white areas.
4.       Mist with water spray and blot.

5.       Place Jo’s Bubbles stencil over and colour small circular apertures with white chalk pen. Repeat over main umbrella.
6.       Add Silver Wink of Stella, followed by glue pen and glitter over the white circles on main umbrella.

7.       Stamp music stave from Joy set randomly in 1st and 2nd generation ink.

8.       Add and colour wavy border; outline with turquoise pen then mount onto white, black then 8x8 card blank. 

Et voila - Umbrella Ella.
. . . . . Or it could be 'Femme avec Parapluie!'  ;~}

Wednesday, 3 August 2016

Chocolate Baroque Anniversary

Chocolate Baroque 
Second Anniversary Challenge 
 July 2016
Chocolate-covered Honeycomb!


‘Chocolate-covered Honeycomb!’


A special time for CB Challenge Blog and what a great way to celebrate - a ‘chocolate’ challenge. I must say it took a bit of thinking out as I don’t have a sweet tooth but on rare occasions, usually after a walk through a nearby RSPB nature reserve, I indulge in a ‘chocolate-covered honeycomb bar and therein lay my inspiration.


Stamps – all from Chocolate Baroque ‘Honey Bee’ set; variety of Distress inks; white card; Polychromos; clear Sparkle pen; hexagon dies.
·         A series of hexagons were die-cut, including a card blank, decorated using ‘Honey Bee’ stamps then layered up. I used StazOn Ganache – most appropriate for a chocolate challenge – and edged with a variety of Distress inks – Ground Espresso, Walnut Stain, Tea Dye and Wild Honey.
·         The skep scene was stamped with Ganache the coloured with Polychromos.
·         The tiled hexagons were coloured with a dark brown alcohol marker then over painted with a clear Sparkle pen and attached to the decorated frame. This was placed over the skep and glued down with foam tape.
·         Another hexagon was randomly stamped and masked with the flower – using 1st and 2nd generation Ganache, coloured with Polychromos and edged with Distress inks. Flower stamped on scrap card three times, coloured and added –one to base as a ‘stopper’ and a double to top right hand of topper.
·         Large bee stamped twice, coloured then decoupaged and added to topper.
·         Hexagon card top folded into an easel card, honeycomb topper. attached over. Adhere flowered hexagon to card base. Attach flower stopper to suit and add clear Sparkle pen.

·          Stamp, colour and add a few bees to flowers. 


Monday, 1 August 2016

Clarity Challenge 42

Clarity Challenge 42
‘Fussy Cutting’
Hi and welcome back. It's the 1st August and therefore time for another Clarity Challenge! Great excitement this month as the long-awaited Clarity Retreat is drawing close and I'm so looking forward to it and also to do a bit of catching-up. 
As I often - sorry, make that 'nearly always' - add 3D elements to my projects, I wanted to do something slightly different this month as I hope both projects reflect. (The second will be posted mid-month.) I tried different combinations of the Elephant and Savannah stencils once they'd been cut, eventually deciding to turn the latter upside down in the end. Not every stage has a corresponding photo but I hope you get the gist from the explanation. 

Materials:-
·         Clarity Stencils :- Elephant – NDC 14, Savannah
·         Card :-  Clarity Stencil Card 7x7 – 10 sheets; Black A4 x 2
·         Inkpads:- Versafine - Onyx Black; Distress Inks – Mermaid Lagoon, Fired Brick, Squeezed Lemonade, Wilted Violet, Picked Raspberry, Carved Pumpkin, Mowed Lawn, Mustard Seed
·         Micron Pens:- 01, 005
·         Clarity Double-sided Sticky Plastic

Instructions:-
1.     *   (I used my Grand Caliber and added two sheets of copy paper to achieve the expected depth of emboss.)
2.       Ink the elephant image with blending tool and variety of Distress inks so that one colour merges with the next. Using a 005 Micron pen, add a variety of zentangles; colour areas with the 01 pen. Add a tiny piece of sequin waste as an eye. Set elephant image aside.(Sorry, no photos for this part!)


3.       Ink the selected side of the elephant stencil with Onyx Black and place between two sheets of copy paper and onto a sheet of Stencil card before passing through the die-cutting machine. Pull another three or four images without re-inking.
Please ignore the cut areas - these were 'try-outs.'

4.       Select one of the grey prints from (3.) Apply a sheet of double-sided adhesive to the reverse of the coloured and zentangled elephant and proceed to cut out each individual part. Attach each piece as it is cut out allowing the un-inked lines to show. Set aside.
5.       Ink the Savannah stencil and repeat the process explained in (3,) pulling a number of prints onto Stencil card.
6.       Choose two prints – one lighter for the front image, a darker one for the shadow. Fussy cut around the printed images.


To assemble:-
1.       Add foam tape around the perimeter of each Savannah cut-out, peel off backing and apply some glue from a glue stick to allow for some ‘wiggle room.’ Place one over the other but slightly offset to create a shadow.
2.       Apply more foam tape as above and place over the coloured elephant.
3.       Glue to a black backing then make a frame to fit using another sheet of black card. (I used a trimmer to make the frame.)
Et voila! Here we have my 'Elephant Walk.' 
Stencils and stencil card are available from the Clarity website. 
Once again there were beautiful examples from all the participants this month, making Top 5 choices a very difficult task. I'm sure you'll be most inventive in this month's challenge and as always I very much look forward to viewing your projects. Please check out the Clarity Challenge guidelines and remember you could win yourself a voucher to the value of £50 to spend on Clarity goodies! 
Best wishes and happy crafting!
Shelagh. 


Sunday, 31 July 2016

Indigoblu Challenge Summer Florals July 2016

Summer Florals
Hi there and welcome to shelaghscraftyconcepts.blogspot.co.uk
This is my project for the Indigoblu 'Seasonal Flowers'  challenge. 
'Poppy and Holly'
Using the Indigoblu 'Poppy' Dinkie A7  and 'Holly' stamps, I have created this horseshoe as my great niece (soon to reach the grand age of three) is an attendant at her aunt's wedding at the end of the summer and this was the reason behind my project. I have already completed one for her but I very much wanted to make a horseshoe in vellum and when I found some sheets of the pearlescent type in my stash, I had to try it out. The Indigoblu Challenge remit was just the excuse to have a play. The images - two poppies and two holly leaves for each flower - were stamped in Distress 'Picket Fence' then heat embossed with a silvery white embossing powder. They were cut out and shaped before being glued onto a die-cut ring (in triplicate for strength). Fine ribbon and bows were added and to complete, I stamped, embossed and cut out fourteen extra leaves to conceal the reverse card base. 
'Poppy and Holly' - same horseshoe, different background!

My great niece now has a choice to make. Decisions! Decisions!


Saturday, 23 July 2016

Daisy, Daisy!


Here is my entry for the Craft Stamper 'Take It, Make It' Challenge July 2016. It is my first ever for this challenge and I'm pleased I read the Craft Stamper blog earlier this week! below is a quick 'how to,' to explain the resources and techniques used. 

As this is 'Take a Stamp' month along with 'Anything Goes,' I have made a canvas and decorated it with a Julie Nutting Prima Doll stamp, Clarity Daisy stamp and  Clarity 'Petal' stencil. 
The background canvas was coloured with a combination of Bursts and Liquid Metals. The 'Petal' stencil was overlaid and Translucent Texture paste coloured with Fresco Finish 'Orchid' spread over. With the stencil removed, the coloured paste was dusted with Nuvo 'Hot Pink' and 'Diamond' glitter. The petals were outlined with a variety of Pitt pens of nib width XS, M and B.
The Doll and Daisy stamps were stamped onto turquoise and purple 'Burst' papers and also a dictionary page, prior to being coloured and cut out. They were added to background using Cosmic Shimmer glue. Shadows and highlights were added using Polychromos. 
The canvas was edged with Black Soot, some additions from Sakura glitter pens then mounted onto Hunkydory Centura Pearl Deep Purple and Yellow Gold.


Another departure from my usual craft work, but oh! how I enjoyed the freedom to mix and match resources!
Craft Stamper 'Take It, Make It' Challenge July 2016

Saturday, 16 July 2016

Clarity Challenge 41 Mid-month

A Day Out

A Card from Delft
Materials:-

·         Cardstock:- Clarity Stencil card 7 x 7 ins – two pieces; card blank 16.5 x 7.5 ins – scored at 2ins, 4ins, 10.25ins
·         Clarity Stamps:- Large Harbour Scene, Windmill from Wee Farm Scene, Girl on Bicycle from Wee Folk1, Wee Houses, Wee Shops, Ornate Lamp Posts – second smallest, Word Chain Alphabet
·         Clarity Stencil:- Cracked Box Frame Stencil, Pond Fish Stencil
·         Inkpads:- Archival Cobalt Blue; Distress Tumbled Glass, Stormy Sky
·         Fine Micron Pen
·         Faber Castell Polychromos
·         Blue Alcohol Marker

Instructions:-

1.       With Cobalt Blue, stamp the Girl on Bike and Lamp Posts on main card and on post-its. Cut the latter out and mask the images on the main card.
2.       Mask a horizontal line slightly above half way.
3.       Using the top of the masking tape as a guide, stamp the houses and shops along this line.

4.       Using the foot of the tape as a guide, place the stencil over and blend over Tumbled Glass. Remove this stencil and place the Pond Fish stencil where the previous one ended. Blend over more Tumbled Glass. Outline the ‘rocks’ with a fine Micron pen and doodle a waterline to demarcate the area between the ‘wall and the water.


5.       Stamp each boat from the Harbour Set and join with a Micron line. Add an anchor line from the larger boat and a few ripples around.
6.       With 3rd and 4th generation ink, add the small fish to give an underwater illusion.
7.       Shade areas with pale blue and grey Polychromos. Add shadows in a similar fashion.
8.       Mask the shops and houses and blend over Stormy Sky.
This is my original and not the actual card. 

9.       Outline main card with blue alcohol marker and repeat on mat.

10.   On a strip of card, cut to fit mountain fold, stamp windmill and sentiment. Outline with blue marker and add shadows. Adhere to front of card. 

Friday, 15 July 2016

Polkadoodles Horse-shoe


Summertime Wedding Horse-shoe

My two year old great niece is an attendant at her aunt's wedding this summer and with this in mind, I made her this horse-shoe.I had thought about stamping onto vellum or parchment but the selection of flowers from Polkadoodles 'Winnie Fruit Punch fitted perfectly. To make it, die-cut three rings, cut a sliver out from the circumference and glued them together. I printed a couple of sheets of the flower with a trio of leaves and the same of daisies, cut them out then added them to the base. I cut out the daisies, curled the petal round a fine paintbrush, then added them either singly or in pairs over these. A couple of butterflies were added plus self-adhesive pearls and a ribbon plait. 
Et voila! A delicate horse-shoe! 


Wednesday, 13 July 2016

Two Tees, Please!


Indigoblu Challenge June 2016 

Teal and Brown


My submission for this month's Indigoblu Challenge 'Brown and Teal/Teal and Brown' has taken me down a different route as the British Open Golf is to be played in Troon soon, and Troon is a town I know well as I went to school, Marr College, there. As a student many moons ago, I also worked in the Marine Hotel during an Open Golf Tournament so this is also a reflective creation. I used Fairway to Heaven, Ledger Background, Boadicea, Holly A6 and Bubbles Background and stamped with StazOn Teal Blue and Ganache as well as  Distress Inks Tea Dye, Vintage Photo, Walnut Stain, Peacock Feathers and Mermaid Lagoon. The varnished tees were sanded then Tea Dye (very appropriate!!!) and Teal Blue blended lightly over; the pencil was also coloured with the StazOn inks to complete. 

This was great fun to make and I hope it has given you some ideas. 

Thanks for visiting,

Shelagh
'The Making Lady'

Sunday, 10 July 2016

Chocolate Baroque Challenge June 2016

Materials:-
·         Stamps:- Chocolate Baroque Butterfly Dress
·         Inkpads:- StazOn Royal Purple, Pumpkin; Distress Black Soot, Wilted Violet
·         Canvas:- 5ins x 7ins
·         Bursts:- Yellow, Lemon, Orange, Violet, Purple
·         Polychromos
·         Charcoal Pencils
·         Acetate
·         Mod Podge matte
I
To make:- 
Spritz the canvas lightly with water then gently tap on lemon, yellow, violet, orange and purple Bursts. Spritz again then after a minute or so, mop with kitchen roll. Accentuate the background with Distress ink followed by a light charcoal pencil. Lighten areas by patting with damp kitchen roll. Create a moon by applying a damp mini blender sponge to desired area then mopping with kitchen roll; repeat until you get the required effect. On good quality paper, stamp the Butterfly Dress twice using Royal Purple and colour the images with Polychromos. Re-ink the stamp and stamp again onto acetate twice and set aside to dry. Clean stamp then apply Pumpkin ink and stamp again onto acetate sheet.
To assemble:-
Cut out one coloured image and add to canvas using Mod Podge matte. Cut out the acetate image leaving a small outside margin and glue over coloured image to give a 3D illusion. (I used glue dots which I then covered with a stamped flower image.) Cut out a variety of flowers and butterflies from the second image and attach over acetate using mini glue dots.(The acetate adds an outline intensity to the stamped image and suggests a3D effect.) Cut out butterflies from acetate and adhere to suit. Mat and layer onto complementary colour card.
Et Voila! La Mia Bella Donna.  (Not to be confused with ‘Belladonna’ which is another name for Deadly Nightshade and highly poisonous!!!)
 This was a fun project and I very much enjoyed making it. It is my entry for this month's Chocolate Baroque challenge. 

Thanks for looking at my blog.

Shelagh
The Making Lady.


Friday, 8 July 2016

Shoes and More Shoes!


I Wish, I Wish!


Hello and hi!

This is a bit of a departure from my usual crafted cards. I used Polkadoodles digi images,
chosen primarily due to my lifelong and well-known love of shoes. I used a background paper from the ‘Winston’ collection, copied the sentiment ‘bags, shoes,’ to create a second background paper which was inked with Distress Worn Lipstick and Tea Dye then curled around a paintbrush handle on diagonally opposite corners. A Polkadoodles character was added along with shoes and boxes. The sentiment was outlined with a fine liner, dotted with a glue pen then glittered. An outline was scribbled around the perimeter of the base paper. A couple of presents with decoupaged bows from the collection were added to the base. More glue pen and glitter added to characters flowers and shoes and twine (customised by colouring with alcohol markers) attached to top right corner.
Et voila! Here we have ‘I Wish, I Wish!’

Components:-
·         Polkadoodles Winnie Sugar Sprinkles Fruit Punch; Winston Kraft Paper
·         Glitter
·         Glue Pen
·         Fine Micron Pen
·         Alcohol Marker Pens – Pink, Brown
·         White Twine

Thank you for visiting and hope to see you again very soon.
Best wishes,
Shelagh  ;~}