Wednesday, 15 June 2016

Clarity Stamps Challenge 40 - June 2016 Mid-month
Masculine
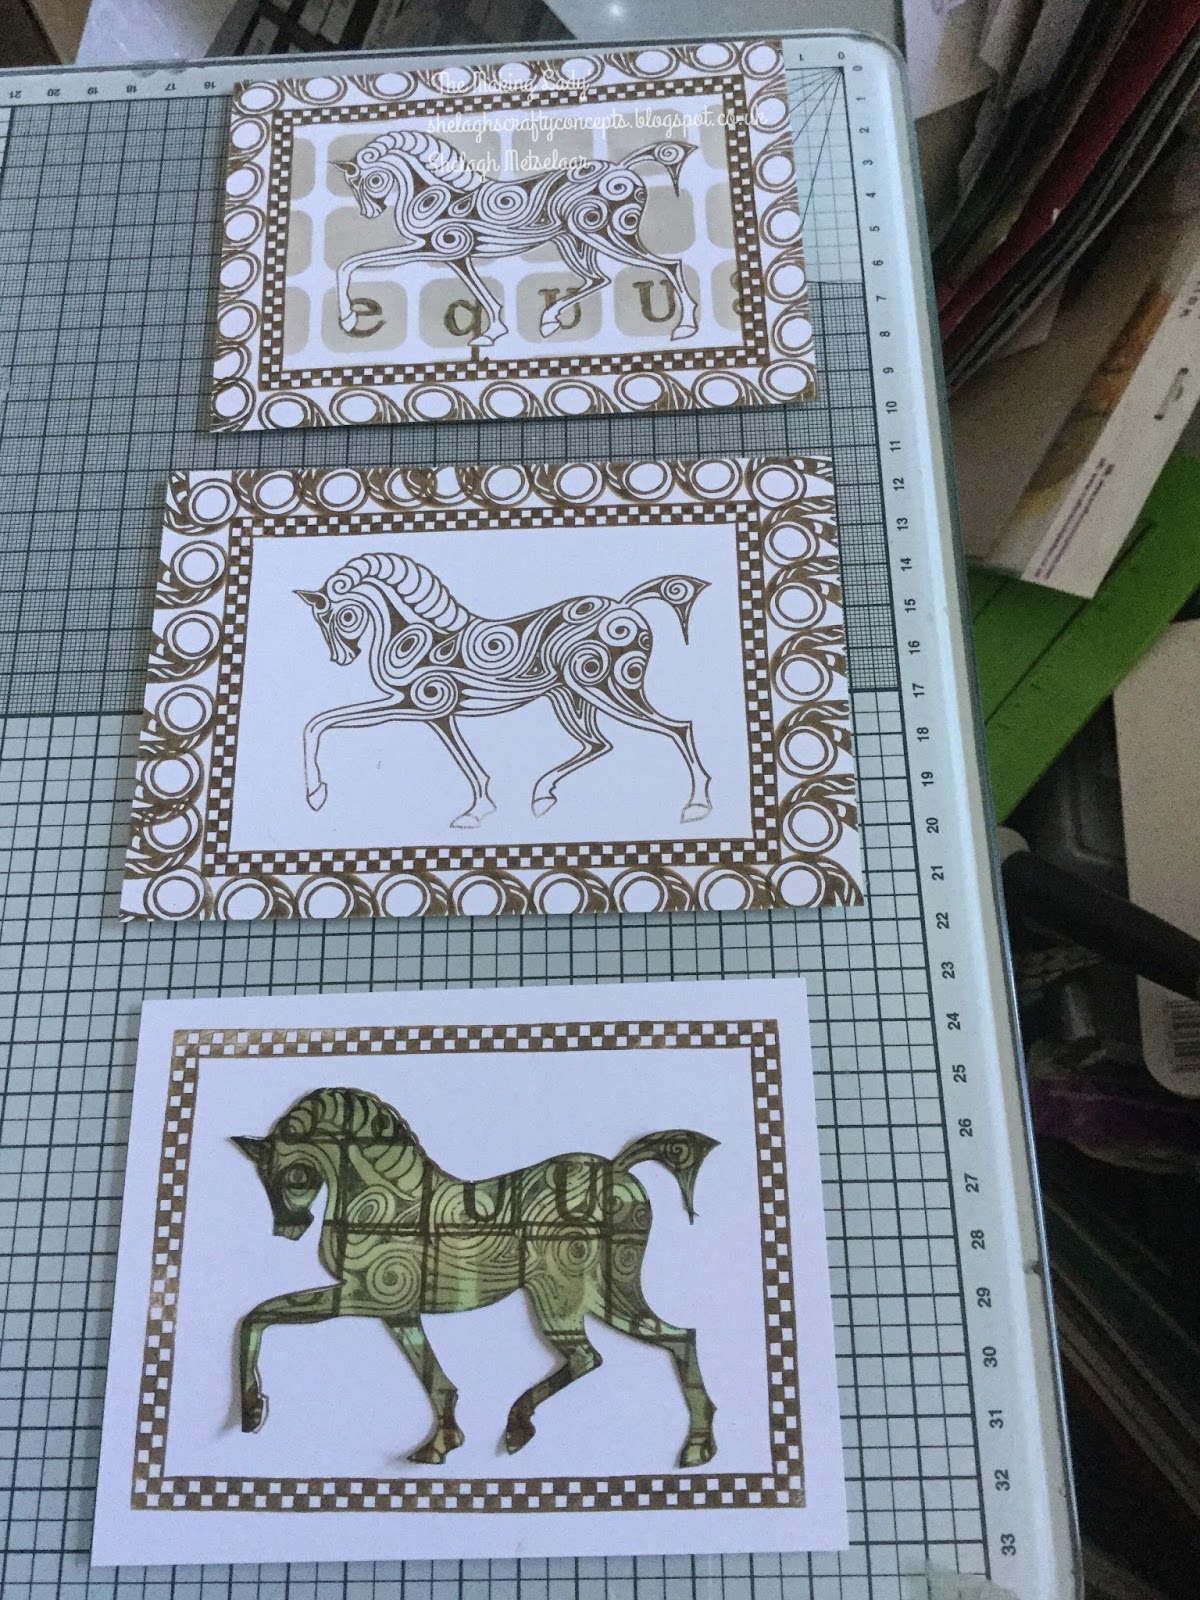
'A Horse with no Name!'

Materials:-
·         Stamps:- Clarity – Filigraphy Frame, Wooden Horse, Chequered frame from Brilliant Work of Art Set, Alphabet Word Chains
·         Cardstock:- Clarity Card; black, cream pearlescent from stash
·         Stencil:- Lattice Stencil NDC 16
·         Inkpads:- Archival – Potting Soil; Distress – Pumice Stone, Antique Linen, Tea Dye
·         Miscellaneous:- String, Cork mat


Instructions:-
N.B. This is stamped in black and not the 'Potting Soil' used for the actual card.
1.       Using Archival Potting Soil, stamp Chequered Frame centrally onto an A6 sheet of Clarity Card (coated cardstock.) Dry with a heat gun.

2.       Stamp the Wooden Horse centrally inside the stamped frame, again using Potting Soil and allow to dry. Make a mask by stamping the horse onto a post-it note and cut out.
3.       Place mask over dry horse image.

4.       Place post-it sheets onto the frame including the chequered borders.
5.       Place Lattice Stencil over masked image to form squares and brush with Pumice Stone. Remove stencil. Lightly dry with a heat gun. Polish with kitchen roll.
6.       With perimeter masks still in place but having removed the horse mask, brush again with Antique Linen.
7.       Place post-it masks to cover the interior of the frame including the chequered squares.

8.       With Potting Soil, stamp a circle from a corner of the Filigraphy Frame at each corner of the masked frame. Repeatedly stamp the same Filigraphy corner to fill the gaps between the corners. Allow to dry then polish as before.
9.       Using a mini blending tool, sponge Antique Linen around the extreme edges.
10.   Now sponge a little Tea Dye over this to create a graduated colour.
11.   Stamp ‘equus’ from the lower case Alphabet Word Chains using Potting Soil onto the line of lower squares.
12.    Trim left and right hand sides.
13.   Mount onto black card. Colour string randomly with Tea Dye. Allow to dry then tie around opposite corners of mounted card. Adhere to cork sheet.
14.   Mount onto cream card.
I wasn’t quite happy with the finish of the card as it seemed a bit ‘flat’ so I pressed a small area of a scrunched-up baby wipe on each tile – success - instant distressing!!
And here we have . . . . . a horse with no name!

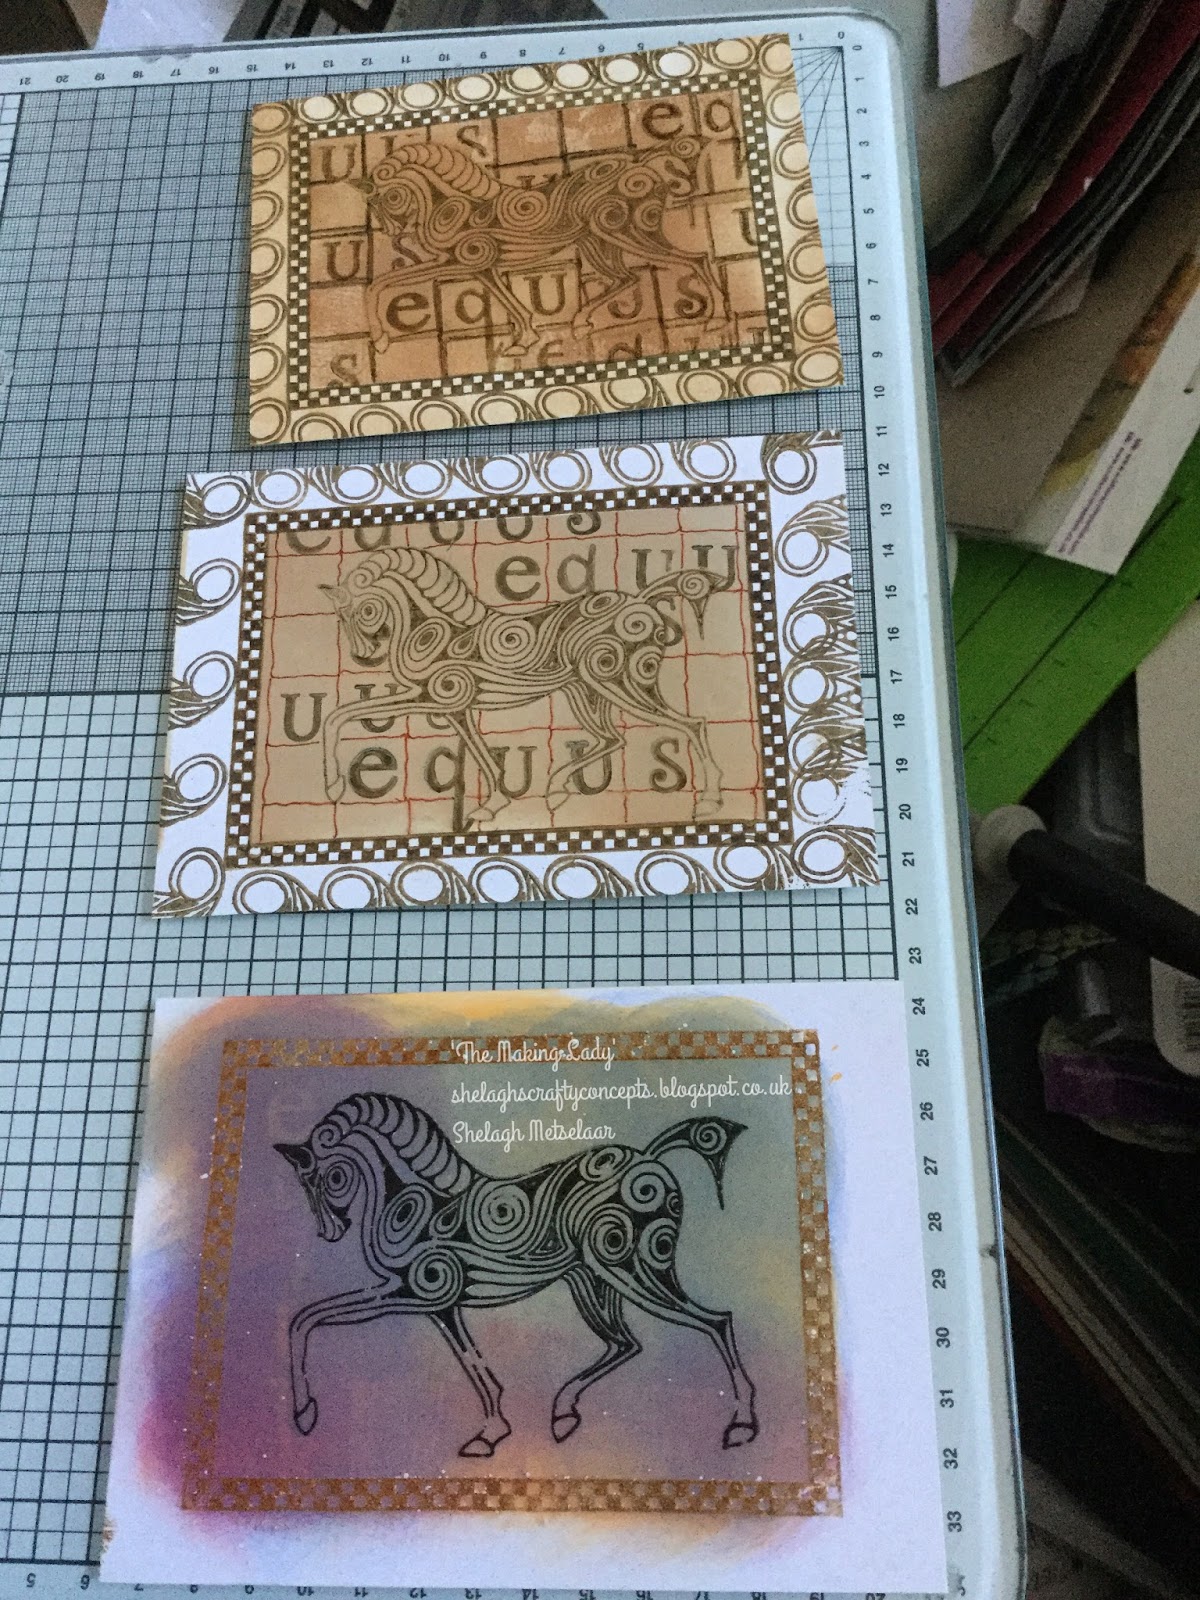
Some more ideas I roughly tried before settling on this one.



Tuesday, 14 June 2016

Indigoblu - Surprise, Surprise!

Indigoblu Challenge - May 2016
Surprise! Surprise!
'Surprise! Surprise!' is my interpretation for the Indigoblu Challenge 'May All Your Dreams Come True' inspired by a long-stifled desire to appear out from a birthday cake!

The card has three sections and the top area (unseen) is folded over to create balance.


  • Stamps:- Indigoblu Floral Swirl A6, Sewing Mends the Soul, Large Snowflake
  • Inkpads:- Versafine Onyx Black, Distress Inks - Black Soot, Picked Raspberry, Worn Lipstick, Carved Pumpkin, Abandoned Coral, Candied Apple.
  • Clear detail Embossing Powder
  • Polychromos
  • Card - white, pearlescent black
  1. Cut rectangle of white card 6cm x 19.5 cm and fold into three 6cm x 6.5cm. 
  2. Stamp Floral Swirl with second/third/fourth generation Onyx Black randomly onto each section and emboss with Clear Detail; sweep Worn Lipstick and Abandoned Coral over with blending tool, followed by Black Soot around perimeter. 
  3. Spritz with water and mop with kitchen roll.
  4. Mount onto pearlescent black. 
  5. Stamp lady from Sewing Mends the Soul set; colour with Polychromos; cut around female image.
  6. Stamp Snowflake twice in Onyx Black and emboss with Clear Detail; colour randomly with listed Distress Inks apart from Black Soot; score at every peak and trough, cut once to circle centre and alternately mountain and valley fold. 
  7. Arrange folded circles around the female form and glue in place.

Wednesday, 1 June 2016

Clarity Stamps Challenge 40 - June 2016 'Masculine'

Clarity Challenge 40 – June 2016
‘Masculine’
'Happy Landings!'


Hi and thank you for visiting my blog. 
Well, this is supposed to be 'Flaming' June but here in Aberdeen it's flaming cold!! Our daily 'constitutional' (along the beach esplanade today) saw me kitted out in my winter windproof jacket complete with gloves. Even the seagulls found it too tiresome to fly against the wind and were huddled along the groynes. 
A 'Masculine' card/project is always a trial for me and this month was no exception. (My masculine cards are often of the 'pick and stick' variety - and what's wrong with that I ask myself as it can be quite therapeutic in its own way!!!) Anyway, I looked through my Clarity stamps and stencils, selected some of each then got on with the task in hand. I liked the resulting prints from the inked stencil and then decided to experiment further. 
I hope you find the 'making' process below helpful. 


Materials I used:-
·         Stencils:- Clarity - Fish Stencil  NDC 12, Lattice Stencil NDSC 16
·         Cardstock:- Clarity Stencil card 7x7
·         Inkpads:- Versafine – Onyx Black,  Versamark; Ranger Distress Inks – Squeezed Lemonade, Fossilized Amber, Twisted Citron, Mowed Lawn, Mermaid Lagoon, Black Soot
·         Paints:- Fresco Finish – Snowflake, Nougat, Antarctic, Bora Bora, South Pacific, China
·         Miscellaneous – Wooden Plaque, Pebeo Gedeo Mixtion Relief, Pebeo Silver Leaf, Dark Grey Alcohol Marker, Spectrum Noir Sparkle Pens – Clear, String, brayer, WOW White Twinkle embossing powder


Instructions:-
For the plaque:-
1.       Remove the existing string from the plaque. (I found the wooden plaque in a bargain basket and paid 99p for it.) Base coat the wooden plaque on all sides with Snowflake and leave to dry. (NB – I needed four coats to obliterate the original writing on the plaque.)
2.       Place at a distance from each other on a craft mat pea-size blobs of China, South Pacific and Bora Bora. Starting with the darkest, brayer colours over the plaque at random until the entire surface is covered. When dry, add small areas of Nougat and Antarctic to suit.
3.       Place the Lattice stencil on the dry plaque and by using the edges of the ‘squares,’ lightly draw in pencil lines to form the suggestion of squares for the net. Roughly draw over the pencil lines with grey alcohol marker, then clear Sparkle pen; now draw fine lines with the ‘Mixtion’ over these, leave to dry for a few hours then apply the Silver Leaf.
4.       Sponge Black Soot around the edges. Set aside.


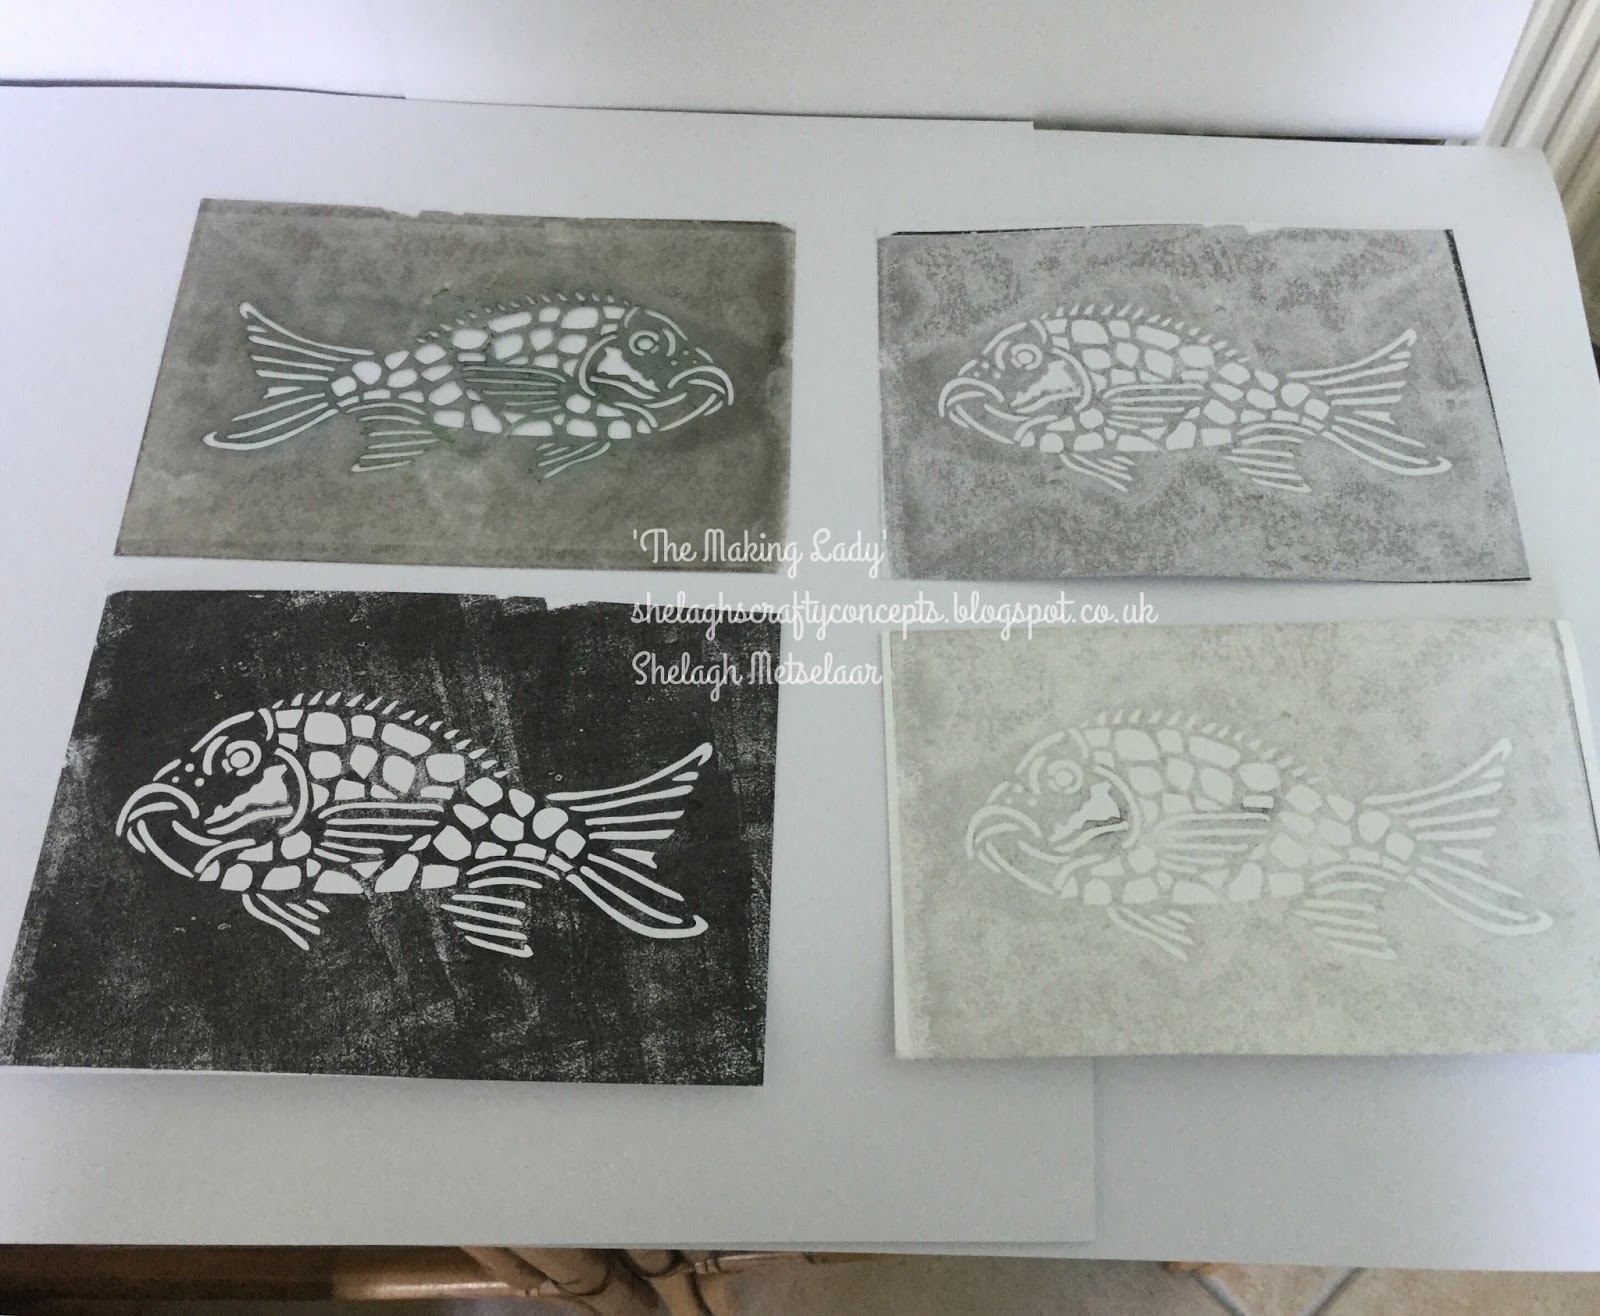
Top Left - stencil after prints 
Bottom Left - First print
Top Right - Second print
Bottom Right - Third print

For the fish:-
1.       Cover the Fish Stencil with Onyx Black, place on a sheet of 7x7 card, cover with a sheet of copy paper then place between relevant embossing machine plates and wind through the machine. Repeat to obtain second and third generation prints. (I gave the prints a blast with my heat gun to set the ink and I also washed the stencil in soapy water.)

2.       Replace the stencil over the first generation printed silhouette and sponge through a variety of Distress Inks listed above. (I offset the stencil slightly to create white areas.)
3.       Leaving the stencil in place, sponge over Versamark ink, remove stencil and add White Twinkle embossing powder. Heat set. Clean stencil.

4.       Repeat 2 and 3 with either second or third print.


5.       Trim the paler image along the outside line. From the darker image, cut out the fins, tail and backbone (NB No animal or fish was harmed in this process LOL!!) and glue into position with white glue.


Top Image a 'mock-up' of the plaque to ensure the image fitted.

To assemble:-
1.       Coat the reverse of the fish with matte Mod-Podge and place (or PLAICE!!) onto plaque to suit. Thread through string.

And there we have it –‘ Gone Fishing,’ ‘What a Catch,’ Happy Landings,’ call it what you will!

Some more ideas for the 'fishy' stencil.


 Top image - Translucent paste on acetate then whilst still wet, sprinkled with a variety of fine coloured glitter and mounted on black card.
Bottom image - inked through stencil onto white card; translucent paste on acetate then stencil replaced over image when dry and inks applied as below; the acetate image is then replaced over image on white card but slightly offset to give a 3D illusion. 


Below - Translucent paste through stencil onto a wooden 'label' which has been painted with Fresco Finish  paints; glitter applied over.


Thank you for taking the time to peruse the above.

It's now time for you to have a go at this month's 'Masculine' Clarity Challenge. All the details can be found on the Clarity Stamps website and please ensure you use Clarity stamps, stencils or Groovi plates (or indeed a combination of these) to create your masterpiece. Looking forward to viewing your worderful pieces of artwork!
Best wishes,
Shelagh
(The Making Lady)


claritystampchallenge.blogspot.co.uk
claritystamp.co.uk
barbaragrayblog.blogspot.co.uk


Friday, 27 May 2016

The Posing Peacock - Chocolate Baroque Challenge May 2016

Chocolate Baroque Challenge
*Stamps          - Chocolate Baroque Birdcage Collage, Steampunk Christmas, Music Fanfare

*Inkpads         - Archival Black, Stampin Up Wisteria Wonder, Certainly Celery, Wild Wasabi, Distress Dusty   Concord, Wilted Violet, Peacock Feathers, Twisted Citron, Peeled Paint
*Spectrum Noir Sparkle Pens - Clear
*Polychromos
The Posing Peacock!


Double-stamped  tree from Steampunk Christmas.
Sponged background over 'torn copy paper' hills.
Overlaid layers of Birdcage Collage.
Birds and flowers highlighted with Clear Sparkle pen.
Music Fanfare stamp to create 'bubble border' (first, second, third generation stamping and over stamping.


Five Layer Parchment Birthday Card

Five Layer Parchment Birthday Card

Clarity Groovi  - Plate Mate 
                         Plates:- Nested Hearts, Nested Circles, Frilly Circles, Lace Flowers,                                    Diagonal Groovi Grid
                         Borders:- Ribbon and Stitching, Ribbon and Hearts, Occasions 
Parchment       - White - Clarity Groovi; Turquoise and Rainbow - Pergamano
Pens                - Distress Markers - Scattered Straw
Tools               - Embossing styli, single piercing and twin piercing styli, Solingen scissors


Completed 
Five Parchment Layers
 Base Layer - White
 Turquoise pierced and embossed overlay
 White Daisy and Heart Circlet
 Individual Daisies Images
When assembled, mounted onto rainbow parchment then onto 8x8 card

Tuesday, 17 May 2016

Clarity Challenge 39 'Anything Goes' Mid-month Reminder


Clarity Challenge 39 May 2016
‘Anything Goes’
 Mid-month

Hi and thank you for visiting my blog, it's truly much appreciated. 
Already we are nearing the halfway point of May and time for a little nudge to remind you of this month's Clarity Challenge, 'Anything Goes.'
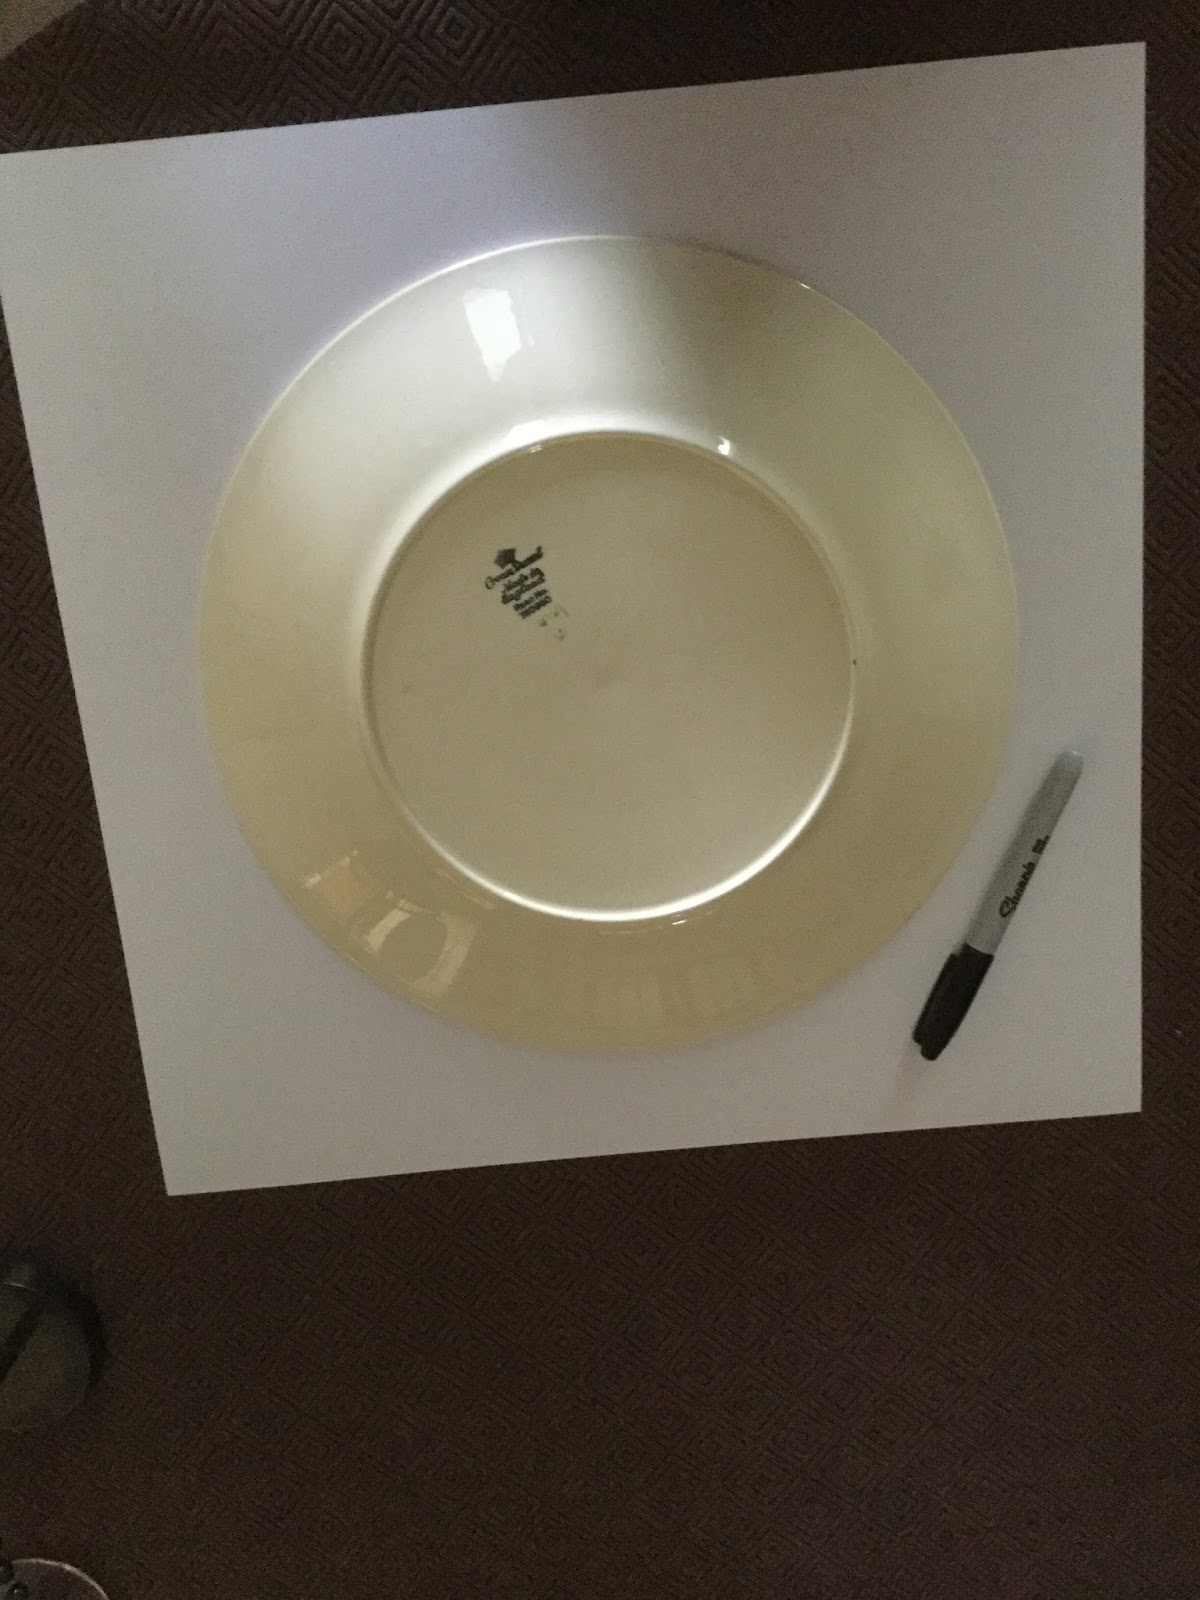
My mid-month contribution is a parchment shade, ready to sit atop a wine glass (LED night light is a must!!!) I used the trellis plate for the first time and had just taken delivery of new scissors hence the decorative top and bottom. The most perplexing part was drawing out a template and you will see the gist of how it was done. I used lids, plates, string and eventually my gran's pavlova plate was almost the right size. 
Looking forward to your art work!

Materials:-
·         Clarity Groovi Parchment - A4 size
·         Groovi Starter Kit
·         Groovi Plates: - Lace Flowers, Trellis. (Large Lace Netting and Frilly Circle were used in the step by step photos)

·         Large sheet of paper/card
·         Twin needle piercing tool
·         Fine scissors

Instructions:-
*To make the template, I had several attempts before using the 'plate and string'  method which I made up as I went along. Basically I drew around a very large plate onto 16x16 inch card, used string to divide it into three and on one of the thirds, added a tab before cutting out. There are a few photos below to give you an idea.


The blue shade above was where my idea began but had no idea how to go about forming a template.


1.       Draw around the template on the parchment with a soft pencil.


2.       Place the Lace Flowers plate into the Groovi Plate Mate and emboss the top and bottom of the parchment shape by fitting each scallop from the frame along the edges.

3.       Emboss flowers from the plate along the parchment.

4.       Remove this plate and replace with Trellis plate. Emboss blank areas, moving the parchment when necessary until all blank areas are filled.

5.       Using number four and three styli, add white work to the flowers. (Add white work to the trellis at this stage too, if desired.)
6.       Pierce around scalloped edges with the twin needle tool then cut, using fine scissors.

7.       Trim excess parchment from the sides. Cut a slit in the plain side using a craft knife and slot the tab in. (At this point, I folded the tab back which meant there was no need for any form of adhesive.)
Et voila! A wine glass lampshade!

*Please remember to use the LED nightlights! 

There are some stunning pieces of art already on show on the Clarity Challenge website so please think about having 'a go.' As I've said before - It's fun and it's free!! Remember you could be the lucky one, winning a £50 Clarity voucher. 

Best wishes to you all,

Shelagh
The Making Lady. 

Sunday, 1 May 2016

Clarity Stamp Challenge 39 May 2016 'Anything Goes'

Clarity Challenge 39 May 2016
Anything Goes
'La Belle Dame Sans Merci'


Hello and thank you for visiting Shelagh-land and viewing my contribution to this month’s Clarity Challenge ‘Anything Goes.’  The canvas took a convoluted route before arriving at what you can see before you. The canvas itself, from my ‘little’ stash, is long and narrow and my original idea – even after re-working, did not quite fit the bill. Sadly, there are no photos of the project’s progress as it took many twists and turns over the weeks before evolving into the finished article. Whilst not entirely accurate regarding its subject, the phrase ‘Alone and palely loitering’ from Keats poem immediately came to mind, so I have called the canvas ‘La Belle Dame Sans Merci.’


Materials:-
Canvas:-  50cm x 20cm
Stencil:- NDSC 4 Mirror Image, Pine Needle
Stamps:- Filigraphy Foliage
Inkpads:- Versamark
Gelli Plate
Paints:- Fresco Finish Acrylics – Sherbet, Nougat, 
Perfect Pearls:- Mists – Blue Smoke, Forever Blue, Pewter, Pink Gumball, Blue Raspberry, Pearl
Embossing Powder – Wow Gold
Grunge Paste
Texture Paste – coarse and fine 
Mod Podge
Miscellaneous:- Copy Paper, White Gesso, Charcoal Pencil, Posca Pens, Micron Pen, Ruler, Polychromos

Instructions:-

Canvas

1. Paint entire canvas with two coats of white gesso, allowing canvas to dry in between applications. 
2. Tear up a few sheets of copy paper into strips along the long side. Paint desired area of canvas with gesso and add strips to suit, painting over with gesso in between layers. Allow to dry.
3. Thinly skim over areas with coarse texture paste and allow to dry. Add fine texture paste over and around the dry paste. Allow to dry.
4. Spray dry canvas with Perfect Pearl Mists to suit and tip canvas top to bottom and side to side, allowing the liquid colours to mingle. (If necessary, mop up excess with kitchen roll.)
5. Allow to dry.
6. Attach the Pine Needle stencil to the top right-hand corner of the canvas with a ‘hinge’ of low-tack masking tape and ‘pull’ through a layer of grunge paste. 
7. Sprinkle over a good covering of gold embossing powder and dry with a heat gun. DON’T BE ALARMED!!!! The grunge paste will ‘puff’ up whilst the embossing powder melts and this creates texture.
8. Repeat on the next section at the top of the canvas.  
9. Ink one of the leaves from the ‘Filigraphy Foliage’ set (I used the second largest) with Versamark and stamp along the bottom left-hand corner. Add gold embossing powder and heat-set. Repeat to suit. (Due to the texture paste, the stamped image will not always be  perfect but I didn’t mind this as it added to the vintage effect.)

Lady Image

1. Previously, I had used my gelli plate to mix a number of Fresco paints (detailed in ‘Materials’ for backgrounds. From these, I chose the pink-hued print. 
2. Draw around the ‘Lady’ image on the reverse of print and cut out. Decide on the style of dress and cut the neckline accordingly. Draw around the 'Lady' image on plain paper (I used paper heavier than copy paper) cut out and add hair to image with Polychromos.
3. Shade areas of the dress image with Polychromos, adding depth to the hem and sleeve.
4. Paste the reverse of the Lady with Mod Podge and place on canvas. Apply more Mod Podge over image and add dress. Paste over gently entire image to seal. 
5. Using a charcoal pencil, add shading to define the outline.
6. Using a ruler and a soft pencil, measure 2cm intervals along length and width of all sides.

7. Paint alternate rectangles with diluted pink and silver from Posca pens. (I scribbled these two colours on a mat and watered them down as I went along.)

8. Using a Micron pen, scribble uneven lines oven the faint pencil marks. Add Zentangle patterns to every silver area around canvas. 

Et voila! Here we have 'La Belle Dame Sans Merci.' 

This month's Clarity Challenge 'Anything Goes' is open to interpretation but please remember to check the rules. Your contribution may just win you a £50 voucher to spend on your favourite Clarity goodies!

Looking forward to all your creative projects. 

Best wishes,

Shelagh.