Tuesday 1 December 2015

Clarity Challenge - December 2015 A Christmas Story


Clarity Challenge - December 2015
A Christmas Story
Hi there and thanks for taking a peek at Shelagh-land. This challenge is a bit of a departure for me as I have included parchment work for the first time. 
I spent a couple of months earlier in the year in Kuwait where Mike was working and as I knew I'd have plenty of time on my hands during the day, I went armed with my Groovi collection - and being fresh from the Clarity retreat at Crowborough, the stash had certainly multiplied! The only thing I found myself somewhat lacking was the beautiful, high quality Clarity parchment so I had to be very economical. Once back home, an order was promptly placed for more and I was more able to experiment and the above just developed. Hope you like it despite the lack of stage photos - sorry - I forgot!

Materials:-

·         Clarity Stamps Groovi Plates:- Groovi Plate Starter Kit, Santa and Stars, Christmas Tree, Nested Squares, Nested Circles; Set 1 and 2,  Christmas, Holly and Art Deco Groovi Borders
·         Clarity Stamps:- NDC Alice, Santa and Sleigh from Christmas Miniatures and Window Set
·         Clarity Stencils:- Peace, Noel Snowflake stencil; Curly Strip 2in1
·         Texture Paste with Glass Beads
·         Gilding Wax
·         Black Soft Paste
·         Perfect Pearls Mist - Pearl, Pewter
·         Parchment and Parchment Tools
·         White Pencil.

Instructions:-

Parchment
1.       Stamp ‘Alice’ onto card and trace onto parchment using a white pencil.
(I think I was finally successful on my seventh attempt, between 1) changing backgrounds, 2) Alice at first sitting on a leaf - hence the stamped leaves above, 3) positioning of Alice and 4) dissatisfaction with my white work. Oh and I'll post my favourite 'blooper' at the end!)


2.       Create a circular border from two offset nested circles and decorate – I used small holly leaves from the Holly border plate.


3.       Using the two plates from the Groovi Starter kit, create a background of trees, hills and moon. Add trees from the Christmas Border and stars from Santa and Stars plate.
4.       Stamp the Santa and sleigh image onto card then trace onto parchment to suit background.


5.        Create an outer square border using the Nested Squares and decorate – I used the ribbon from Borders 1&2.


6.       Decorate the area between the circle and square with patterns of choice – I used stars from the Santa plate for the top and swirls and dots from the Christmas tree plate.


7.       Using the blue mat, I placed low tack tape along one of the lines the embossed using the letters for the sentiment from the Bunting Border.
8.       The parchment was then trimmed to 14cm square then I played about with 2,3,4 stylus to create some white work.
9.       Cut a sheet of parchment to a 16cm square, draw a double line border and embellish corners – I used a flower from the Art Deco border and swirls from the Christmas tree.

10.   Cut a sheet of parchment into an 18cm, draw a double line border then embellish with a trio of flowers from the Art Deco border. (I had the idea to use these as corners, and with a little bit of piercing, use them to contain the main picture. This was very much a trial as I hadn’t tried it before, so it did take me a couple of attempts to produce something reasonable, although by no means perfect.)

11.   To ensure all was secure, I added a few little bits of 2mm double sided sticky tape to areas where it would not show.

Canvas Mount
1.       Using low tack tape, mask off a double border around the perimeter of 30cm square Clarity Canvas.


2.       Paint white area with diluted black Soft Paste.
3.       Mask off the words on the Snowflake stencil, leaving only the snowflake exposed and tape onto the dry black canvas.
4.       Mix some black Soft Paste into some glass bead texture paste and apply through the positioned stencil. Repeat if necessary when paste is dry. (Remember the stencil needs to be washed in between applications.
5.       Before removing any tape – spray the stencilled canvas with Perfect Pearls Mist ‘Pearl’ and ‘Pewter.’ Allow to dry.
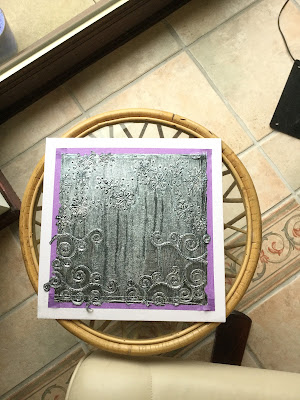
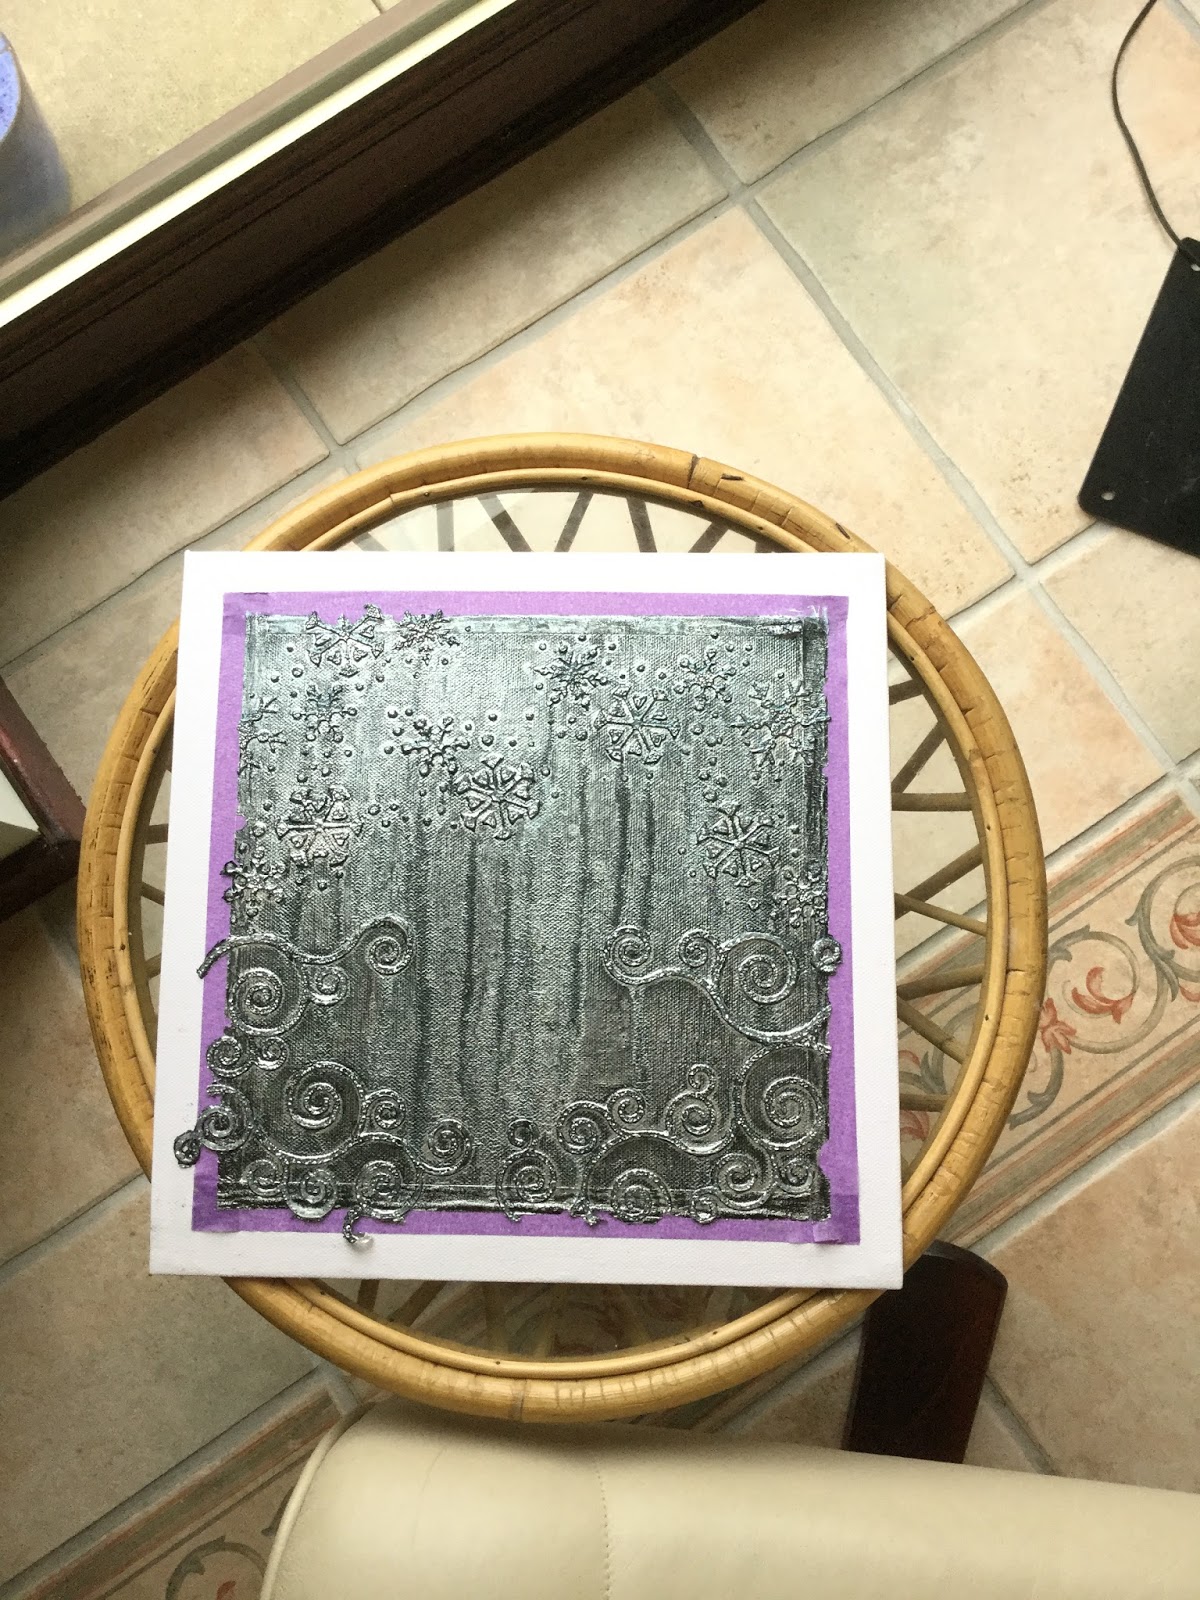
6.       Carefully remove the outer line of masking tape to reveal a white border. Apply gilding wax all round – I started with silver then gold then a touch of copper.


7.       Remove the inner line of masking tape and add the parchment. (I used a small square of Clarity Double Sided Sticky in the centre to attach the parchment.)
(NB When I removed the inner masking tape, the pliable nature of the texture paste allowed most of the stencil work which overlapped the border to remain. I had thought of trimming these off but decided I quite liked the link they provided between the background and the white surround. Another happy accident!)


Et voila! My take on 'A Christmas Story!'
I hope you have found the explanation helpful and apologies for not taking as many photos of each stage but it was one of those 'carried away' moments and I forgot!

A now for the mistakes (the second Santa was a positioning trial as the piece was ruined anyway!)
. . . . and some other trials!


Thank you again for visiting; I very much look forward to all of your wonderful contributions to the Clarity Challenge. Remember  - there is a Clarity gift voucher for the lucky winner! Most of my materials are available from the Clarity Stamps website so be sure to have a look at all the gorgeous products.
Little more to be said than see you again next year!
Kind regards and best wishes for a wonderfully enjoyable festive season!
Shelagh.


Sunday 29 November 2015

It's Christmas!


Christmas Bags and . . . . 
. . . . Exploding Boxes!
 I bought bags from The Range at four for £1, table favours (wedding) from Tesco and LED colour changing faux candles also from The Range.
The bags were decorated back and front with the Clarity Ribbon stamps - Thank You and Merry Christmas - on shaving foam backgrounds. (These were done in Kuwait and I had no inks so I used green, blue, red and yellow food colouring.) 

For the boxes, card (I used Crafter's Companion double sided pearlescent white A3) was cut to 9ins by 9ins, scored at 3ins and 6ins to create a grid. 
Cut away the squares from each of the four corners. These spare squares were retained, trimmed down and used as the decorative plaques on the inside and outside; the extra squares required were made from the card off-cuts and all were decorated with a variety of stamps from the 'Wee Folk' range, edged with a red chisel tip permanent marker and glued in place. Lids were made and decorated in a similar fashion.
Apologies for the cardboard boxes in the background - they were my storage solutions prior to the assembly.

Thanks again for vising and hope to see you again sometime.

Best wishes and a happy St Andrew's Day to you all tomorrow - 30 November. 

Shelagh. ;~}

Sunday 1 November 2015

Clarity Challenge 33 - November 2015
Clean and Simple
Clean and Simple

Hello again, hello (as the song goes) and welcome back to Shelagh-land once more. Never mind the month, where has the YEAR gone??? I just cannot believe we are on the first day of the eleventh month! It has been a bit busy here this week as I'd set myself five deadlines - anniversary cards, birthday bunting, birthday cards and also my mum's Advent boxes. This leaves me with six projects for next week and so on until all the Christmas prep is done. Not planning my life away, honestly!!

'Clean and Simple' is the theme for this month's Clarity Challenge and I was a bit stumped until I espied some lovely hessian canvas boards in a little art shop in Kuwait City; they proved to be the inspiration behind my project and having stopped off for a cooling 'lemon mint' on the way home, the notebook was out, sketches made and the idea became a reality. 
I'd bought the lovely 'Matrix Feather' stamps at the Retreat and was itching to put them to use so that evening I set to work and the basic idea formed. I refined it a bit more the next day, played around with the colour of pencils and then called a halt! (That was the most difficult part, believe me!)

Materials:- (All items are available from the Clarity Stamps website.)
·         Stamps:- Clarity Matrix Feather Stamps and Verse set
·         White Card
·         Gelli Plate, Clarity Gelli Mount - 7 x 7
·         Stencils:- Clarity Framer Shapes Stencils Set 1
·         Inkpads:- Versafine Onyx Black; Distress Antique Linen, Pumice Stone
·         Brayer
·         Spectrum Noir Colouring Pencils
·         Micron Pen


Instructions:-
Card

1.       Cut white card to a 7ins x 7ins square and attach the stencil with the square aperture at the top with low tack masking tape.
2.       Using Versafine and the ‘Wing’ verse on 5 x 5 Clarity mount, line the stamp up in the middle of the stencil aperture. Stamp and heat set.

3.       Lift the stencil and stamp the large feather at the bottom left and top right corners. Heat set as before. Stamp also onto Post-It Notes and cut two masks out.

4.       Place masks over the feathers and replace stencil. Set aside on a craft mat.
Gelli
N.B. I wanted to echo the linen effect of the canvas and achieved this by using Distress Inks, a Gelli Plate and a brayer.

5.       Place 6 x 6 Gelli Plate centrally onto 7 x 7 Gelli Mount.
6.       Daub Antique Linen and Pumice Stone over Gelli Plate.
7.       Brayer inks so the colours mingle.
8.       Place the inked Gelli over the stamped image,see (4) and press gently until you see the ink transferring equally onto the white card.
9.       Carefully turn over the ‘bundle’ and remove the card/stencil but leave stencil and masks in place.


10.   Using a make-up sponge, sweep in some of the residual ink from the stencil to darken the edges of the inked aperture.

(N.B. This was a technique which Barbara shared with us at the Retreat; thanks, Barb!)

11.   Remove the stencil and gently scribble an outline around the coloured square with a Micron pen.
12.   Colour in the feathers, again using a technique from the Retreat. Choose three coloured pencils – Light, Medium, Dark and colour each area of the feather ¾ light, ½ medium, ¼ dark. (Thanks again, Barbara. What a difference this has made to my colouring!!!)

Having placed the completed item on the hessian canvas, wasn’t too happy with the definition of the end result and as I’d made a number of these before choosing the one that ticked all the boxes, I chose one of the rejects, edged it with a black Sharpie then scribbled another line near to the edge to tie it all together. Happier with it now, I repeated this on the No1 example, mounted it onto the hessian canvas.


Et voila! 'Clean and Simple' complete!

I hope you find this easy to follow. It wasn't without the odd trial and tribulation as I had a limited amount of craft stash and even make-up sponges were difficult to find. (Although I tried the small Ranger blending foam pads and also Cut ' n' Dry, they weren't as good as the humble make-up sponge.)

Many thanks again for visiting my blog. It will be lovely to see your projects posted on the Clarity Challenge blog. You are all so talented and never cease to amaze and delight! If you haven't joined in the 'Challenge' before, then please consider doing so. You can find all the details on the Clarity Stamp website and don't worry if you don't have a blog, you can email your entry and it will be posted for you - that's how I started.

'Til next time,

Sincere best wishes and happy crafting!

Shelagh.


Monday 26 October 2015

Groovi Stamping!


First Attempt!

Hello and greetings from a blustery Aberdeen but at least there is no rain - YET!

Last month, I spent hours making my mum's special Christmas cards - far longer than usual - but as they were all made with the Groovi system, it was never a chore. I then got to thinking of traditional parchment work and armed with an online book, decided to trace a design and what better than the Clarity 'Columbine' stamp, the same one I used in September's 'Shaped Card' blog. 

I traced the stamped image with a white Faber-Castell Polychromo pencil and then set to work with different sizes of embossing tools before playing around with the different Groovi plates and borders as you can see above. 

I also have two family anniversaries pending at either ends of the spectrum in a few days time, one - a 1st Anniversary and the second - a 57th so I used the above design again but this time - another first - I coloured the reverse with my Polychromos. Wasn't too sure at the start, though!

This red one was made on two different pieces of parchment and I used tiny glue dots to fix the square onto the frame.


This one was made on one piece as second time around, I'd worked out how to to incorporate the square into the frame. Will remember that for the future and save a sheet of parchment! I haven't decided which card will go where but need to make my mind up by tomorrow as they need to  be posted by then!

Hope you like them! 

Many thanks for looking at my blog.

See you soon.

Shelagh.

Thursday 1 October 2015

Clarity Challenge 32 – October 2015
 Stencils
Hi there - greetings from Shelagh-land again. So sorry the extra posts have not materialised but I've been nursing a very sick computer and despite shelling out a fair amount to return it to full health, I'm writing this on my brand new laptop. I've yet to learn how to shut it down but at least it's working and connected to the printer! 
This month's Clarity Challenge is entitled 'Stencils' and I decided to go down another route by drawing inside the stencil shape with my Micron pen, an idea which took shape whilst doodling in a 'zentangle' book in Schipol Airport. I knew I wanted to use the 'Flower Power' stencil and from there it was a question of sorting through my collection of Clarity stencils and selecting a suitable one for the background. I also wanted a bit of texture so I used water-colour paper for both butterfly and background. Once the stencils had been outlined, it was again back to doodling to fill them in and quite therapeutic it was, too. (All materials are all available from the Clarity website.)


Materials:-
·         Watercolour Paper
·         Clarity Stencils: - Flower Power, Leafy Strip, Filigraphy Butterfly  
·         Micron Pen
 Instructions:-
1.       Tape the butterfly stencil onto a sheet of the watercolour paper. Using the Micron 01 pen, outline the butterfly stencil and all its markings twice.  
2.       Using the Micron pen, doodle Zentangle-type patterns inside each shape pattern.
3.       Cut out each butterfly and set aside.

4.       Tape the Flower Power stencil onto another sheet of watercolour paper and when happy with the placement, outline the desired flower pattern again using the Micron pen. Remove stencil.

5.       Over this outline, tape the Leafy Strip stencil to suit and draw in the outline with the Micron pen, ensuring the leaves are behind the flowers.

6.       Again using Zentangle-type patterns, create line work on each leaf.

7.       Cut black then white mounts to suit and place in a frame.

8.       Remove the head from one of the butterflies (quite painless, really!), cut into the wings of the same butterfly and manipulate to create shaped wings.

9.       Attach this over the second butterfly and attach to framed picture to suit.

N.B. I wasn’t happy with the frame as the white was tinged with yellow so I painted it twice with Fresco Finish Snowflake. It now was the right ‘white’ but too matte so I found a tin of lavender floor polish in my cleaning materials and sat for an evening working this in around the empty frame with my finger. It was actually quite therapeutic! Once it was fully absorbed, I repeated this another couple of times until the required look was achieved.
Below are a few of the trials before I settled on the final draft.


Many thanks again for tuning in to my blog; I do greatly appreciate you spending your valuable time reading it.  Once more I am very much looking forward to your challenge entries; you never disappoint! If you have not entered before, please consider doing so either by your own blog or emailing your contribution to claritystampchallenge@hotmail.com
The Clarity website can be found at www.claritystamp.co.uk and Clarity also has a Facebook page - https//:www.facebook.com/claritystamp.co.uk

Have fun!
Warm wishes to all,
Shelagh.