Thursday 22 June 2023

Cleverprints Blog 20

 Cleverprints

Hello. This week's project is a fancy fold card I happened upon and decided to use some of Jane's 'Under the Sea' collection to decorate. Patterned papers provided the stamping background with further colour added. 

Details below. 

Stamps from https://www.cleverprints.co.uk

Fancy Fold Card

Materials:-

Cleverprints Products:-
  • Stamps - Starfish set; Sea Anemone set; Born to Fly set.
Extras:-
  • Printed Papers (from stash)
  • Card - white
  • Alcohol Markers
Instructions:-


1. Cut white card to measure 21cm x 21cm. (8 1/4in x 81/4in.) 
Score at 7cm (2 3/4 in.)

2. Turn card by 90 degrees and score again at 7cm. (2 3/4in.)

3. Lightly pencil mark 14cm on both scored edges. Join both marks with a score line.

4. Fold and burnish along first score line.

5. Fold and burnish card at second score line

6. Fold and burnish third score line as in photo. (Valley fold, Mountain fold, Mountain fold, Valley fold.)

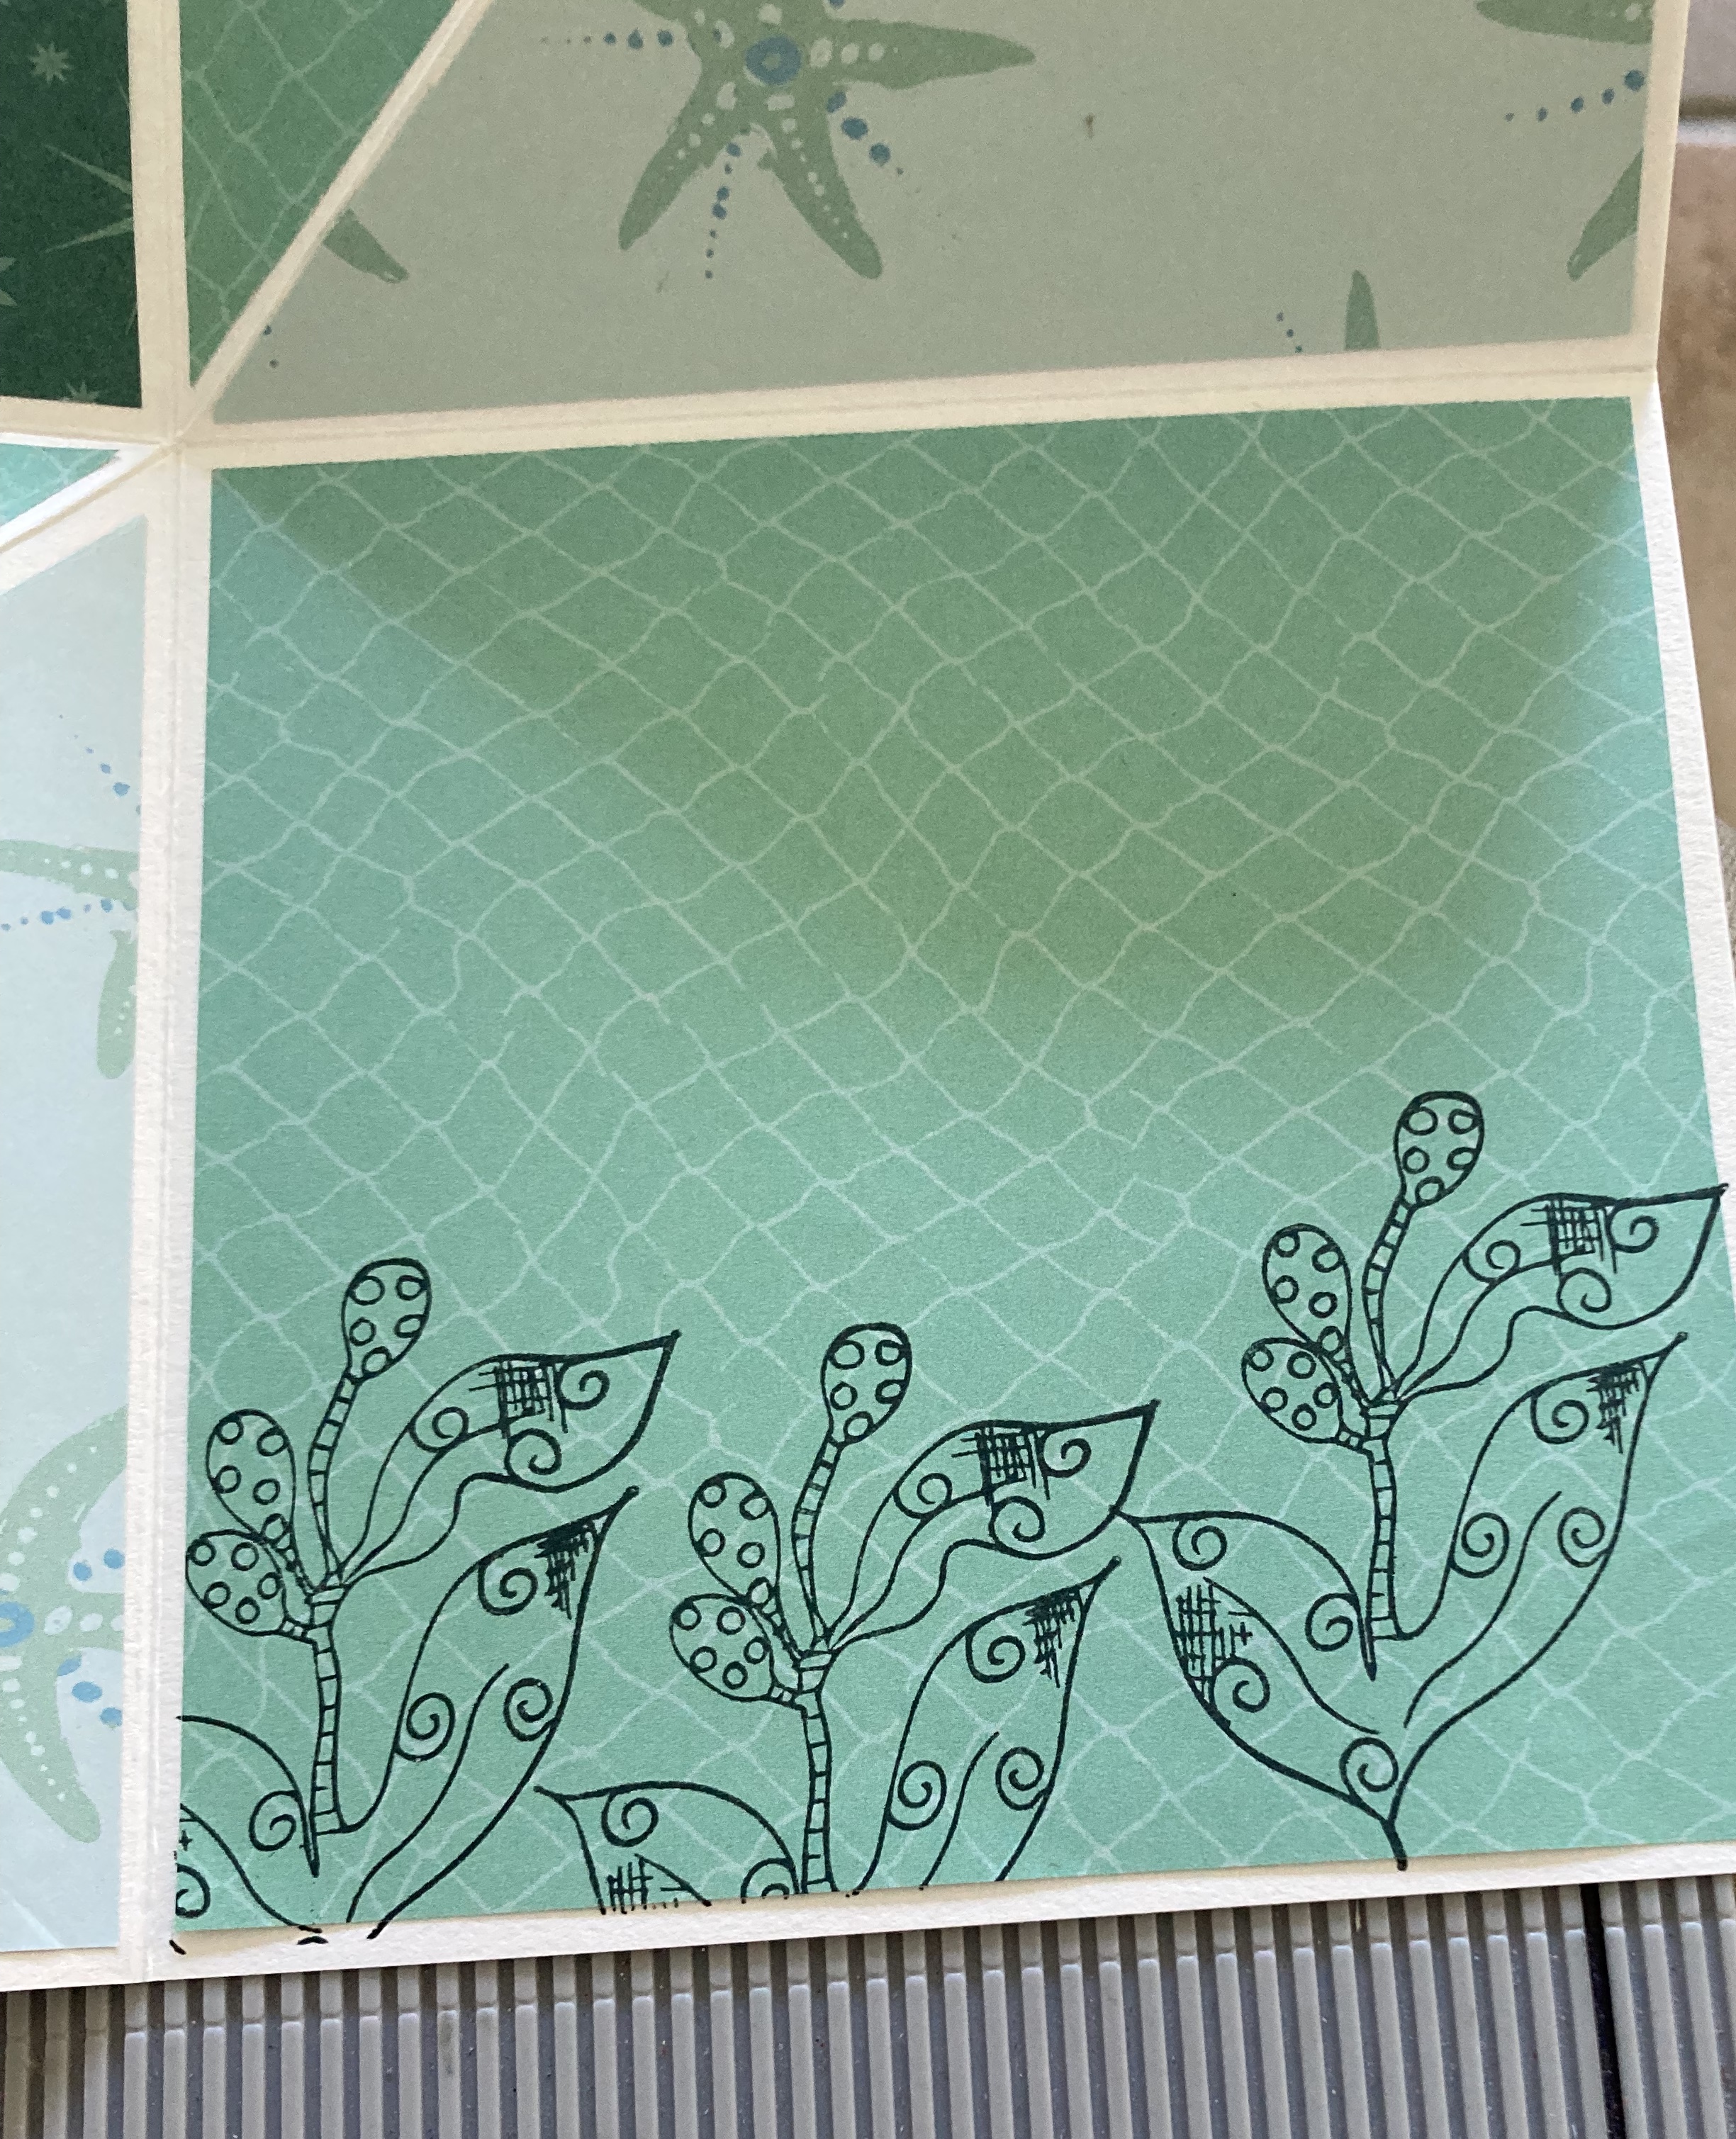
7. Mat each area with patterned papers. 

8. Stamp image from 'Starfish' stamp set; colour to suit with alcohol markers. 

9. Stamp shell image from 'Sea Anemone' stamp set multiple times on patterned paper.

10. Colour shell shapes and trim. 

11. Arrange on card then glue in place. Stamp a few dragonflies from the 'Born to Fly' stamp set. 

12. Stamp large dragonfly from 'Born to Fly' set on patterned paper, colour and trim. Attach to square on front of card. 

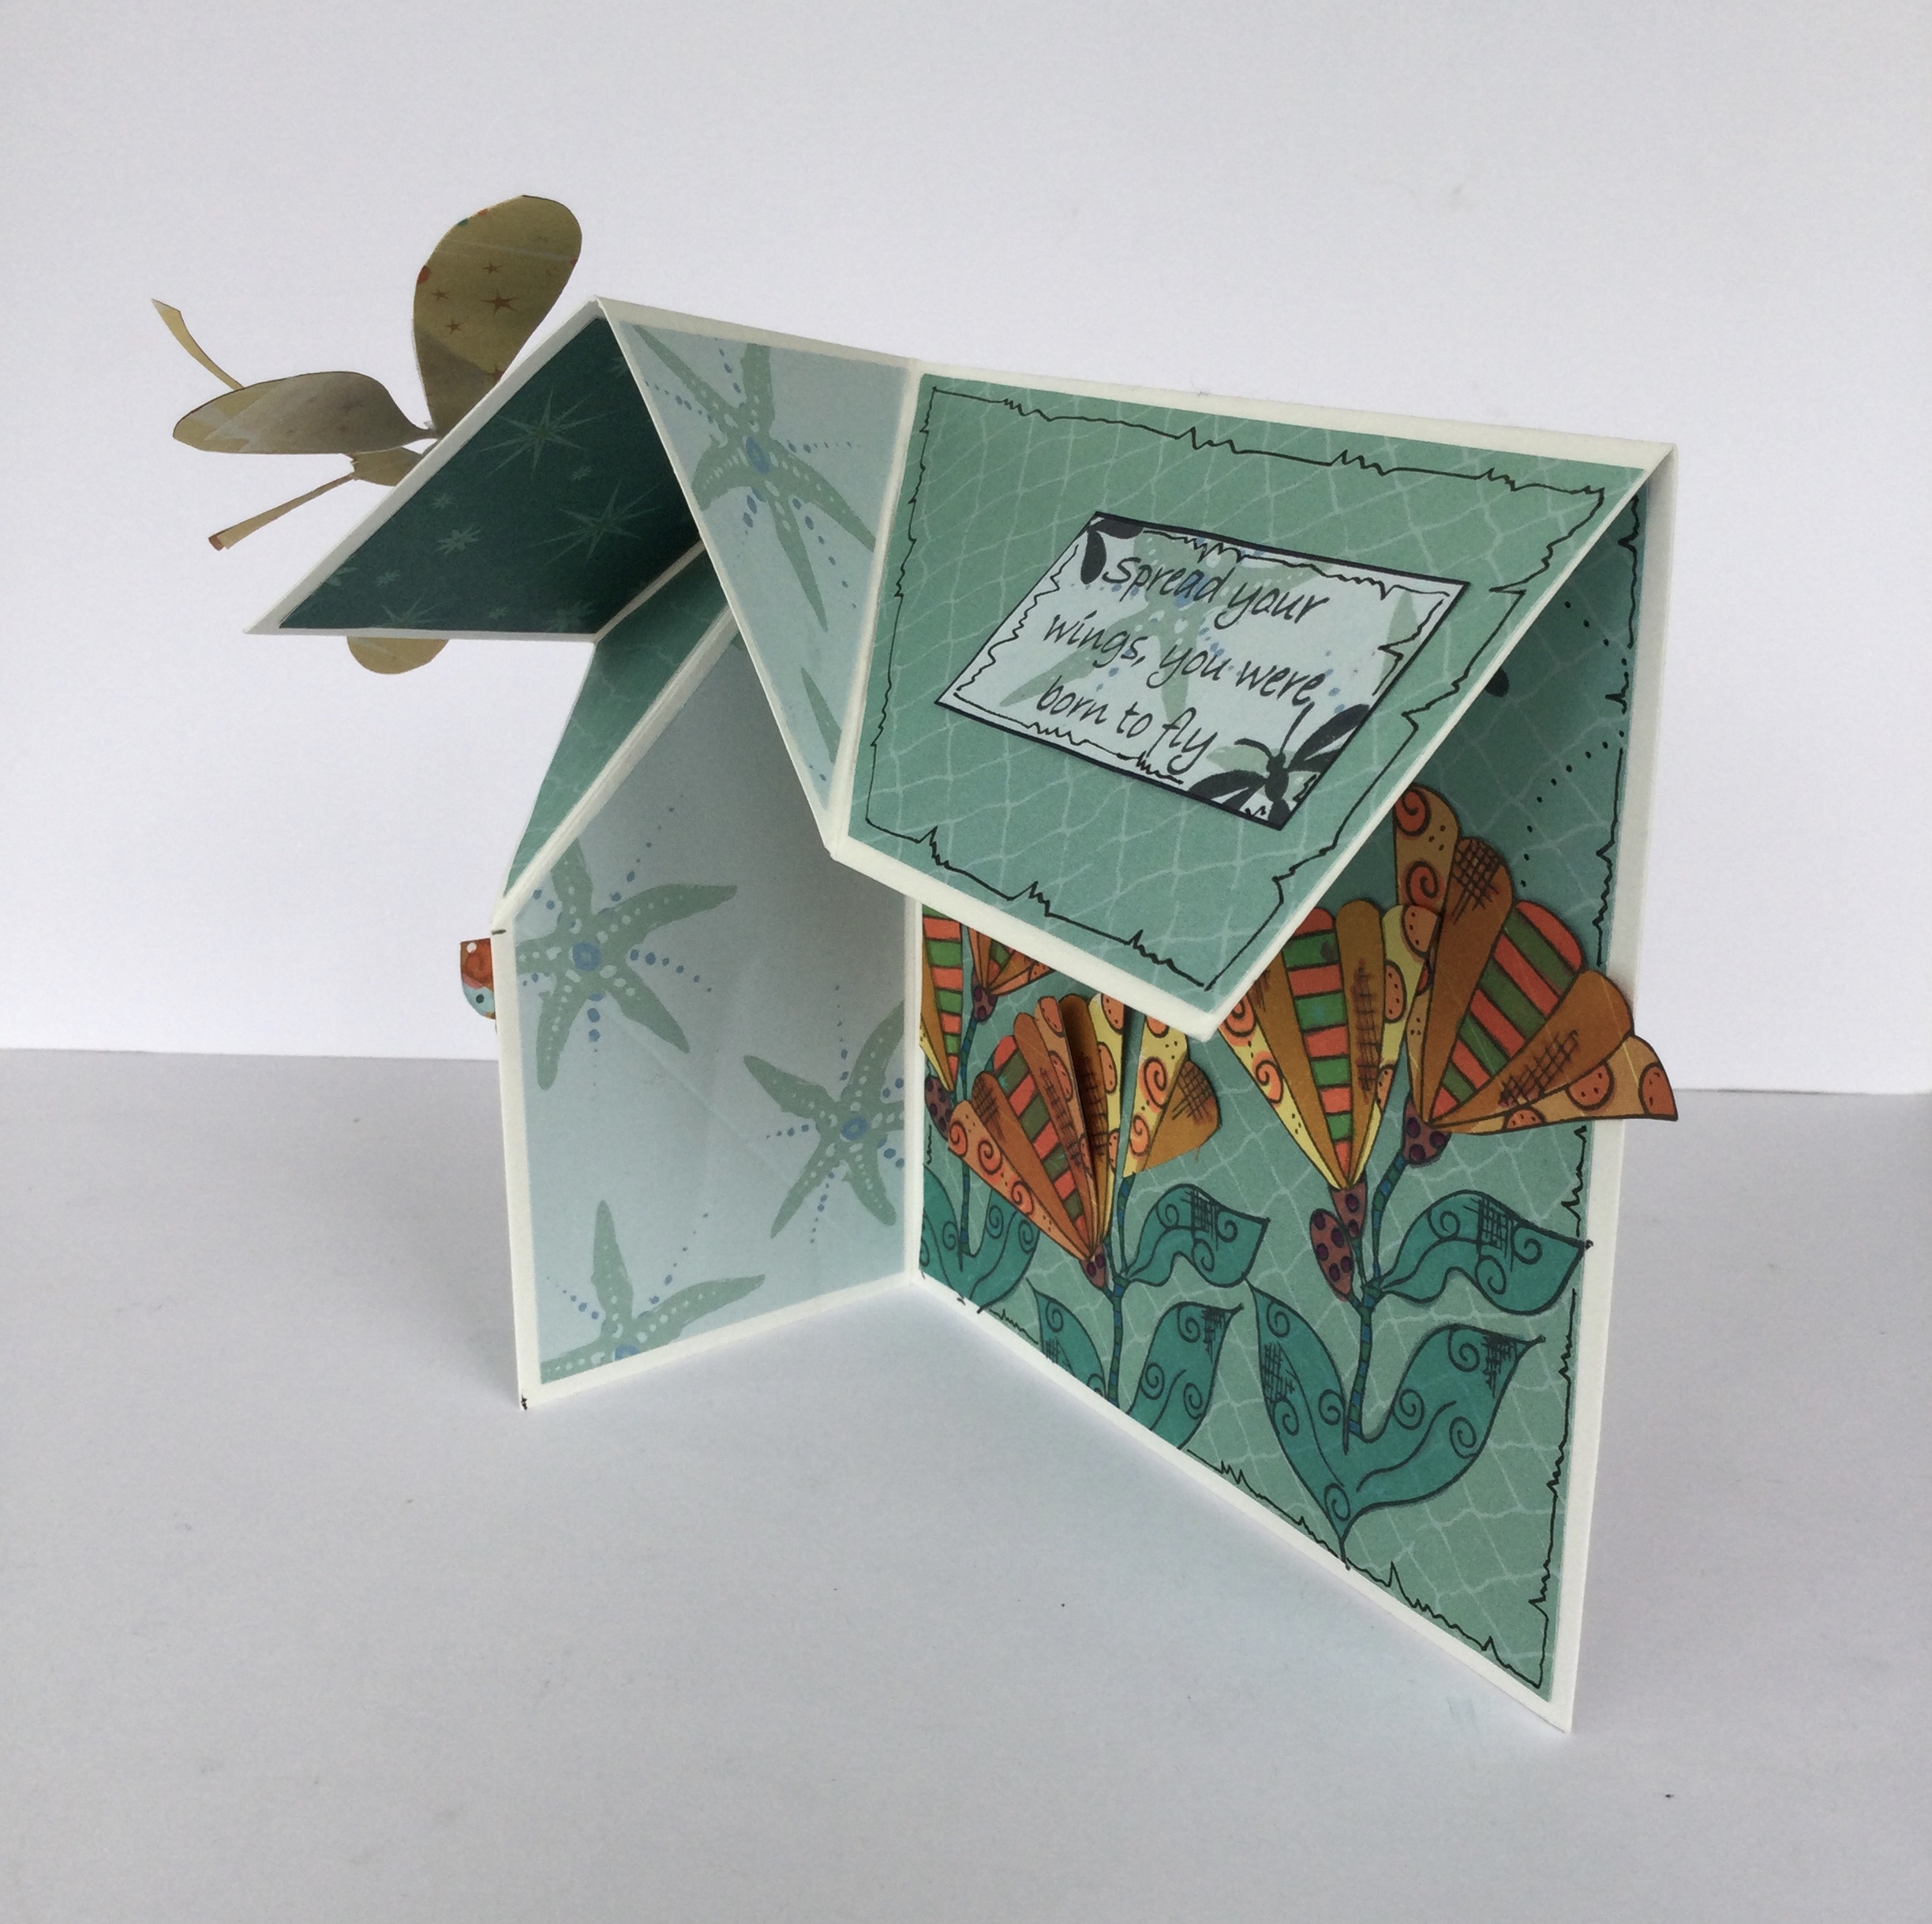
13. Stamp sentiment on patterned paper, add some dragonfly silhouettes and trim. 

14. Et voila! Fancy Fold Card!

15. This card will fold flat for mailing - thumb optional!!! (My husband's - he does finished item photography for me!)

Thank you for following the instructions. 

Happy crafting!

Shelagh
'The Making Lady.' 


Thursday 15 June 2023

Cleverprints Blog 19

 Cleverprints


Hello again. 

This week's project is a card which will satisfy an number of criteria:-1) the use of some hearts found in a forgotten workroom box; 2) Father's Day card; 3) Stamps from Jane's HobbyMaker shows earlier this week. I'm going to add a further caveat to this - no sentiment added for Father's Day as this will be used within the next couple of months for a male birthday card. Not a bad result! 

Father's Day Card


Materials:-

Cleverprints Products:-

  • Woodland Creatures 'Have a Hoot' Stamp set

Extras:-

  • Kraft Card - for heart layers and card blank 
  • Black Card
  • Alcohol Markers
  • Black Ink Pad
  • Card - white or cream
  • Self-adhesive Gems
Instructions:-

Please Note:-
As this card was made without my usual step by step photography, the photograph of the finished card may act as a reference.

1. Stamp owl from 'Have a Hoot' stamp set onto white or cream card. Colour main image with alcohol markers and trim. 

2. Cut (either free-hand or die) three large and three small hearts from kraft card and three medium hearts from black card. Layer hearts - large, medium, small and glue in place. 

3. Cut one of the hearts in two, down the central line and attach one half to either side of card blank. 

4. Adhere two hearts, in layers, bridging the gap between each heart half. refer to photo for placement. 

5. Attach coloured owl image centrally over top heart.

6. Decorate owl and card front with self-adhesive gems. 

*Top Tip - Before gems are placed, add a dot of glue to base card to secure. 

With Jane's shows on HobbyMaker earlier this week and the advent of Father's Day at the weekend, these were the raison d'etre for this card, not withstanding the uncovering of a box of multiple heart shapes in a little workroom tidy. 

Hoping this gives some ideas.

Best wishes,

Shelagh
'The Making Lady' 


Wednesday 7 June 2023

Cleverprints Blog 18

 Cleverprints

Pop-up Card

Hello - blog time again. This week's project is a pop-up card - and for a bit of fun - featuring 'wobbly' Woodland Creatures due to the acetate 'spring' on each. Enjoy!

Materials:-
Cleverprints Products
  • Woodland Creatures Stamps
Extras:-
  • Ink Pad - Black
  • Alcohol Markers
  • Card - 2 x A4 Lemon, 1 x A4 White
  • Acetate
Instructions:-
1. Score A4 card at 9.9cm on long side of lemon card; fold, burnish then trim off extra to create DL card blank. 

2. Score card front at 5cm from centre score line, fold back and burnish. Cut two lemon mats - 1 x 20.5 x 4.4 cm and 1 x 20.5 x 9.4cm. Adhere to front and inside panels.

3. Cut three squares from white to measure 6cm x 6cm. 
*At this point it is advisable to stamp and colour background patterns to all three squares - only I omitted to photograph this!

4. Mat white onto lemon then trim to leave a narrow border. 

5. Cut strip of lemon to measure 14cm x 3cm; score at 3, 6, 9, 12cm and attach into an open cube with either wet glue or double sided sticky tape. 

6. Attach two matted squares as shown to top and bottom of card front then adhere the open cube centrally. Add a few strips of double sided sticky to top of cube.

7. Trim off corner of third square and attach to cube top. 

8. With added stamped background.

9. Stamp three woodland creatures and trim either with corresponding Woodland Creatures dies or with some fussy cutting. 

10. Attach images to squares; here they are elevated away from the square by folded acetate. 

11. Add sentiments to suit.

. . . And there we have a simple pop-up, something that may be adapted for all sorts of occasions and all sorts of stamps and die -cuts.

Thanks for looking!

Happy crafting.

Shelagh 
'The Making Lady.'