Clarity Stamps
Hochanda August 29 2017
How Time Flies
Hello, welcome to my blog and thank you for looking. Below are a number of examples I made for Maria's fabulous show on Hochanda. Cannot quite work out my favourite yet - I do like the one immediately below, 'Ding! Dong! and 'A Matching Pair' although the other two follow closely.

Materials:-
·
Stamps:- Carpe Diem, Girl and Butterflies
·
Stencils:- Clockwork
·
Ink Pads:- Lime Kiss, Morning Dew, Tenacious
Teal; Archival Black
·
Card:- Stencil Card 7ins x 7ins
Instructions:-
1. Using
Archival Black, stamp Carpe Diem centrally on card.
2. Ink
Girl only and stamp onto the edge of the ‘M.’
3. Ink
Butterflies only and stamp onto top of ‘C.’
4. ‘Smoosh’
over Lime Kiss, Morning Dew and Tenacious Teal. Spritz with water and mop.
5. Attach
stencil to reverse of card and emboss using a die-cutting machine.
6. Colour
letters with Polychromos.
2. Love
You

Materials:-
·
Stamps:- Cogs, Big Ben, Word Chains – 6, 11
·
Stencil:- American Love
·
Ink Pads:- Archival – Watering Can; Artistry –
Blushing Rose, Aged Stucco, Moon Crater
·
Card:- Clarity Card
Instructions:-
1.
Mask stencil to leave heart only exposed.
2.
Sweep over Moon Crater then Blushing Rose with
stencil brushes.
3.
Using 1st and 2nd
generation ink from Aged Stucco pad, stamp a variety of cogs. Allow to dry then
polish with kitchen roll.
4.
Scribble an outline using a fine Micron pen.
5.
Cut a frame to fit using another sheet of
Clarity card.
6.
Add some Blushing Rose and Moon Crater to craft
sheet; stamp cogs around frame edge.
7.
Glue frame in place.
8.
Stamp sentiment using ‘Watering Can.’
3. Ding!
Dong!
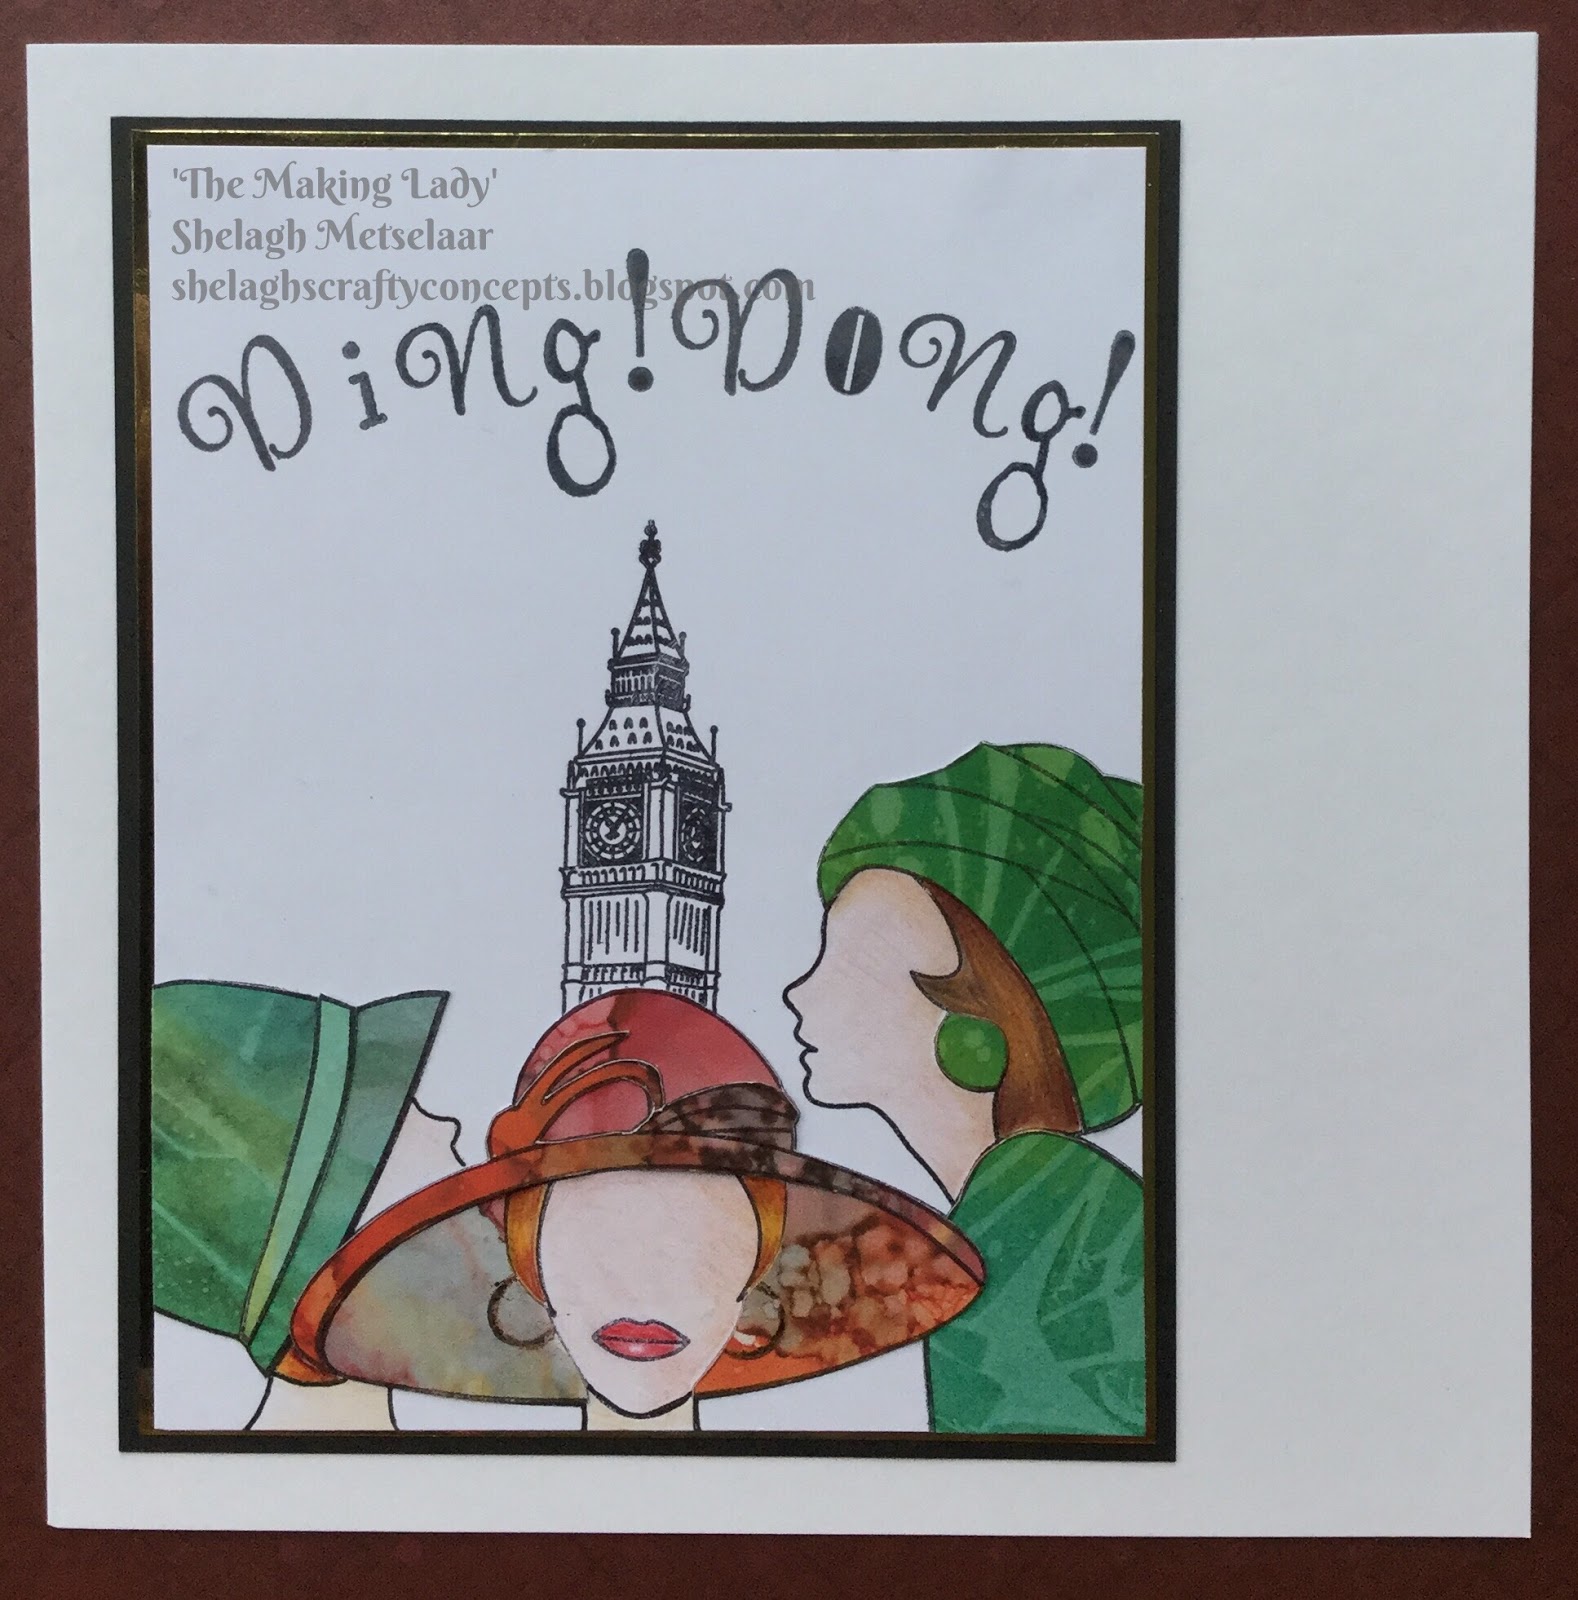
Materials:-
·
Stamps:- Big Ben, Hats 1 & 2, Alphabet Chain
·
Indian Summer paper
·
Ink Pads:- Archival - Watering Can, Black
Instructions:-
1.
Stamp three ladies from Hats 1 & 2 onto
Theuva card using Archival Black, masking to suit. Keeping the mask in place on
central lady, stamp Big Ben with Archival Black.
2.
Colour hair and faces with Polychromos.
3.
Stamp each lady onto chosen sheet of Indian
Summer paper twice. Add Clarity double sided sticky sheet to reverse and cut
out hats. Add onto stamped images.
4.
Stamp ‘Ding! Dong!’ using Archival Watering Can.
4. Matching
Pair!

Materials:-
·
Stamps:- Cogs from Time Flies set, bag from
Handbags set, boots from Shoes set.
·
Ink Pads:- Archival Black
·
Card/Paper:- Indian Summer
Instructions:-
1.
Stamp bag and boots twice onto chosen Indian Summer
sheet. Stamp chosen cog over both boots and bag images.
2.
Add Clarity double-sided sticky to reverse of
all images.
3.
Cut out boots, omitting heels. Without removing
backing, place boots onto chosen background sheet to suit and lightly mark
where heels should be. Stamp a small cog and the hour hand to create heels.
Remove sticky backing and place boot images on background.
4.
Apply one stamped bag to the background by
removing backing paper. Cut out the front handle and ‘flap’ from one handbag
image. Apply cut out over main image.
5.
Stamp a medium cog three times onto boot paper
remnant and repeat with a smaller one.
6.
Cut out and scrunch up all cogs; add to boots and
bag as decoration.
5. Clockwork
Canvas

Materials:-
·
Canvas:- 4 x mini canvasses, 1 Clarity 8ins by
8ins canvas
·
Stamps:- Cogs
·
Stencil:- Clockwork
·
Ink Pads:- Silver
·
Paint:- Fresco Finish - Honeydew, Nougat,
Snowflake, Sherbet, Vintage Lace
·
Misc:- Black gesso, Texture Paste, Clarity
double-sided sticky sheets, gilding wax – gold and silver
Instructions:-
1.
Tape all four mini canvasses securely together
on the reverse.
2.
Attach Clockwork stencil to front. Sweep through
moulding/texture paste. Allow to dry. (Overnight is preferable.)
3.
When dry, separate then apply black gesso over
all four mini canvasses. Allow to dry. (No heat guns unless you require this
effect – application of fierce heat bubbles the paste.
4.
Dry-brush paint using the stated colours.
5.
Add gilding wax to suit.
6.
Stamp interlocking cogs onto 8 x 8 canvas using
silver ink pad or Versamark and silver embossing powder. Add some gilding wax
around edges.
7.
Place squares of double-sided sticky onto
reverse of mini canvasses and add to larger canvas to suit.
. . . . .And there we have my selection of examples for Maria's shows on Hochanda.
Hope the details help.
Thank you for your visit.
Happy crafting,
Best wishes,
Shelagh
'The Making Lady'


