November 2016 Challenge
Glowing Colours

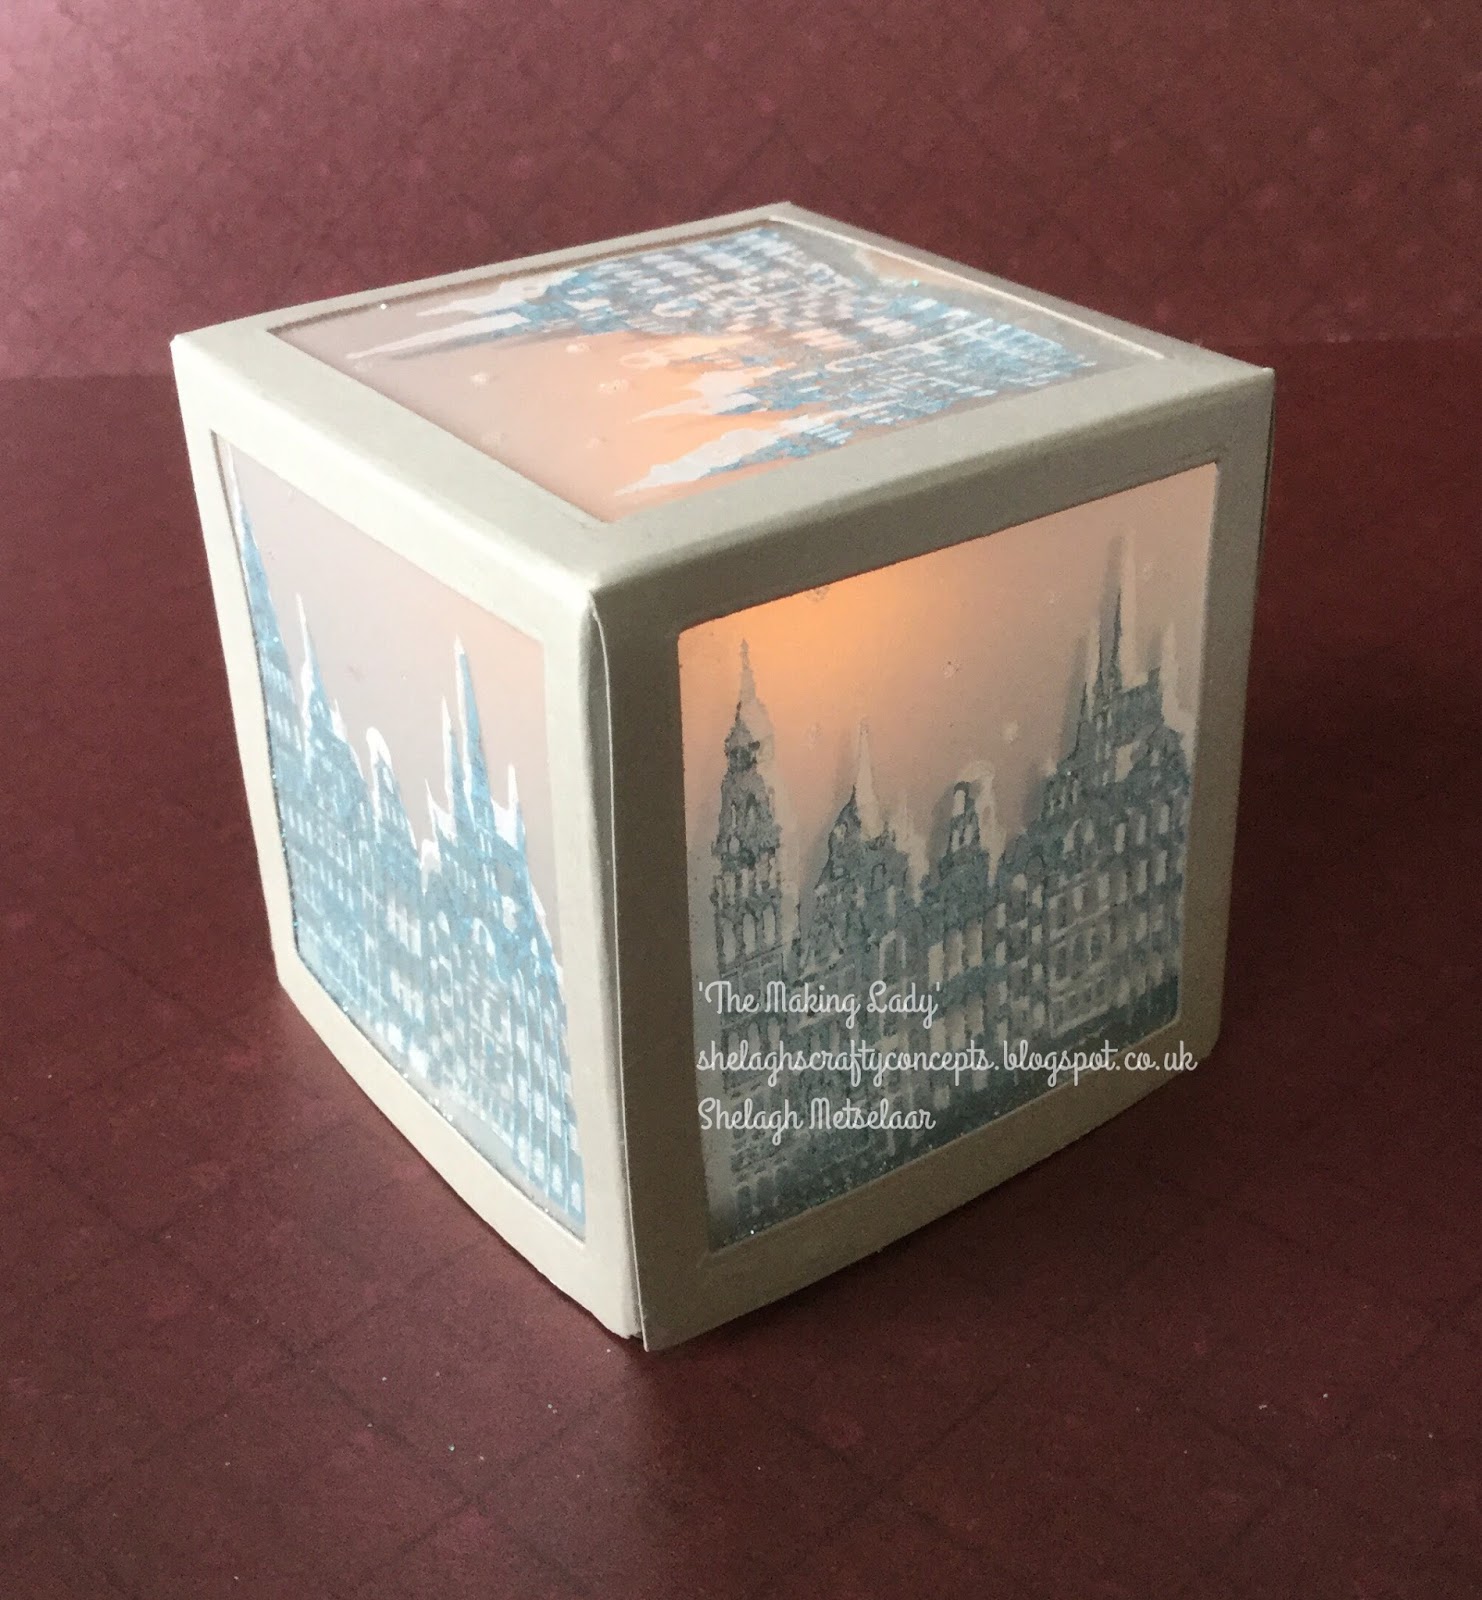
'Glowing Colours'
This is my entry for the Chocolate Baroque November challenge and included a bit of 'crafty' recycling. More will be explained!
Materials:-
- Stamps:- Chocolate Baroque - A Year of Stamping Issue 9 small; Issue April large and small; Tangled Garden
- Ink Pads:- Archival - Sepia; Distress - Twisted Citron; Mustard Seed, Fired Brick
- Paper etc:- Firm Acetate (recycled packaging); Tissue - recycled from shoe-box; kraft card - circle die-cut from scrap; white card - small circle die-cut from scrap; cream copy paper
- Miscellaneous:- Pebeo White Poster marker; double-sided sticky sheet; Faber Castell Polychromos; glue pen; Glamour Dust - gold
Instructions:-
For the cylinder and decoration:-
- Cut acetate into a rectangle approximately 20cm x 10cm - whatever the recycled packing allows. Form into a cylinder and join sides with red liner tape.
- Stamp small YoS9 - four times, YoS large - once and YoS small twice onto a sheet of tissue using Sepia Archival. (My tissue has one side dull, one side shiny; I stamped on the dull and inked the shiny.)
- Dab white paint from the poster marker evenly onto the reverse side from the stamped images. Allow to dry.
- Attach double-sided sticky sheets over this whitened image. (Mine were 2 A4 sheets from my stash which I cut roughly to fit.) Turn to the stamped images and gently smooth the tissue into its sticky base.Gently lay down base colours using Polychromos; I began with mid yellow for the poppy heads then onto the green background and finally the butterfly in light orange. I then went on to add colour depth to each colour set.
- Once satisfied with the colours, I cut three areas out, peeled off the backing and applied each to the acetate cylinder. I also cut out an area to fill a gap in the acetate.
- At this stage I cut around the images so there was no hard acetate line.
- Die-cut a kraft circle and a smaller white circle and blend over sections of Twisted Citron, Fired Brick and Mustard Seed. (I blended all three together with the Mustard Seed.)
- Attach cylinder to base using a fine line of wet glue and allow to dry and set.
- Next step was to color and cut out one butterfly from the large stamped image and two from two of the small stamped images. ad glue pen dots and lines and sprinkle over gold Glamour Dust.
- For these, I did not want a sticky reverse side, so I brushed it with cornflour (from the kitchen cupboard) then added a tiny spot of wet glue to the centre, leaving the wings to float free.

- Using Archival Sepia, stamp plain flower from the Tangled set onto cream copy paper (I actually stamped twelve as my first flower required three images for each.)
- Blend Mustard Seed - for speed I inked them straight from a mini pad- over six flower shapes, concentrating on the central flower shape. Cut out and shade with orange and red Polychromos.
- As shown below, cut out the centre (it should be coloured but I photographed a couple of spares.) Roll the outside 'frill' around a cocktail stick and glue on a second frill. Continue to roll around and when happy with shape, apply wet glue to base to keep inner spiral in place. Repeat twice more.
- For the small flowers, I tore the left-over centre circles into spirals and glued them either to the base or into the centre of the flowers.

And there it is - 'Glowing Colours' -my entry for the penultimate CB challenge of the year!

Hope the explanation is as clear as the photographs! (The last pair below are not so hot - they're mine but I wanted to show the large butterfly!)
My resident photographer makes a great job every time. Thank you, Mike!


Best wishes and
Merry Christmas!!!
'The Making Lady.'