Wednesday 28 January 2015

Shoe Box


  • I made this example a little while ago using Sizzix dies for both box and shoe. The flowers were also made from the Sizzix collection. 
  • The suitcase was made from Kraft card, Coredinations and Tilda patterned papers and the shoe  from Tilda patterned papers.
  • The suitcase fronts were run through an embossing folder prior to inking the edges.


  • The interior was decorated with more papers from the same Tilda selection.
  • A toning ribbon was tied around the suitcase as a fastener. 
Thank you for visiting my blog, today. Now must go hurry to the Post Office before the snow flurries get any worse!

Saturday 24 January 2015

Golden Girl

Golden Girl

Hi,
For my weekly post, I thought I'd show you a card I made at the end of last year.  It's made with an eclectic collection of stamps. The image is Bildmalarna Mimosa; the leaves - Clarity Stamps re-mountable Maple Leaves; the background - IndigoBlu 'Bubbles;' the sentiments - Stampin Up.

1.The background inside and out was stamped and heat-embossed using Versamark and Wow Twinkle White Embossing Powder on two sheets of A4 white card. It was then coloured using Adirondack Butterscotch, with Willow blended around the edge to create depth. One sheet was cut into four equal rectangles which were mounted onto white and trimmed. All four were then secured onto black, a short edge next to a long edge.

2.The girl was stamped using Versafine Onyx Black and coloured using Spectrum Noir pens. It was then die-cut into a circle using a Tonic plain circle die from one of their sets and attached to the centre of the coloured background.

3. The maple leaves (all three sizes) were stamped repeatedly onto green pearlescent vellum (I bought this in the USA a good few years ago) with Versamark and heat-embossed with Wow Gold Embossing Powder. They were cut out and secured around the the circumference of the image.

4. I scored and folded a long rectangle of white pearlescent card from my stash to create an easel card which has a mountain fold as a 'stopper.' (This is my preference rather than a stopper on the base.) A background off-cut from (1) was mounted and a sentiment stamped, matted and added.


5. The back and base of the easel was layered with background paper from (1) and a few leaves and a sentiment added.

.... and there we have 'Golden Girl.'

Many thanks for visiting.

Best wishes,

Shelagh.


Tuesday 20 January 2015

The Rose

                                                                          The Rose


This card was quite time consuming but I wanted to explore another use for a stencil I've had in my stash for quite some time. I found the Letraset Tacky Dots the cleanest way to attach each small petal.


Shelagh Metselaar
The Rose


·         
       Materials:-
      Cardstock:- Neenah Solar White; White Pearlescent; Creative Expressions – Gold; Black Card;           Tilda – Sewing
·         Stamps:- Imagination Crafts - Rose, Butterfly
·         Stencil:- Imagination crafts – Flower
·         Punch – EK Success
·         Letraset Tacky Dots
·         Inkpads:- Distress Inks – Weathered Wood, Tea Dye; Versafine Onyx Black
·         Stamps Away Clear Detail Embossing Powder
·          Distress Markers, water brush
·         Quickie Glue Pen
·         Glamour Dust – Gold

 Instructions:-
 1. Cut 3 squares of white card slightly larger than the stencil. Tape the stencil on card and draw around flowers using a Micron pen. Repeat on other two pieces of white.
 2.  Repeat with patterned paper and cut out each individual petal.
 3.  Apply the Letraset Tacky Dots to reverse of patterned paper and apply each petal to corresponding area on white card.
 4. Ink the edges with Tea Dye and mount onto black, then gold then black again.
 5. Stamp the Rose stamp 6 times on white card and colour in using Distress Markers. (I used my glass mat as a palette.)
 6. Decoupage the images. Mount onto black, gold, black as in (4.)
 7. Adhere centrally to paper-pieced background.
 8. Stamp each butterfly twice and colour using Distress Markers. Cut out and set aside.

I completed the card by scoring a long piece of white pearlescent card centrally to fit the completed topper, allowing for a border. The remaining length at each side was scored and matted panels of the paper-pieced stencil added. The ends were scallop-punched, decorated with flowers reserved from the patterned stencil work. Attach butterflies to suit. Using a Quickie Glue Pen to highlight flower centres and areas of the stencil work, Gold Glamour Dust Glitter completed the card.

Thank you for visiting my blog. I'm still very much a novice in finding my way around this new experience. 

Shelagh. ;~}


Monday 19 January 2015


Glitz and Glamour
January 2015


Materials:-
Cardstock:- white, gold mirri, black
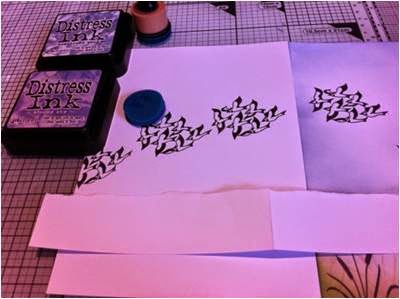
Stamps:- IndigoBlu ‘Love Is,’ ‘Sewing Mends the Soul,’ ‘Music Hall’
Inkpads:- Versamark, Ranger Distress Salty Ocean, Peacock Feathers, Black Soot
Embossing Powders:- Wow gold, Wow holographic white
Pens:- Sakura White Pen, Quickie Glue Pen
Extras:- Glamour Dust gold glitter, ribbon, self-adhesive gems
Instructions:-
1. Take a 5ins x 7ins piece of white card and stamp the ‘Love Is’ heart using Versamark in the centre.  Heat emboss in goldInk and emboss the corset stamp from ‘Sewing Mends the Soul’ with Versamark, having turned the first embossed image upside down.
2. Repeat inking and embossing scissors from the same set to create a dress-form.
3. Stamp and emboss separately heart, corset and scissors again on another piece of card and cut out.
4. Ink and emboss as before the scroll-flourish from ‘Music Hall’ set around outside of card at (1.)
5. Ink and emboss using white embossing powder inside this frame.
6. Ink the card and separate images using Salty Ocean and Peacock Feathers. Darken the outer edges using Black Soot.
7. Attach the scissors, heart and corset to main image using foam pads. Add gems.
8. Highlight the outer gold scrolling with a white pen and areas of the skirt and corset with glue pen. Apply the glitter to the glued areas.
9. Curl some areas of the skirt and corset.h
10. Mount onto gold mirri then black.
The decoration was made from a flower, bird and branch punch from another gold-embossed  heart and ribbon coloured using the inkpads.


Thursday 1 January 2015

Things With Wings


The idea for this card came from a clip about Lapwings where one was flying around reed beds. As an extra note of interest, we were out in the Jeep heading for a brisk winter’s walk in the country this afternoon when I spotted three lapwings scrabbling about in a field; this is not a sight I’ve seen since I was a child!


Materials:-
·        Cardstock:- Theuva Card x 3, Black Pearlescent Card, Silver Mirri Card, White Pearlescent Card
·        Clarity Stamps:- Lapwing Set, Reed stamp

·        Inkpads:- Ranger - Archival Black; Distress Frayed Burlap, Old Paper, Antique Linen, Mowed Lawn, Weathered Wood, Stormy Sky; Versafine Onyx Black

·        Clear Detail Embossing Powder
·        Micron pen
·        Spectrum Noir Pencils

Instructions:-
Stamps used

  • On a piece of Theuva card, positioned 'portrait' - short sides top and bottom - and using Versafine Onyx Black, stamp the smaller 'Standing Lapwing' towards the foot of the right hand side.  Dust with embossing powder and heat set.

  • Stamp this again on a sticky note and cut out.
  • Using the same process, stamp the 'Lapwing in Flight' in the centre of the card and the 'Flight of Lapwings' at the top left hand corner

  • On a second sheet of Theuva card, stamp three sets of the 'Flight of Lapwings' in a downward motion and heat emboss.
  • Stamp some masks on 'sticky notes' and cut out.
  • On a third sheet, stamp two sets of the same almost parallel to echo the horizon.
  • Using distress ink 'Old Paper' stamp the 'Reed' stamp randomly along the foot of each of the three cards.  Over stamp these to suit with the same stamp and Black Archival.
  • Cut a large circle mash (the sun) from a 'sticky note' and place over part of the stamped 'Lapwing in Flight'.  Place a lapwing mask over the stamped image and also over the 'Standing Lapwing' and the 'Lapwings in Flight'


  •  Tear a sheet of copy paper across to create a rough horizon. Place this over the first card about one third of the way from the foot. Using a blending tool and Weathered Wood, gently colour the area above the horizon mask and on to the top of the card.

  • Move the horizon mask onto the second then third stamped sheets and repeat.

  • Using a blending tool and Old Paper, add colour over the stamped reeds at the foot of each sheet. Build this up to a small mound at the right of sheet 1 so the ‘Standing Lapwing’ appears to do just that. Add depth of colour to this area by blending in Frayed Burlap and blend in some Mowed Lawn along the reeds.

  • Remove the sun mask and blend some ‘Squeezed Lemonade’ to form a reflection on the water. Shade the sun using some yellow Spectrum Noir pencils and blend into paper. (I used my fingers).
  •  Blend Stormy Sky and Weathered Wood to create the darker sea. (I originally coloured the sea lighter and sky darker but on looking out from my craft room on a beautifully sunny winter’s day out towards Aberdeen harbour and the horizon, I noticed the opposite was true thus all change)!
  • From here, using Spectrum Noir grey pencils, add some shading to the birds.
  • Trim, mount onto silver, black then white. 


Thank you for visiting my blog
Shelagh ;-}