Clarity Stamps Challenge April 2016
Techniques – Masking
'Butterfly Magic!'
Hi again and welcome back to 'Masking Month' in Shelagh-land. This is my second exhibit for the 'Masking Challenge' and I this time I used one stamp. This butterfly image has a variety of lines you can follow to allow you to decoupage it and that's just what I've done here. I made a number of these using different colouring mediums and I have listed them at the end of this blog, including 'the one that got away.' So - grab your Clarity stamps and matching masks or, as I have done, arm yourself with a sticky note-pad and have a go. A £50 Clarity Voucher awaits the winner. Happy Masking!
(Remember to check out the rules and also how to send your submission via your own blog or to claritystampchallenge.blogspot.com in which case it will be posted on your behalf.)

Materials:-
·
Cardstock:- Clarity Stencil card 7x7
·
Stamps:- Clarity ‘Butterfly’ from ‘Butterfly and Montage’ set, ‘Magical’ from Word Chain 7
·
Stencil:- Clarity Round Aperture
·
Inkpads:-
Archival:- Watering Can
·
Pencils:-
Polychromos
·
Embossing
Powder:- WOW Black Sparkle
·
Perfect
Pearls:- Blue Smoke, Forever Blue, Forever Violet, Forever Green, Mint
·
Red
Liner Tape
*Most items are available from the Clarity Stamp website www.claritystamp.co.uk
*Most items are available from the Clarity Stamp website www.claritystamp.co.uk
Instructions:-
1.
Stamp
the butterfly onto a ‘post-it’ pad. Cut out four masks – no need to repeat,
just peel off four sheets prior to snipping! (Please ensure the image is stamped onto the where the ‘sticky’ bit is -
I know because I’ve stamped it elsewhere and after much fussy-cutting the mask
was fit to be junked!)


2.
Attach
circle aperture to card with low-tack tape and lightly draw a faint pencil-line
around inner circumference. Remove stencil.


3.
Ink
up the butterfly stamp with ‘Watering Can’ Archival and stamp at top of 7x7
card, aligning horizontal wing separation with circle line. Mask.


4.
Ink
up and stamp again to right of butterfly, again keeping mid-wing line in tune
with the pencilled circle. Mask.


5.
Repeat
around circle line – seven butterfly images in total. (N.B. I found it easier
to leave the first mask in place.)


6.
On
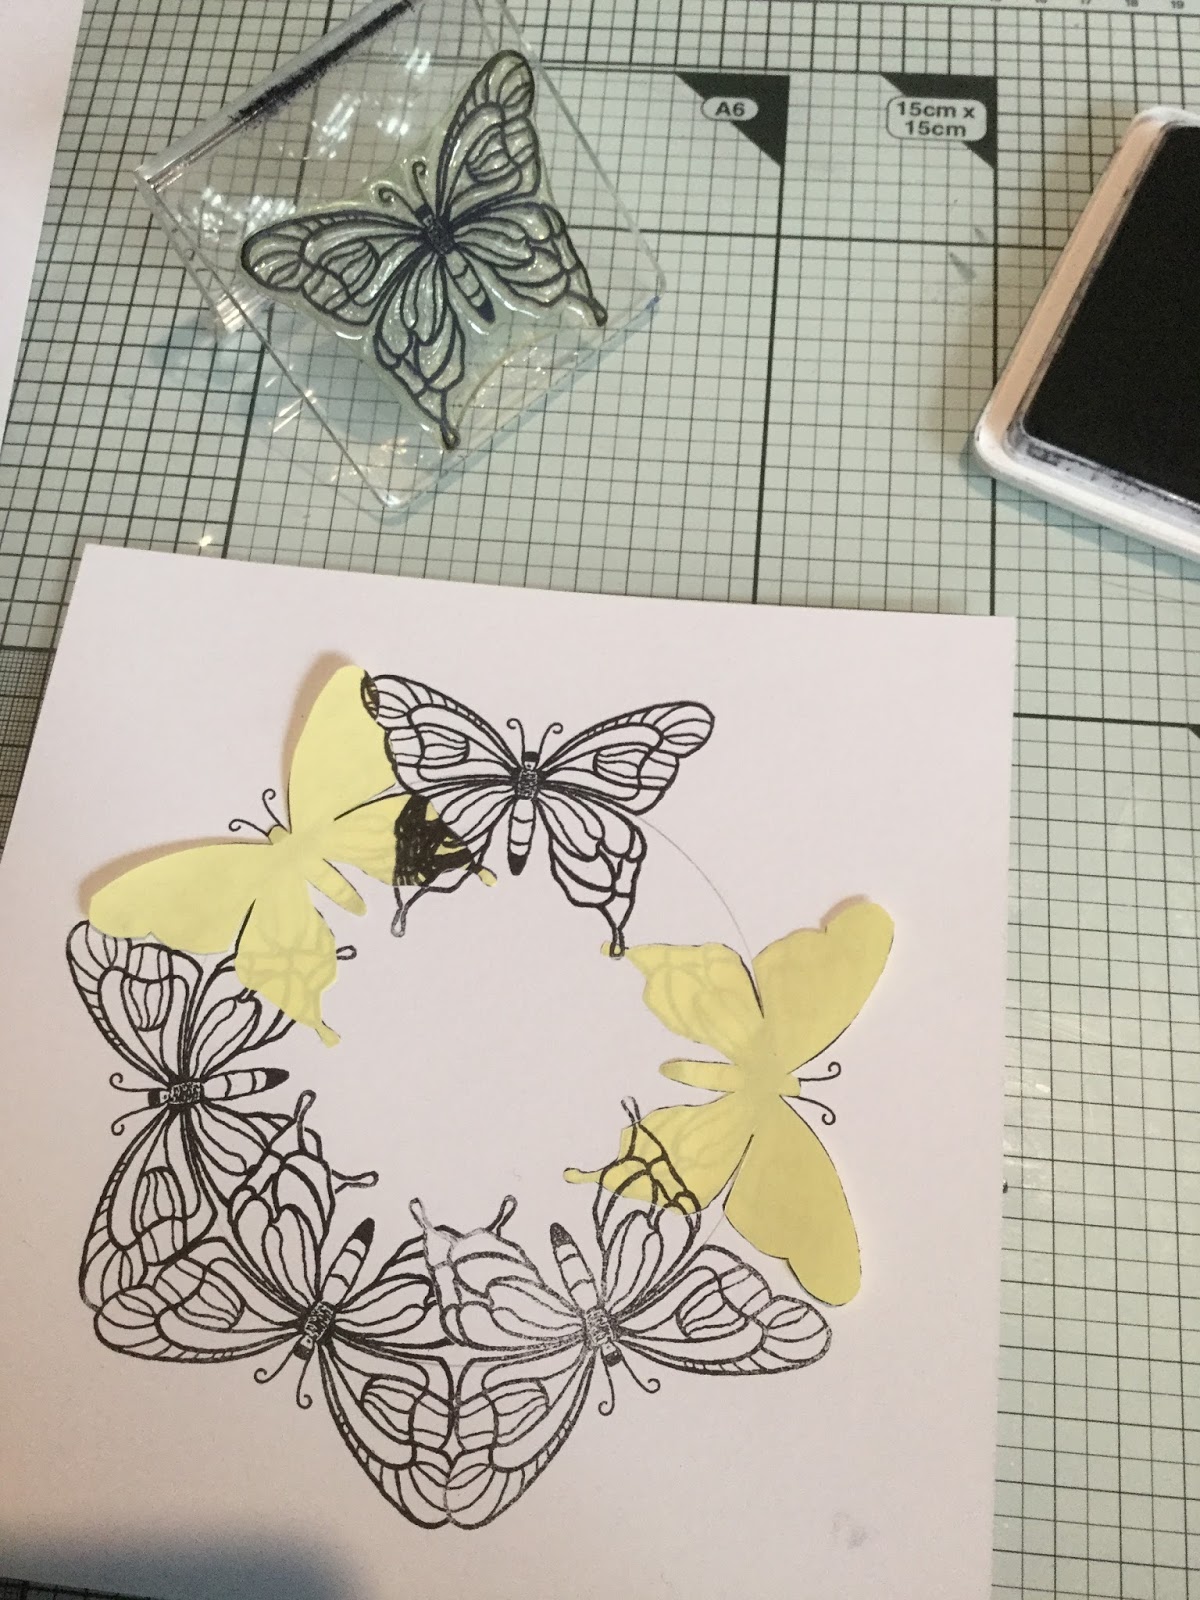
another card stamp seven separate butterflies to create 'free-flying butterflies' using the same ink pad as before. (The photo above shows one butterfly attached to the top image and four that have be cut out in decreasing size for a decoupage effect. I also chose to use a different central word.) PS The change in word was due to my mislaying the 'Magical;' now repatriated with its other pals on the 'Chain Gang!'
7.
Colour
each butterfly with selected colour-choice of Polychromos and also the extra
‘free-flying’ butterflies to tone in.
8.
Cut
out the free- flying butterflies and and gently curl wings around a pencil, finger, paintbrush handle or what ever is nearby. Attach to coloured-in images on card. (I used white glue.)


9.
Stamp
‘Magical’ (or 'Amazing' as above) using Versamark, add embossing powder and heat with heat gun.


Coloured with Polychromos
10. Apply red-liner tape around the
perimeter of card, select and apply Perfect Pearls of choice. ‘Stipple’ in
Perfect Pearls with brush.
11. Et voila! Magical Butterflies!

Coloured with Distress Markers.

This was my favourite colouring as it comprised more muted tones but as you can see, I made a right mess of stamping 'Magical.' Will find some use for it though - too much work to go to waste.
Thanks again for visiting my blog and remember 'You've got to be in it to win it,' as one famous game host said.
Best wishes,
Shelagh.
Lovely card design it is stunning. Xx
ReplyDeleteThanks, Carol. This is as easy or complex as you want. I found the exemplars quite therapeutic re the colour choice and medium used. ;~}
DeleteThis is so beautiful Shelagh. I like it even better now I can see the 3D butterflies. Was it luck that the butterflies fitted around the circle or some very careful planning? x
ReplyDeleteHi Lesley,
DeleteI have to admit I did have a number of 'plotting' trials with the butterfly before I could discern how the images would fit in with the stencil circumference. Many thanks for commenting.
So like how you have done this its lovely colours are great to
ReplyDeleteSo like how you have done this its lovely colours are great to
ReplyDeleteThanks, Julie - back in the land of the Internet so I can now respond. This was a very simple project compared to my main posting. Thought it sensible to have a balance. ;~}
DeleteI love this Shelagh. Thank you so much for the step by step. xx
ReplyDeleteThank you, Morag; I'm so pleased you found the step by step useful. I like it as it's only one stamp! Lol X ;~}
DeleteWow Julie this is beautiful, love the colours and thank you for the step by step, this is definitely one for me to try as I have one of the old butterfly stamps xx
ReplyDeleteThank you, I think it's good to revisit stamps in our collections and produce something with a different slant. Best wishes. Shelagh ;~}
ReplyDelete