November 2016
'Glisten and Sparkle'

My entry for Indigoblu challenge 'Glisten and Sparkle' is a Christmas votive. I tried a new technique and as the explanation unfolds, you will understand why I had to adapt my original* idea. My next task will be to try this technique with Indigoblu white GeeSso Good and Indigoblu Artist's Acrylic paint in Snow White. (Order will be placed in early January!!!)
Please note that I move between Imperial and Metric measurement to suit my cause!!!
Materials:-
- Stamps:- Indigoblu Snow Globe Set
- Inks:- Pebeo large white marker pen; Archival Cornflower Blue
- Paper/Card:- A5 parchment - white; A4 Silver-Grey pearlescent card
- Miscellaneous:- Square die of side around 2ins and die-cutting machine; Red Liner Tape; Glamour Dust - Clear; Glue Pen; LED light
Instructions:-
Windows
- Score A5 parchment at 2 and a half inch intervals on both long and short side to create six squares. Fix parchment perimeter onto a board/mat with low-tack masking tape.
- Using the buildings stamp from the Snow Globe set, dab on white paint from marker. (Stamp a trial image on scrap paper to check the paint consistency.) When satisfied with coverage, repeat on five parchment squares and allow to dry. Clean stamp with water and kitchen roll.(This takes only a few seconds.) N.B. Do not be alarmed if the parchment 'bows' - it does not like water but I resolved this and will explain further on in the instructions.*
- Using Cornflower Archival, ink the same stamp and over-stamp each white image allowing a white shadow to be seen.
- Add glitter to the wet ink and allow to dry.
- Add dots from the glue pen to suggest snow and add glitter as before.
- Cut along score lines.
Frame:-
- Score silver-grey A4 sheet at 2 and a half inch intervals to form a grid with three rows of three squares (nine squares altogether.).
- Select a centre square so that it has a square attached to each side. Remove each corner from the grid but allow an extra 0.5cm at the right hand side of each square - apart from the central one - for a tab.
- Using a suitably sized square die, align centrally and cut out the centre from all five joined squares.
- Add narrow red liner tape to the perimeter of each square frame.
- Add each stamped parchment square to each frame to suit, ensuring the buildings are facing up as the cube base is actually the top in this instance.
- Run a narrow line of tape down each tab and fold up to make a cube.
- Place over LED candle** . . . . . .

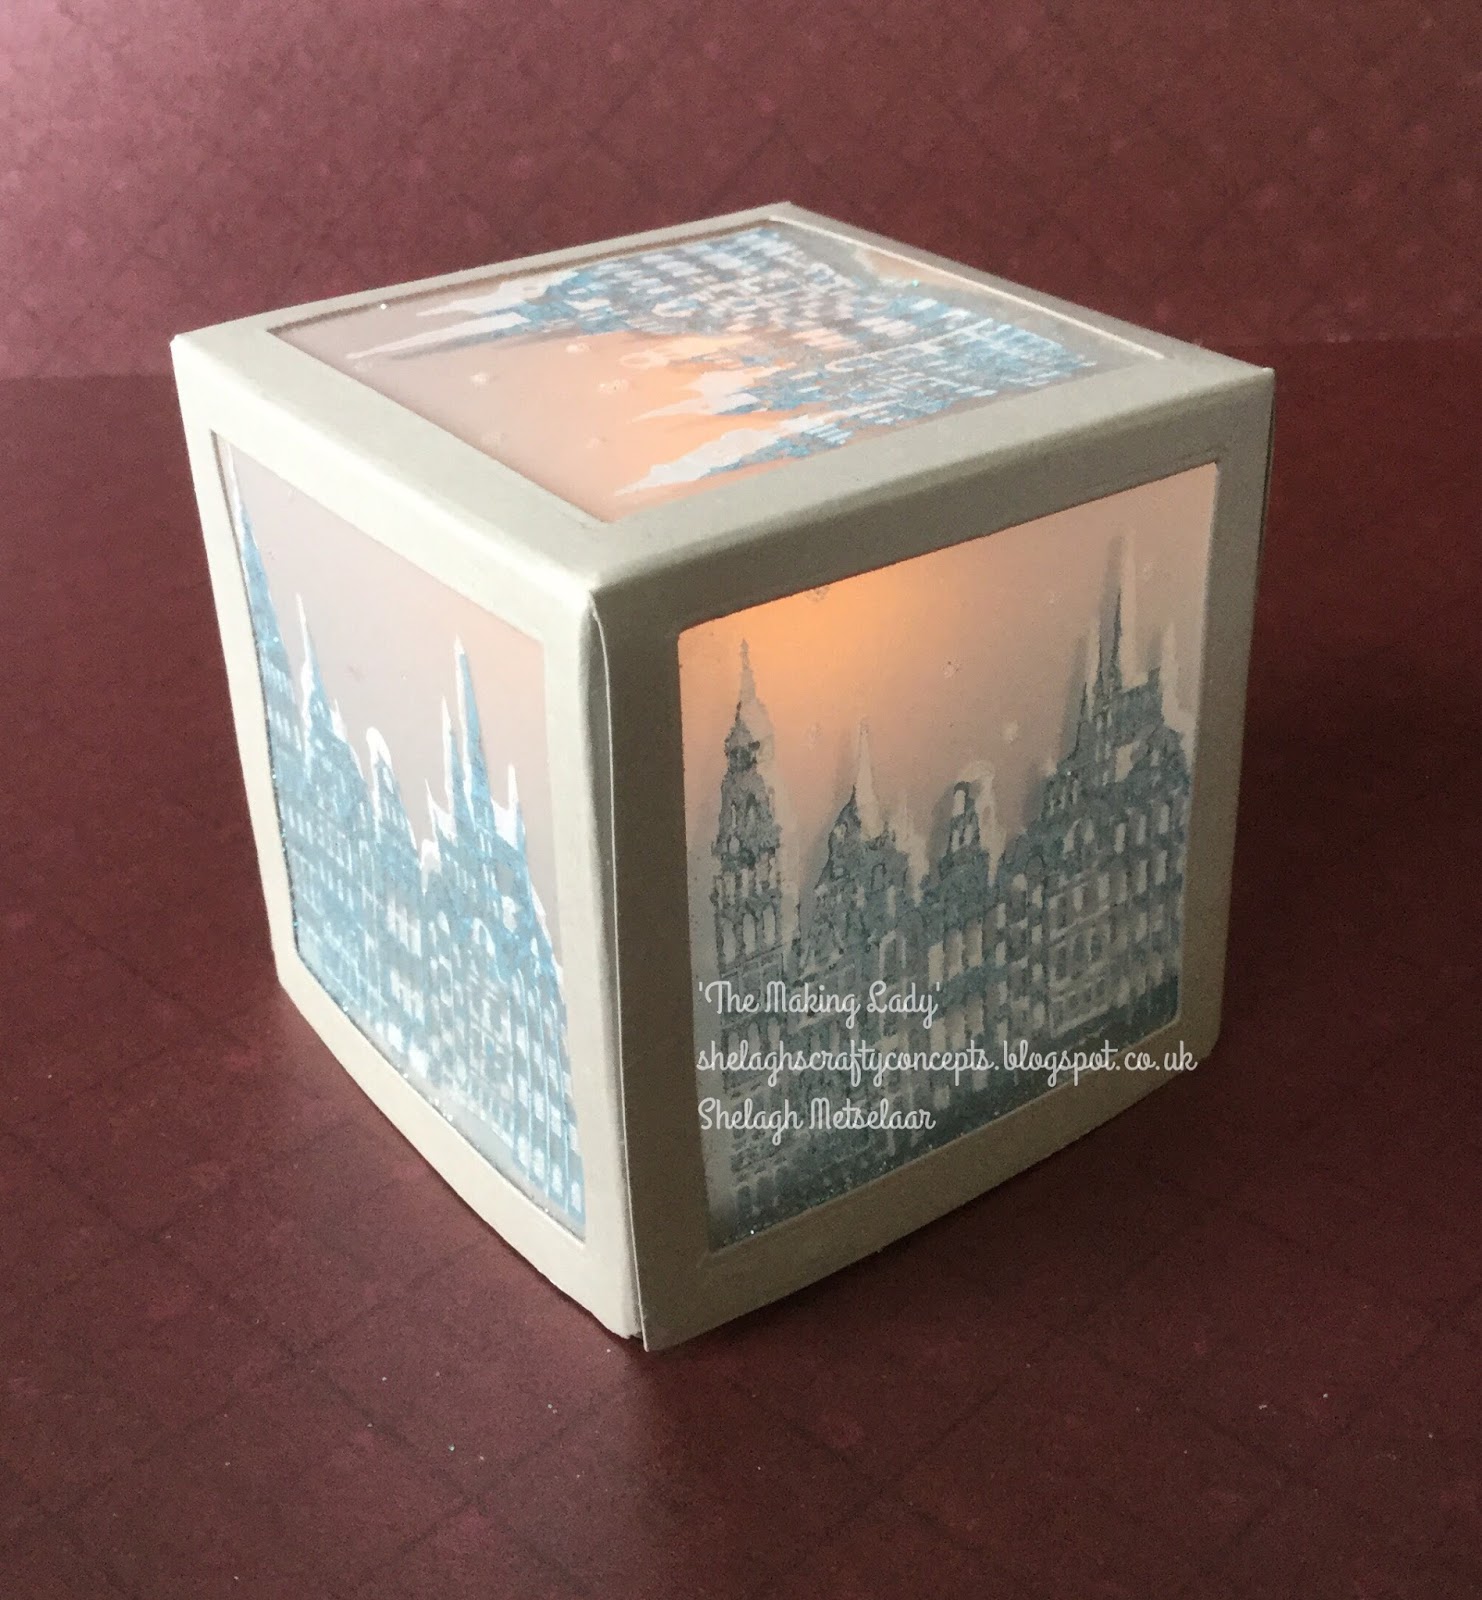
. . . . . .et voila! A sparkly, shining light!
*I made this first of all in parchment alone and the paint buckled the paper thus back to the drawing board - or indeed - scoring board and came up with a simple frame-work to support the parchment.
**I constructed a base for the cube by making a 'lid' in reverse - slightly smaller than the cube so it fits inside. To make LED holder, I scored a 10cm length of corresponding card - 3cm wide - at each half centimetre. I cut into these scores to Icm deep, formed into a circle and fasted with red liner tape. I glued this to the top of the 'lid,' added the LED light and inserted into the open base of the cube.
Hope this explanation is clear enough to follow!
Merry Christmas!
I absolutely adore this - so very clever! thanks for joining us at the Indigo Blu challenge and good luck! Hugs rachel x
ReplyDeleteThanks, Rachel. The shadow effect was quite a discovery and I must admit to rather liking it - a great and quick way to decorate a festive table in designated colours. ;~}
ReplyDelete