Clarity Stamps –
Hochanda April 1st 2018 – Barbara Gray
Hello there and thank you for taking the time to visit my blog. Gosh, these stamps
like all Clarity products - are superb and as the fine line work reminded me of
embroidery patterns of old, I decided to have a go, even stamping it in blue ink as
some old linen pieces I found in my mum's needlework box. My stitching is not up to
her standard but at least I had gave it my best shot.
Cheers,
Shelagh.
'The Making Lady.'
'The Making Lady.'
‘All Sewn Up!
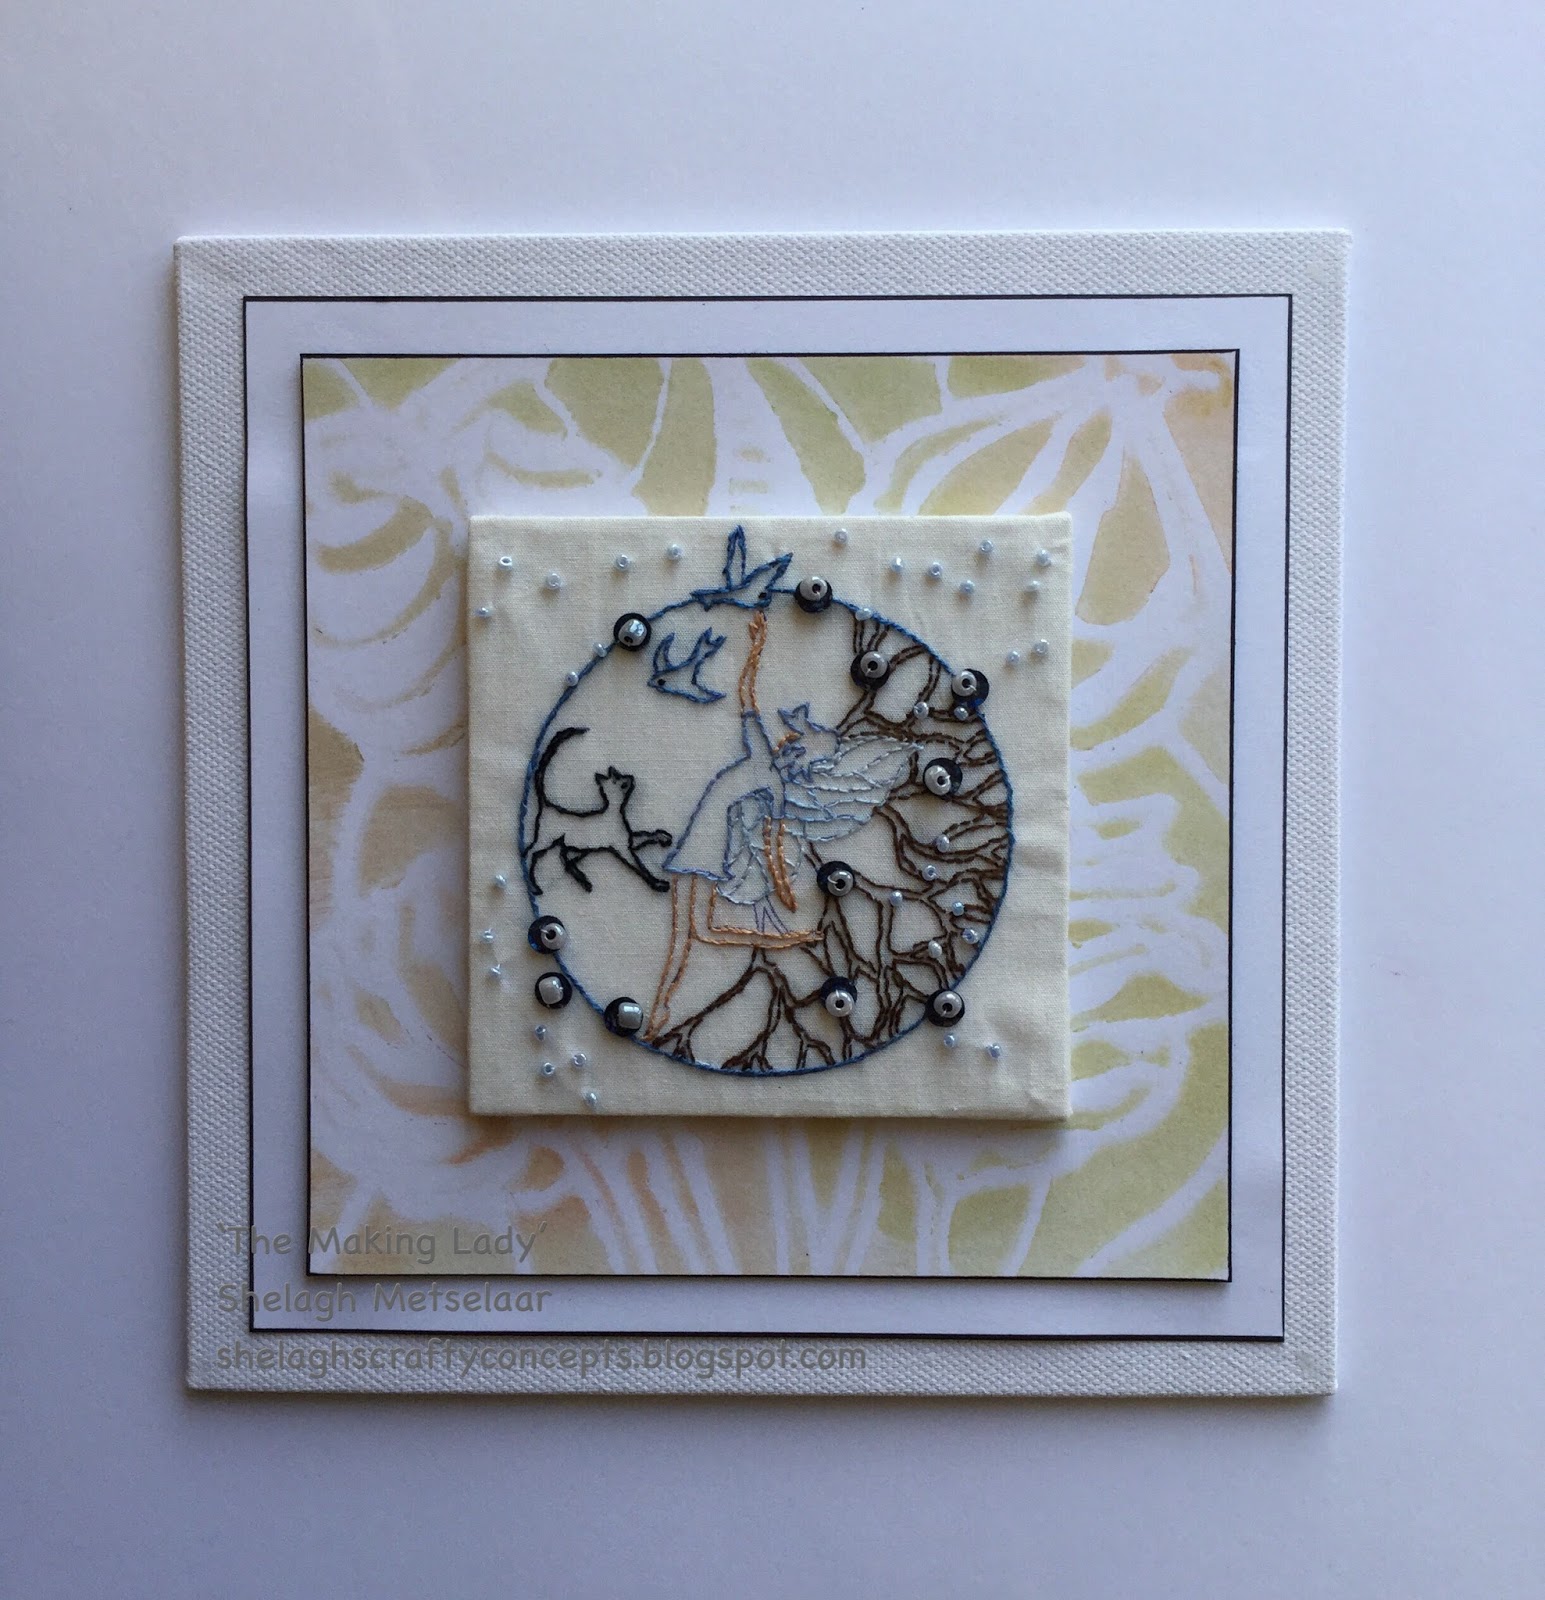

Reverse of embroidered panel
Materials:-
·
Stamps:- Fairy Fine Line Stamp ‘Bluebell’
·
Clarity Stencil:- Wild Seed Head
·
Ink Pads:- VersaCraft Ultramarine; Artistry –
Blushing Rose, Old Parchment
·
Misc:- Material approx. 8ins x 8ins; Embroidery
thread; Bead; Clarity Stencil card; Clarity canvasses – 1 x 4ins x 4ins, 1 x 8ins x 8ins;
Instructions:-
1.
Tape stencil onto stencil card and blend over
Blushing Rose and Old Parchment. Edge with a black Sharpie and set aside.
2.
Stamp Bluebell onto centre of material using
Versacraft ink.
3.
Embroider over lines using a single thread of
embroidery thread in chosen stitches. (I used back stitch for the tree and stem
stitch everywhere else.)
4.
Sew on beads to suit using white cotton.
5.
Stretch and sew over 4 x 4 canvas.
6.
Mount onto stencilled background, stencil card
and finally 8 x 8 canvas.
Sunrise, Sunset

Materials:-
·
Stamps:- California Rounds – Single Tree
·
Ink Pads:- Archival Black; Artistry – Indian Jamun,
Cinnamon Tea, Midnight Blue, Cinnamon Tea, Indian Jamun, Fancy Fuchsia
·
Card/Paper:- Theuva, Black, Designer Paper –
Northern Lights
·
Colours:- Coloured Pencils
Instructions:-
1.
Stamp ‘Round’ twice onto Theuva card.
2.
Colour tree, land, sea using colouring pencils
and add a yellow/orange sun. (I used Polychromos.)
3.
Blend over Cinnamon Tea then Midnight Blue
followed by Indian Jamun to create a ‘sunrise’ sky.
4.
Lightly blend same colours over sea reflection.
Intensify colour areas using coloured pencils.
5.
Repeat steps 2), 3), 4) using Fancy Fuchsia,
Cinnamon Tea and Indian Jamun.
6.
Add die-cut mount over and layer onto Northern
Lights paper.
‘Tag Time’

Materials:-
·
Stamps:- Fairy Round Fine Line ‘Bluebell’, Carpe
Diem
·
Ink Pads:- Archival Black; Artistry – Ocean Ref,
Golden Turmeric, Rosy Cheeks, Cinnamon Tea
·
Card/Paper:- Watercolour; Black; Silver glitter
card, Designer Paper – Northern Lights
·
Misc:- large (ie ¼ A4 sheet) white sticky
labels, Sakura sparkle pens, ribbon, white paint
Instructions:-
1.
Stamp two partial circles onto tag using
Archival Black.
2.
Stamp again onto two sticky labels.
3.
Blend over colours straight from mini ink pads. Spritz
with water spray, leave for a few seconds then blot with kitchen roll.
4.
Colour fairy, cat and birds on labels with
sparkle pens. Cut out and attach over images on tags. Trim off excess.
5.
Colour ribbon to suit using colours from 3).
When dry, add to tag.
6.
Mount onto black, silver and black. Set aside.
7.
Stamp Carpe Diem in white over chosen designer
paper. When dry over stamp with Archival Black.
8.
Edge with black Sharpie and add to card blank.
9.
Repeat Carpe Diem stamping on tag.
10.
Add tag to card blank.
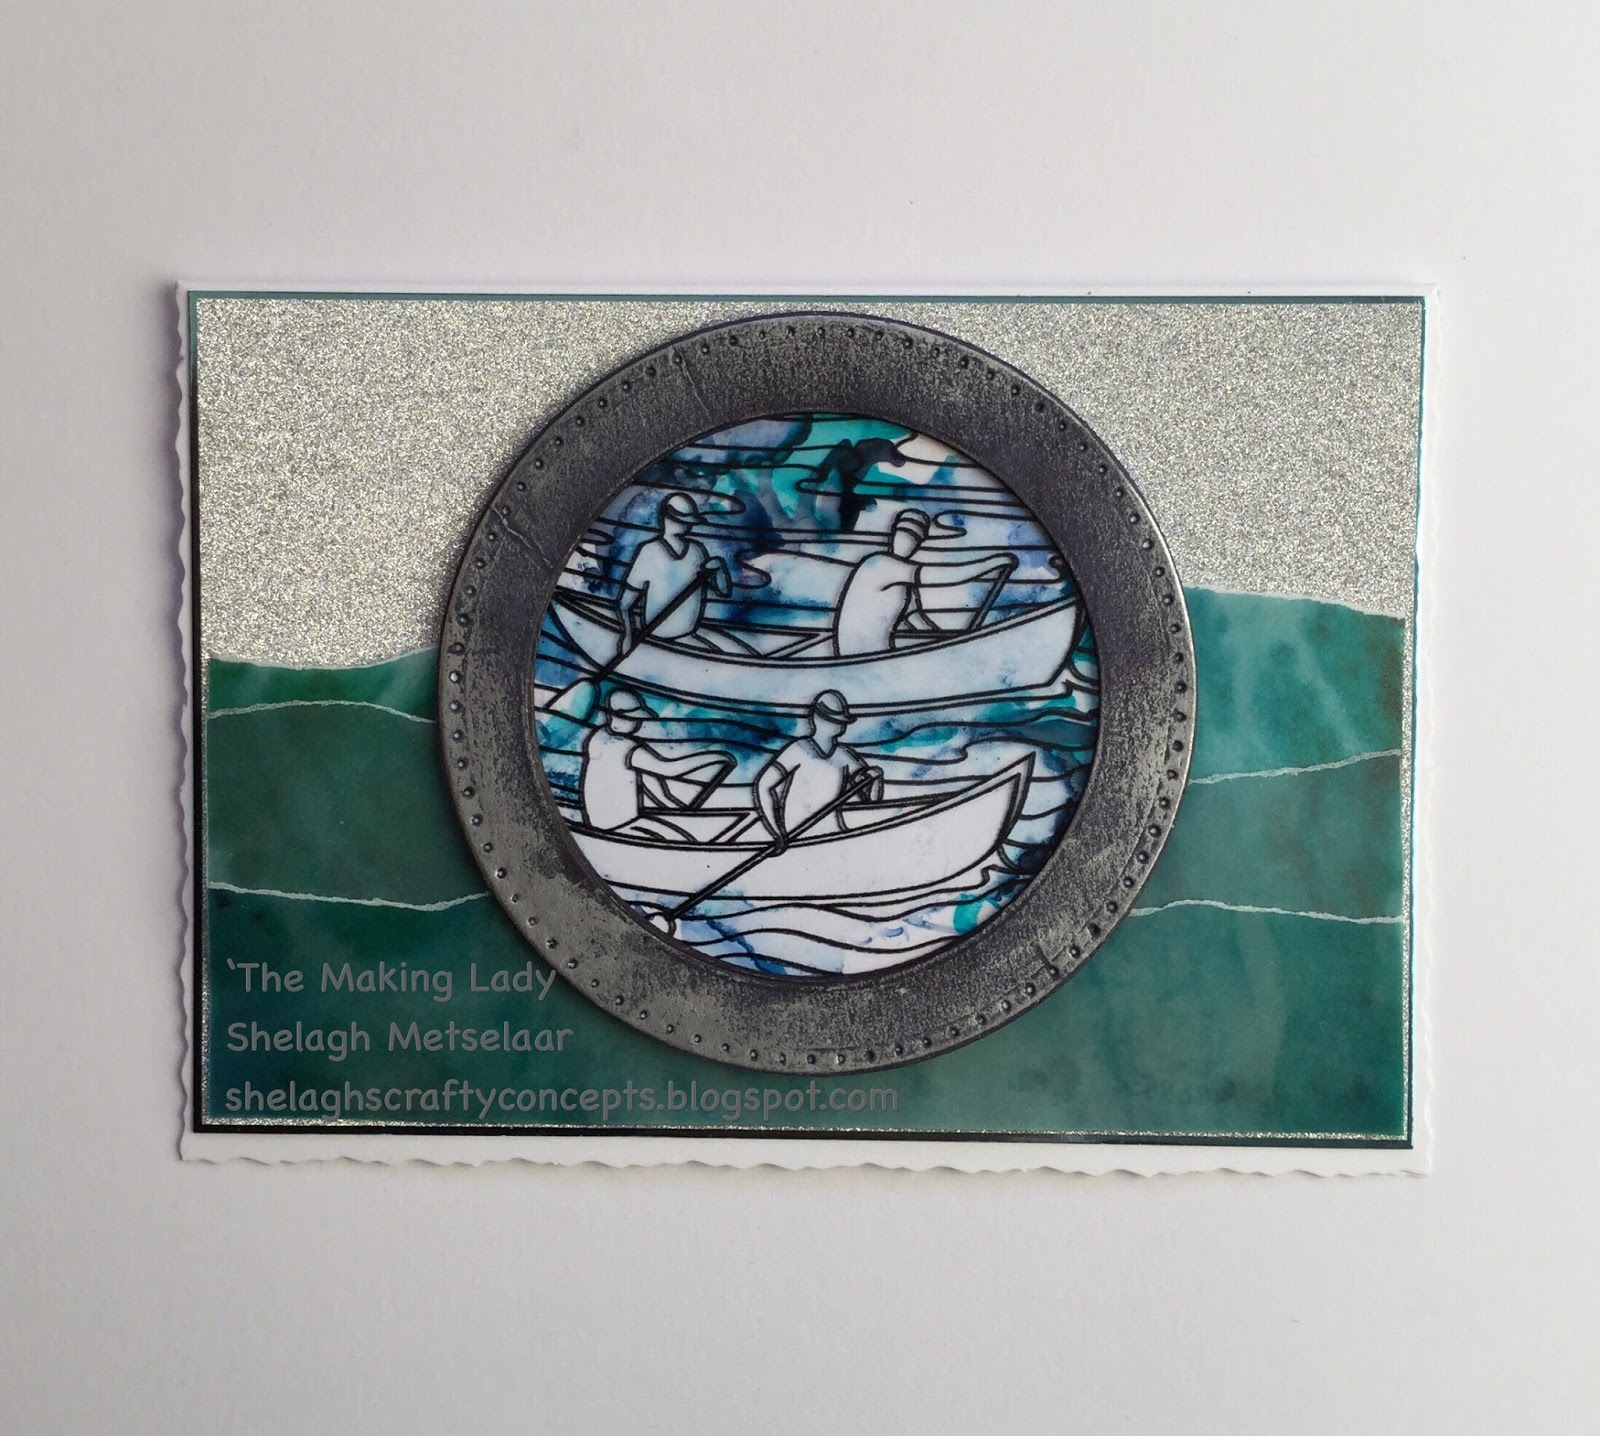
‘Out for a Paddle’
Materials:-
·
Stamps:- Boating Fine Rounds – Paddlers
·
Ink Pad/Inks:- Staz-on Black; Archival Black; Alcohol Inks – Aqua, Stream, Pool, Denim,
Stonewashed
·
Card/Paper:- Clarity Theuva, Designer Parchment
– Rainbow River; silver glitter, turquoise mirror
·
Misc:- Fine drinking straw, Inka Gold –
Hematite, black die-cut rings x 3 and glued together; surgical spirit, fine
paintbrush
Instructions:-
1.
Stamp ‘Paddlers’ once with Archival Black onto
Theuva card and once onto acetate with Staz-on, cleaning the stamp in between.
Set Theuva image aside.
2.
Turn over acetate to work on unstamped side. Add
droplets of chosen colour onto surface, dispersing colours over by blowing
through straw. Do this one colour at a
time.
3.
Dip paint brush into surgical spirit and remove
colour from boats and figures, cleaning brush on kitchen roll each time.
4.
Turn over and glue acetate image over card
image.
5.
Add Inka Gold over ring and attach over image.
Trim.
6.
On layered card blank, add three layers of torn
parchment.
7.
Glue on stamped image to suit.
‘And
the Winner is?’

Materials:-
·
Stamps:- Boating Rounds Fine Line – Paddlers
·
Ink Pads:- Archival Black; Artistry:- Ocean
Reef, Aqua Fusion
·
Card/Paper:- Theuva, Black, Black glitter;
Groovi parchment
·
Misc:- Gel Press, brayer
Instructions:-
1.
Stamp image once onto Theuva and once onto
parchment. Colour boats and figures. (I used Polychromos)
2.
Place parchment image over coloured one and glue
down.
3.
Die-cut circle from glitter black and attach
over.
4.
On Gel
Press, add blue colours straight from mini stamp pads. Brayer over to mix.
Remove some ink by dabbing over scrunched up kitchen roll. Pull prints onto
Theuva card. Die-cut one large, one small circles. Fold and layer with black to
form card blank.
5.
Add stamped image.
‘Bluebell’

Materials:-
·
Stamps:- Fairy Rounds Fine Line – Bluebell
·
Ink Pads:- Archival Black; Staz-on
·
Card/Paper:- Theuva; Designer Paper and
Parchment – Northern Lights; Acetate; Clarity Black
·
Colours:- Alcohol markers, Coloured pencils.
·
Stencil:- Framer Shape – deckle circle
Instructions:-
1.
Stamp image onto acetate with Staz-on and Theuva
with Archival Black, cleaning stamp in between.
2.
Colour card image with pencils – I used my
Polychromos.
3.
Turn acetate image over and create a background
using dots of alcohol markers.
4.
Attach acetate onto card using small dots of
Perga Glue on darker coloured areas.
5.
Layer onto die-cut circles.
6.
Draw around inner circle of stencil onto
designer paper and cut out. Layer onto Clarity black, white, designer
parchment, Clarity black and finally card blank.
‘Going for Gold’

Materials:-
·
Stamps:- Boating Rounds Fine Line – Paddlers;
Letterbox
·
Ink Pads/Inks:- Staz-on Black; Archival Black; Versamark;
Alcohol Inks – Pool, Stream, Aqua, Slate, Denim
·
Card/Paper:- Theuva, Black, Gold, Designer Paper/Parchment
– Northern Lights, Rainbow River
·
Colours:- Alcohol pens; Coloured pencils
·
Embossing Powder:- Gold Detail
Instructions:-
1.
Stamp Paddlers onto acetate using Staz-on and
Theuva with Archival Black. (Clean stamp between changing inks.)
2.
Colour card image using alcohol markers and
pencils. Set aside.
3.
Turn acetate image over and drop different
colours of alcohol ink over, blowing each droplet with a fine straw. (Do this
one colour at a time.)
4.
Remove stray ink from figures and boats using a
fine paintbrush (or Qtip) dipped in surgical spirit. Clean brush between each
application.
5.
Attach acetate over coloured image and add
die-cut rings.
6.
Cut two sheets of Northern Lights paper to
measure 5ins x 5ins. Layer onto black card. Attach to card blank that measures
5.5 ins x 11ins.
7.
Cut two strips from Northern Lights remnants at
6) and attach over gap – in effect to extend the size of the paper.
8.
Stamp sentiment onto designer parchment with
Versamark, add detail gold embossing powder and heat emboss. Trim and layer
onto gold, parchment, black, gold and black. Attach to foot of card.
Thank you for looking at my latest makes. Once again Clarity has triumphed and ideas for the stamps were far too numerous for the time I had available.
Happy crafting! Happy Easter!
Best wishes,
Shelagh.
'The Making Lady' ;~}
'The Making Lady' ;~}
Beautiful cards Shelagh. All so very different and a lovely idea to try stitching one. I do not see any problem with your needlework. Thanks for sharing your wonderful ideas. xx
ReplyDeleteThank you, Lynne. You are always so complimentary and very much appreciated indeed. Happy Easter! ;~}
ReplyDelete