Clarity Challenge 40
– June 2016
‘Masculine’
'Happy Landings!'

'Happy Landings!'

Hi and thank you for visiting my blog.
Well, this is supposed to be 'Flaming' June but here in Aberdeen it's flaming cold!! Our daily 'constitutional' (along the beach esplanade today) saw me kitted out in my winter windproof jacket complete with gloves. Even the seagulls found it too tiresome to fly against the wind and were huddled along the groynes.
A 'Masculine' card/project is always a trial for me and this month was no exception. (My masculine cards are often of the 'pick and stick' variety - and what's wrong with that I ask myself as it can be quite therapeutic in its own way!!!) Anyway, I looked through my Clarity stamps and stencils, selected some of each then got on with the task in hand. I liked the resulting prints from the inked stencil and then decided to experiment further.
I hope you find the 'making' process below helpful.
Materials I used:-
·
Stencils:- Clarity - Fish Stencil NDC 12, Lattice Stencil NDSC 16
·
Cardstock:- Clarity Stencil card 7x7
·
Inkpads:- Versafine – Onyx Black, Versamark; Ranger Distress Inks – Squeezed
Lemonade, Fossilized Amber, Twisted Citron, Mowed Lawn, Mermaid Lagoon, Black
Soot
·
Paints:- Fresco Finish – Snowflake, Nougat,
Antarctic, Bora Bora, South Pacific, China
·
Miscellaneous – Wooden Plaque, Pebeo Gedeo
Mixtion Relief, Pebeo Silver Leaf, Dark Grey Alcohol Marker, Spectrum Noir
Sparkle Pens – Clear, String, brayer, WOW White Twinkle embossing powder


Instructions:-
For the plaque:-
1.
Remove the existing string from the plaque. (I found the wooden plaque in a bargain
basket and paid 99p for it.) Base coat the wooden plaque on all sides with
Snowflake and leave to dry. (NB – I needed four coats to obliterate the
original writing on the plaque.)
2.
Place at a distance from each other on a craft
mat pea-size blobs of China, South Pacific and Bora Bora. Starting with the
darkest, brayer colours over the plaque at random until the entire surface is
covered. When dry, add small areas of Nougat and Antarctic to suit.
3.
Place the Lattice stencil on the dry plaque and
by using the edges of the ‘squares,’ lightly draw in pencil lines to form the
suggestion of squares for the net. Roughly draw over the pencil lines with grey
alcohol marker, then clear Sparkle pen; now draw fine lines with the ‘Mixtion’
over these, leave to dry for a few hours then apply the Silver Leaf.
4.
Sponge Black Soot around the edges. Set aside.

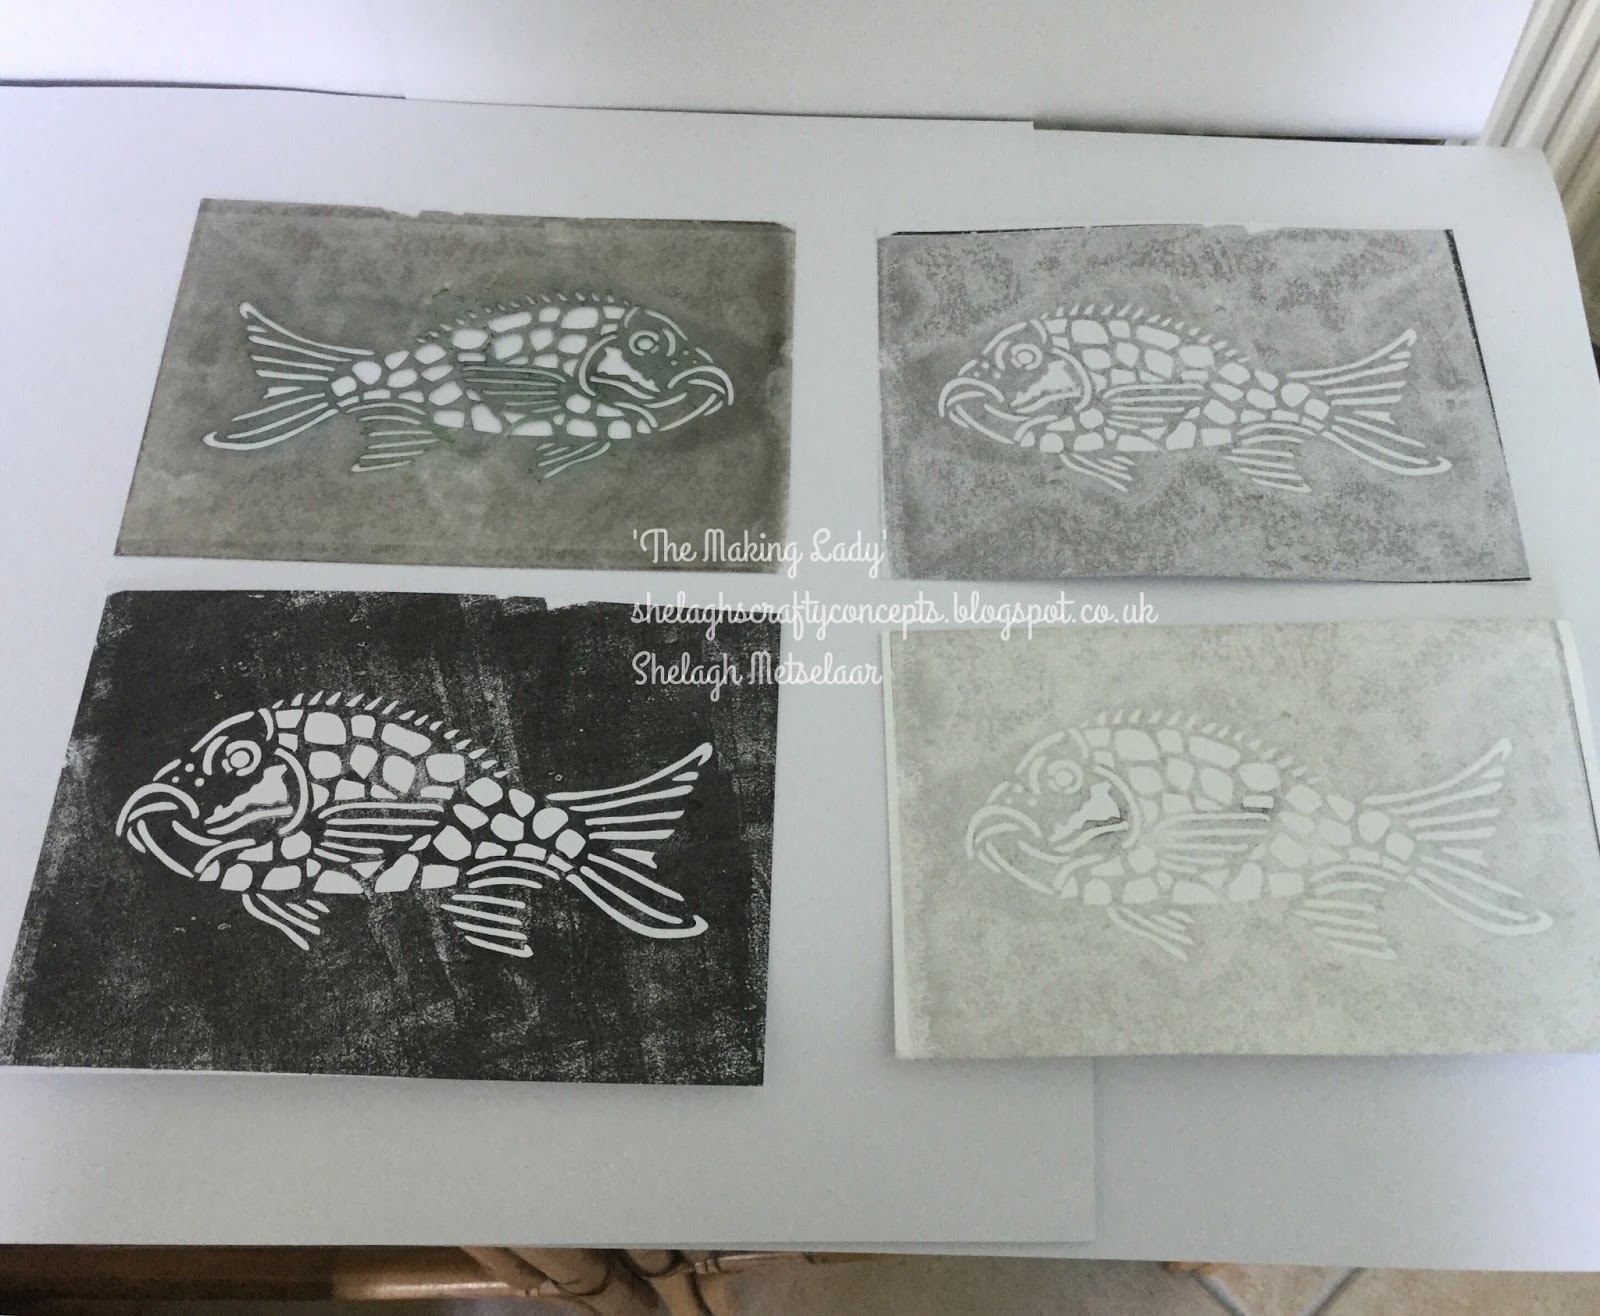
Top Left - stencil after prints
Bottom Left - First print
Top Right - Second print
Bottom Right - Third print
For the fish:-
1. Cover
the Fish Stencil with Onyx Black, place on a sheet of 7x7 card, cover with a
sheet of copy paper then place between relevant embossing machine plates and
wind through the machine. Repeat to obtain second and third generation prints. (I gave the prints a blast with my heat gun
to set the ink and I also washed the stencil in soapy water.)
2. Replace
the stencil over the first generation printed silhouette and sponge through a
variety of Distress Inks listed above. (I
offset the stencil slightly to create white areas.)
3. Leaving
the stencil in place, sponge over Versamark ink, remove stencil and add White
Twinkle embossing powder. Heat set. Clean stencil.
4. Repeat
2 and 3 with either second or third print.


5. Trim
the paler image along the outside line. From the darker image, cut out the
fins, tail and backbone (NB No animal or
fish was harmed in this process LOL!!) and glue into position with white
glue.


Top Image a 'mock-up' of the plaque to ensure the image fitted.
To assemble:-
1.
Coat the reverse of the fish with matte Mod-Podge
and place (or PLAICE!!) onto plaque to suit. Thread through string.

And there we have it –‘ Gone Fishing,’ ‘What a Catch,’
Happy Landings,’ call it what you will!
Some more ideas for the 'fishy' stencil.


Some more ideas for the 'fishy' stencil.

Top image - Translucent paste on acetate then whilst still wet, sprinkled with a variety of fine coloured glitter and mounted on black card.
Bottom image - inked through stencil onto white card; translucent paste on acetate then stencil replaced over image when dry and inks applied as below; the acetate image is then replaced over image on white card but slightly offset to give a 3D illusion.


Below - Translucent paste through stencil onto a wooden 'label' which has been painted with Fresco Finish paints; glitter applied over.


Thank you for taking the time to peruse the above.
It's now time for you to have a go at this month's 'Masculine' Clarity Challenge. All the details can be found on the Clarity Stamps website and please ensure you use Clarity stamps, stencils or Groovi plates (or indeed a combination of these) to create your masterpiece. Looking forward to viewing your worderful pieces of artwork!
Best wishes,
Shelagh
(The Making Lady)
claritystampchallenge.blogspot.co.uk
claritystamp.co.uk
barbaragrayblog.blogspot.co.uk
Stunning art work and so eye catching. Xx
ReplyDeleteThank you, Carol. Once I started rolling with this one, it all fitted together. ;~}
DeleteLike the way you have used the lattice stencil to create your netting. You have given lots of inspiration for using the fish stencil. I had a play with it when it first arrived but because of it's size have struggled to think of what to use it for. Your plaque is a very good idea. x
ReplyDeleteHi Lesley and thank you. Like you, I had no clue what to do with this stencil so it has lingered in a box for all these months; as I searched for stamps to fulfil the brief, there was a bit of a lightbulb moment and it developed from there. It has also been suggested I put it in a bathroom - may just do that and find a space in the downstairs cloakroom. ;~}
DeleteShelagh you always come up with some amazing work love how you did this x
ReplyDeleteHi Julie and thank you for your comments - much appreciated, I can tell you. It's a pity the 'bling' factor from the embossing powder and silver leaf doesn't show too well on screen. I'm off to give it a coat of Mod Podge to seal it and it's going in the downstairs cloakroom. ;~}
DeleteShelagh this is amazing. I've not used this stencil either as I couldn't think of what to do with it - other than ink with stencil brushes - the projects you've covered here have certainly given me food for thought. x
ReplyDeleteThanks, Angela. It was one of those odd things, one idea emerged then a whole shed load came along and I just had to experiment! So pleased you can ponder and perhaps devise alternative projects. ;~}
ReplyDeleteShealgh wonderful art piece and blog. Hugs.
ReplyDeleteShealgh wonderful art piece and blog. Hugs.
ReplyDeleteHi Naomi and thank you. The fishy plaque is safely installed in the downstairs loo. A bit more tasteful than other cloakroom memorabilia I've seen! ;~}
ReplyDeleteLove your design Shelagh, a very innovative way to use the stencil and I bet it looks great on the wall. I love hanging artwork in the bathroom too :-)
ReplyDeleteHave a lovely weekend... if the cool weather carries on, it's a perfect excuse to stay in and craft! x
Thank you kindly, Carole. Moved all my shells - collected from Oman, Brunei, Malaysia postings - to the cloakroom when we had tha main bathroom refurbed earlier this year so the fishy plaque fits in.
DeleteToday has been glorious here - we had a lengthy walk along the esplanade then spent time in the garden. The midges were out in force. Hope it warms up for you. ;~}
A perfect theme for a man's card Shelagh. When I see this stencil I always think of a man coming home and boasting "It was this big!!" Thanks for sharing so many of your ideas; very inspiring. Xxx
ReplyDeleteThanks, Barbara. Had the wooden plaque been larger, I would have added a phrase but 'twas not to be although I did try a few words on a cardboard mock-up but it looked overly cluttered. I guess I was lucky the stencil just fitted otherwise it would have been back to the drawing board. ;~}
DeleteJust perfect Shelagh. very clever use of the stencils, bet it looks great hung on the wall x
ReplyDeleteHi Linda and thank you. Doesn't look to shabby at all, hanging for all to view! Hope you're enjoying this weather! ;~}
DeleteFantastic blog Shelagh. Thanks for all the ideas and techniques. Love what you've done for this months challenge. Xx
ReplyDeleteHi Amanda and thank you. A bit of a delay in responding but catching up after my trip to Mum's and now on way to Crowborough for tomorrow's craft fest. This challenge just seemed to flow along with the ideas. Thanks again. ;~}
Delete