Clarity Stamps –
Barbara Gray – Hochanda 6 May 2018
Three Way Overlay Stamps and Stencils.
Hello and thank you for visiting - it's the first Sunday of the month again and that instantly means Barbara is on Hochanda with more Clarity products to tempt us! Here are some of my examples.
Example 1
' Lanterns'
(This one is a bit of a 'heads up' for the One Day Special which will be showcased from 18.00)
Clarity Stamps:-
·
Three Way Overlay – Group 2
Clarity Dies:-
·
‘Lanterns,’
·
Nested Squares
Clarity Products:-
·
Modelling Crème – Pearl ACC-PA-30485-XX
·
Inca Gold – Gold ACC-PA-30479-XX
·
Silver ACC-PA-30480-XX
Misc:-
·
Versamark – INK-AR-50030-XX
Embossing Powders –
metallic and pearl; Scrap Card, Black Card, Kraft Card, Card Blank
How to:-
1.
Die- cut ‘Lanterns’ from scrap card.
2.
Attach die-cut stencil to kraft card and smooth
over Pearl modelling crème. Sprinkle over chosen embossing powders and heat
set. Apply Inca Gold. Set aside.
3.
Die-cut a frame using nested squares. Stamp
‘Spiral’ outline around frame using Versamark. Add metallic embossing powder
and heat set. Lightly apply Inca Gold.
4.
To assemble – attach frame over main image.
Trim. Mount onto black card. Trim. Add to card blank.
Example 2

'Fire and Ice'
(I found the idea behind this technique on the internet - many thanks to crafter who posted it - then added my own twist and it worked!)
Ingredients:-
Clarity Stamps:-
·
Jayne’s Agapanthus – Butterfly STA-FL-10322-A5
Clarity Stencil:-
·
Three Way Overlay – Group 2;
Clarity Products:-
·
Double-sided Sticky Sheet ACC-AD-30108-A6
Ink Pads:-
·
Versa mark – INK-AR-50030-XX
·
Archival Black– INK-AR-50030-XX
Misc:- Embossing Powder – Clear; Black Card, Holographic
Mirror, Card Blank; Glitter – Holographic Silver, Holographic Peacock,
Holographic Graphite; Acetate
How to:-
1.
Cut square from Clarity Black Card and swipe to
cover from top to bottom with Silver Encore Ink Pad. Add clear embossing powder
and heat set.
2.
Swipe over with Versamark, add clear embossing
powder and heat set.
3.
Turn 90 degrees and repeat 1) and 2). Layer onto
Clarity Black card.
4.
Cut smaller square from holographic card, swipe
over Archival Black, add clear detail and heat set. Swipe over with Versamark,
add clear embossing powder and heat set. Layer onto Clarity Black Card.
5.
Place stencil onto double-sided sticky, remove
backing and place onto scrap black card. Sprinkle over Silver holographic
glitter. Remove stencil and add Graphite glitter. Trim.
6.
Apply double-sided sticky to acetate and turn
over. Stamp butterfly twice onto acetate using Black Archival and allow to dry.
Turn over, remove backing and sprinkle over glitter. Cut out and attach one
image over the other.
7.
To assemble – Attach embossed silver square to
larger black embossed square. Add stencil square, followed by butterfly.
Example 3
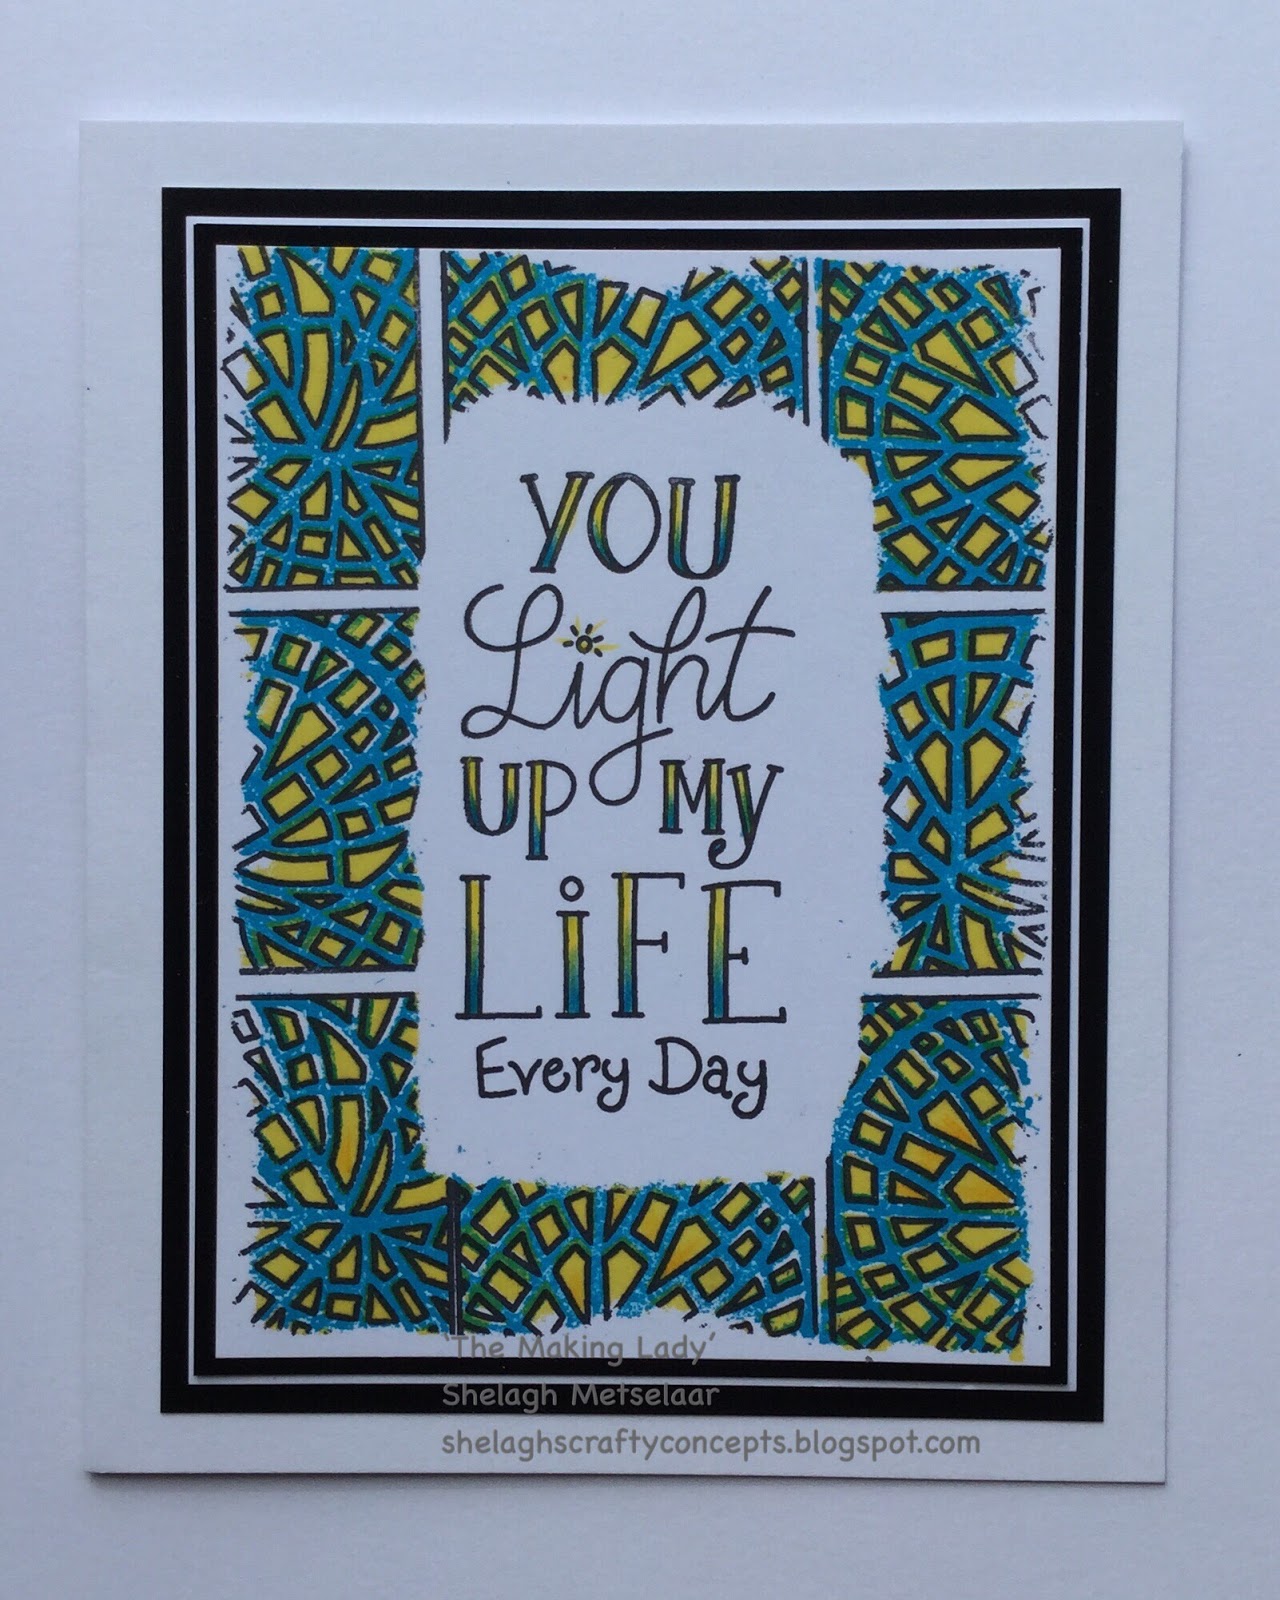
‘Light up my Life’
Ingredients:-
Clarity Stamps:-
·
Three Way Overlay Group 2;
·
‘You Light up my Life’STA-WO-10272-A6
Ink Pads:-
Artistry Collections
·
Golden Turmeric - INK-AT-50225-XX Ocean Reef,
Golden Turmeric
Archival Black- INK-AR-50030-XX
Coloured Pencils
Card:- Black, White; Card Blank
How to:-
1.
Stamp sentiment centrally onto Theuva card. Trim
to suit. Tear sticky notes to form a rough edge around the perimeter.
2.
Cover sentiment by tearing sticky notes to form
a rough outline and place over stamped image.
3.
Stamp spiral outline around masked edge using
Black Archival.
4.
Stamp inner image using Golden Turmeric,
followed by background using Ocean Reef.
5.
Layer onto black, white, black before adding to
card blank.

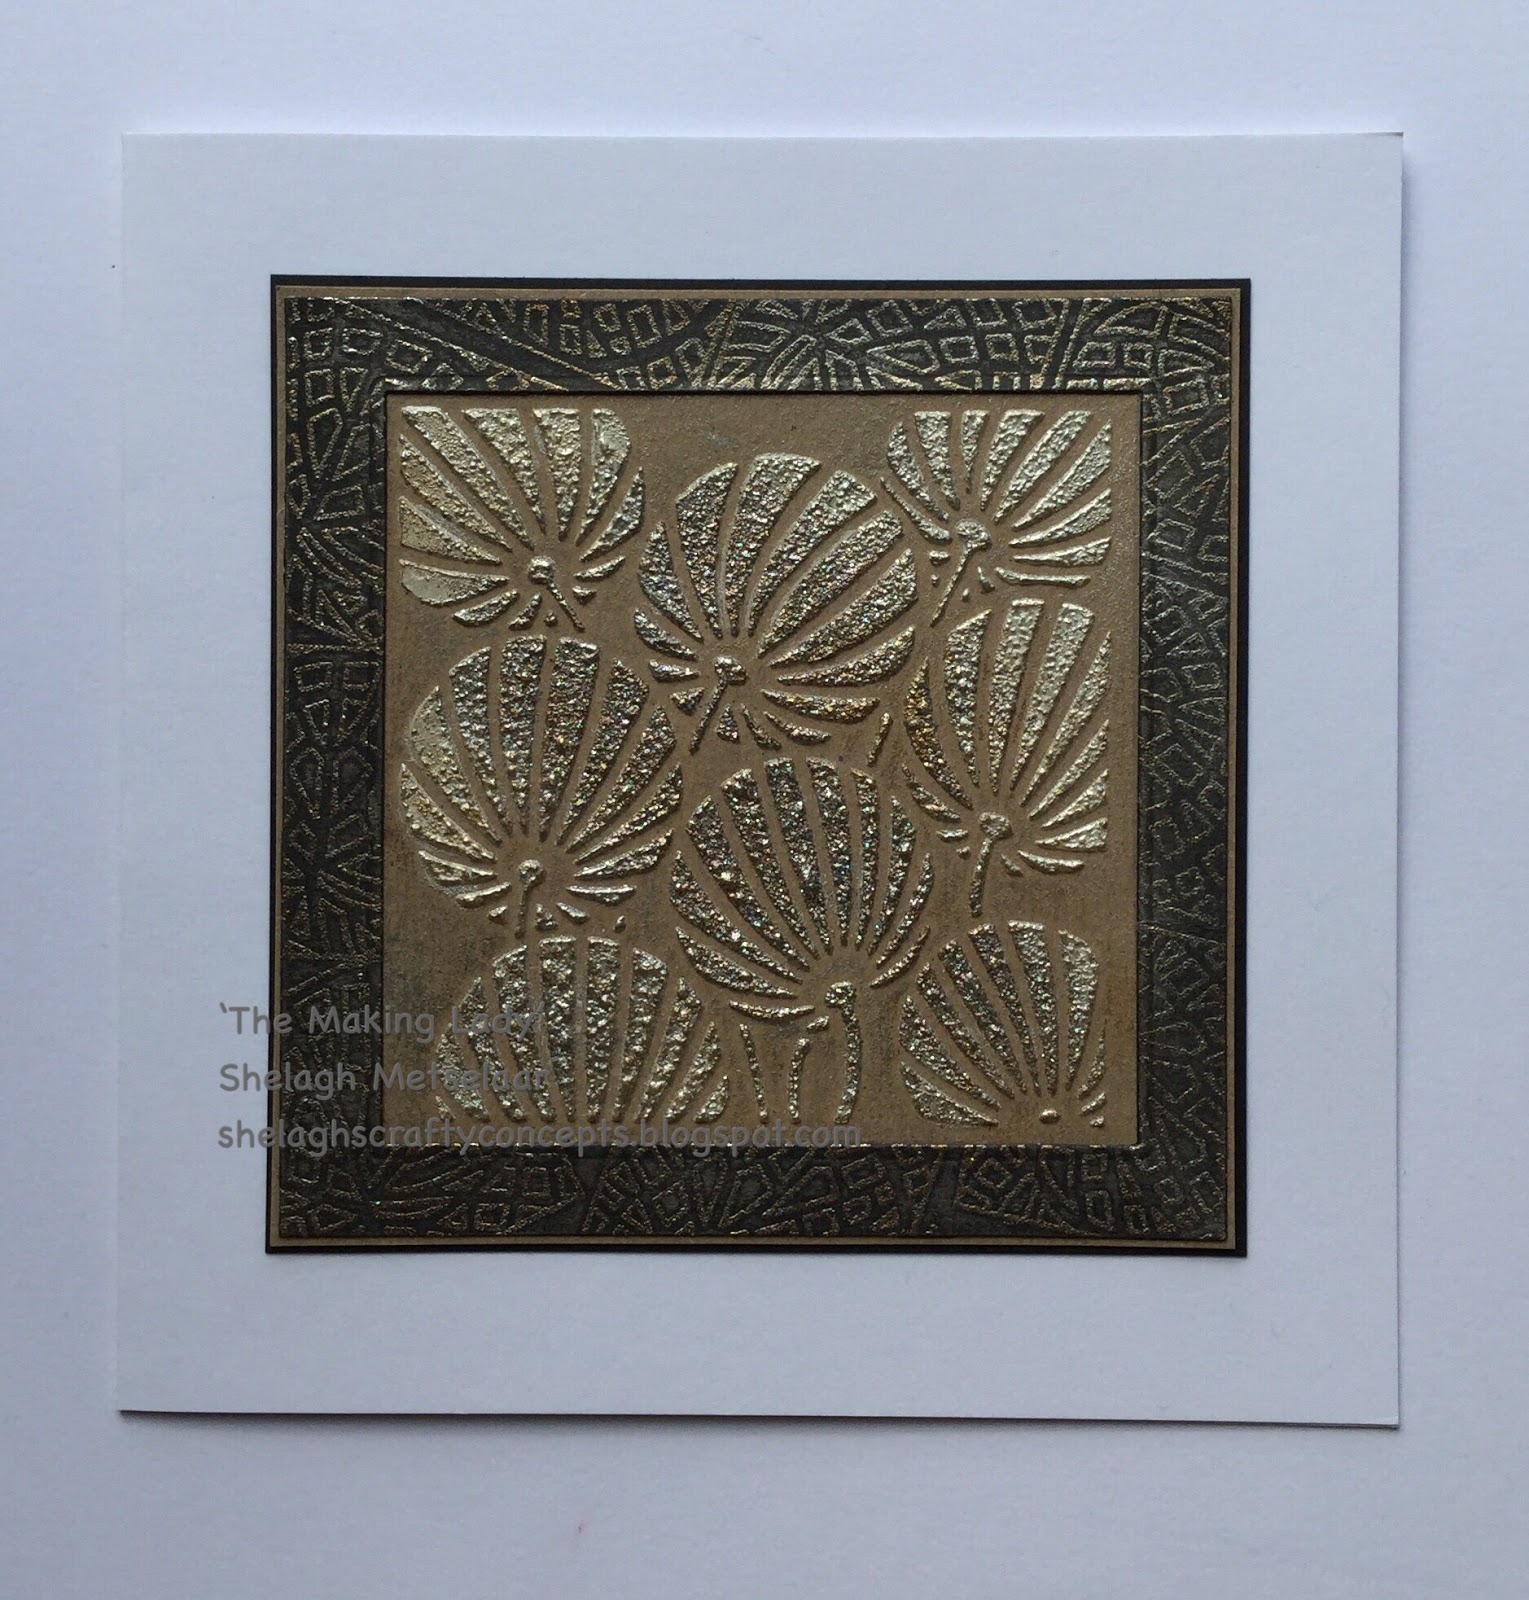
'Papavers'
(I love the effect of the ink and enamel combination and despite the enamel powder having a will of its own and flying off to other areas whilst being heated, this adds a bit of texture and a more rustic feel.)
Ingredients:-
Clarity Die:-
·
Poppy Heads;
·
Nested Squares
Clarity Stamps:-
·
Three Way Overlay
·
Mini Word Chains – 11 & 12
Ink Pads:-
Artistry Collections
·
INK-AT-50226-XX,
·
INK-AT-50228-XX – Old Parchment
·
INK-AT-50226-XX Rusticana, Burnt Umber:
Versamark - INK-VE-50221-XX
Embossing Powder:- Clear Detail, Black Enamel
Card:- Bronze, Gold Mirror, Black, Cream Pearlescent, Black
Misc:- Ribbon
How to:-
1.
Die-cut Poppy Heads. Blend over Old Parchment,
Rusticana and Burnt Umber. Sprinkle over clear detail and heat set. Dab over
Versamark and sprinkle over black enamel. Heat set. Mount onto black card and
trim.
2.
Using Nested Squares dies, die-cut two frames
one from gold mirror and same size from black. Attach one frame over leaving a
small margin of one colour visible on two sides.
3.
Using Versamark, stamp outline image from three
way overlay around frame, add Enamel embossing powder and heat set.
4.
Layer onto black, gold, bronze and finally onto
card blank. Attach die-cut image centrally.
5.
Add embellished stamped sentiment.
Example 5

'Now You See Me'
Ingredients:-
Clarity Stamps:-
·
Three Way Overlay Group 2;
·
Safari Animals-STA-AN-10268-A5
Ink Pads:-
·
Archival Black – INK-AR-50030-XX
Artistry Collections
·
Old Parchment- INK-AT-50228-XX - Fall Fiesta
·
Haystack – INK-AT-50226-XX
Card/Paper:- White, Black, Card Blank
Misc:- Colour Pencils, Bead, Garden Twine
How to:-
1.
Stamp giraffes centrally onto card using Black
Archival. Mask.
2.
Tear edges from sticky notes and place around
edge of card – this will create an uneven border.
3.
Stamp outline from three way overlay around
edge, rotating by 90 degrees on every second stamping and back on each odd
number.
4.
Ink the inner image with haystack and stamp at
each corner – re-inking each time.
5.
Ink background image with Fall Fiesta and stamp
each middle image.
6.
Remove mask and colour giraffes with coloured
pencils.
7.
Stamp a border and embellish.

'Thumbelina'
(My first thought was to create a flower with this petal-shaped stamp and from there on in, I couldn't rid myself of thoughts of Thumbelina - one of the first stories I ever read to myself when I joined the library at the age of five.)
Ingredients:-
Clarity Stamps:-
·
Three Way Overlay Group
·
Alice-NDC 102
Clarity Stencil:-
·
Three Way Overlay
Ink Pads:-
Artistry Collections
·
INK-AT-50225-XX – Golden Turmeric,
·
INK-AT-50228-XX– Blue Chase, Amazon Trail
Versamark-INK-VE-50221-XX
Embossing Powder:- Clear
Detail, Silver Pearl
Clarity Products :-
·
Canvas - A4- ACC-CB-30128-A4
·
Inca Gold
– Haematite –ACC-PA-30481-XX
·
Silver- ACC-PA-30480-XX
·
Gold - ACC-PA-30479-XX
Misc:- Coloured Pencils, Wire, Glue Pen, Clear Star pen, Glitter
How to:-
1.
Tape stencil randomly over canvas and dab over
Versamark. Add embossing powder and heat set.
2.
Water down Inca Gold Hematite and stipple over
canvas. Polish embossed areas with a tissue. Add Inc. Gold Silver to highlight.
Apply Inca Gold around perimeter of canvas.
3.
Stamp Three Way Overlay inner image five times
using Blue Chase. Add clear detail
embossing powder and heat set. Draw in veins with glue pen and glitter. Cut
out.
4.
Stamp same image six times using Amazon Trail,
then over-stamp veins with Golden Turmeric. Add detail with Clear Star pen.
5.
Stamp Alice centrally onto white card. Mask
Alice. Stamp ‘wing’ around using Blue Chase as in 3). Add glitter as before.
Cut out. Remove mask and colour Alice. Stamp Alice again onto scrap white card
and over stamp with wing. Decoupage dress onto image.
6.
Glue single wings off-setting behind main image.
7.
Coil wire around paint brush and add as stem.
Repeat to form leaf branch.
8.
Add stamped and stencilled images to wires and secure
to canvas.

‘On the Wing’
(I stamped around a card frame and liked it so much, I just had to create a picture to complement it.)
Ingredients:-
Clarity Stamps:-
·
Three Way Overlay Group 2;
·
Journalling Set STA-PA-10230-A5;
·
Butterfly and Petals STA-AN-10371-A5 – Butterfly
Ink Pads:-
·
Archival Black – INK-AR-50030-XX;
·
Artistry Ink Mini Ink Pads Goldn Trmrc Coll
INK-AT-50225-XX – Blushing Rose
·
Haystack Coll INK-AT-50226-XX – Haystack,
Apricot Nectar
·
Lime Kiss Coll INK-AT-50227-XX – Lime Kiss,
Roasted Chestnut
·
Old Parch Coll INK-AT-50228-XX – Old Parchment,
Amazon Trail, Sweet Toffee, Rich Mocha
Card/Paper – White, Card Frame
Misc:- Ribbon; Acetate; Glitter – Green, Gold; Wire; Sticky
Notes; Sakura Gold Sparkle Pen;
·
Clarity Double-sided Sticky Sheet-ACC-AD-30108-A6
How to:-
1.
Using Archival Black, stamp a series of double frames
around card frame, masking each previous image. (Stamp and cut a number of
sticky note masks – innies and outies - at this point to save time later.)
2.
Stamp each outline randomly inside each partial
frame, using Rich Mocha, Amazon Trail and Haystack. Set aside.
3.
Cut card 12cm x 19cm and stamp a series of
double frames as in 1) masking each previous image with sticky notes.
4.
Mask each frame and over-stamp with choice of
stamps from Journalling set. Blend over edges with Blushing Rose, Haystack, Old
Paper and Apricot Nectar. Remove masks.
5.
Stamp main outline with Archival Black then
stamp Overlay 2 with Sweet Toffee followed by Overlay 3 with Lime Kiss.
6.
Stamp butterfly twice onto acetate using
Archival Black, allow to dry then place onto double-sided sticky. Peel off
backing and sprinkle over two colours of glitter. Cut out and glue one image
over the other. Attach to coiled wire.
7.
Add bow to frame followed by butterfly.
No comments:
Post a Comment